You’re only steps away from having a beautiful new WordPress blog! It’s time to add the all important Contact page. Modern society is built on communication and we need to give people a way to communicate with you. This page is going to be super critical when large corporations come to you with their stacks of cash offering to pay for advertising space on your blog. So, let’s give them a place to do just that!
Hover over the Pages tab and click on the All Pages link. You should see a list of all of the pages on your site. Click on the Contact page link.
 In the Salient theme, there are a number of page templates that you have at your disposal. These templates have been created by the developer of the theme to speed up the website building process for you. We’re going to use the Contact page template. On the righthand side of the page, you’ll see a box that says Page Attributes. Select the Template that you will be using for this page – Contact.
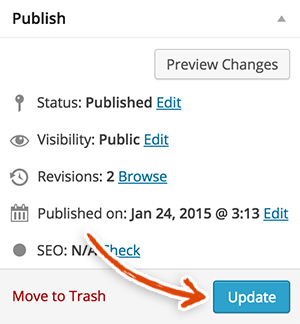
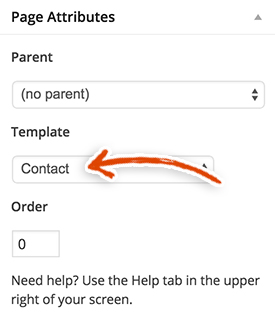 Click Update. This will update the page template for you.
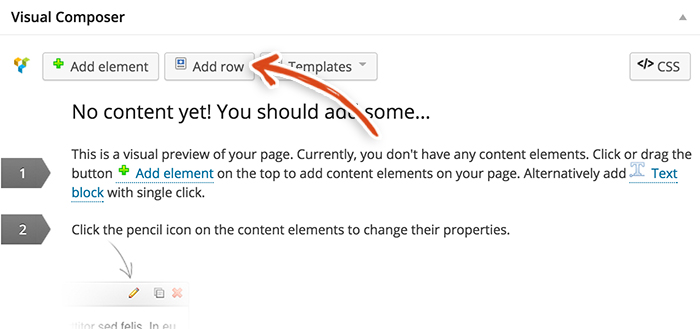
 Now, click on the Visual Composer button.
 Now that you see the Visual Composer options, click on the Add Row button.
 Click on the pencil icon in the top right of the row.
 This will open up a modal (visible below). Select the following settings.
- Type – In Container
- Padding Bottom – 60
Click the blue Save button.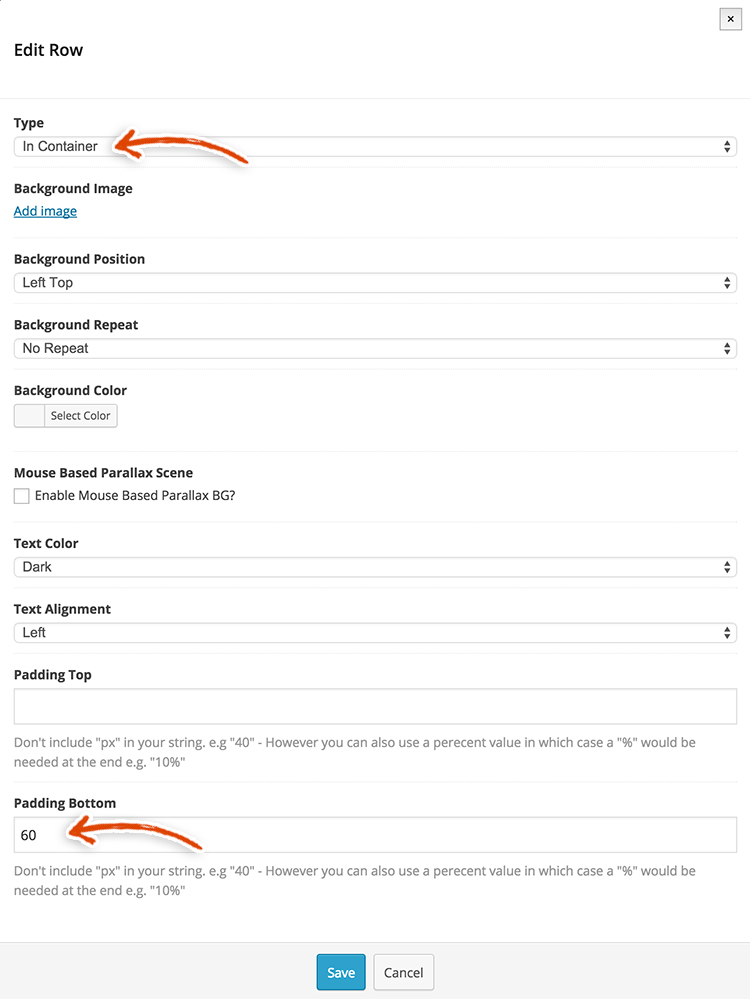 Then, click the big plus sign in the middle of the row.
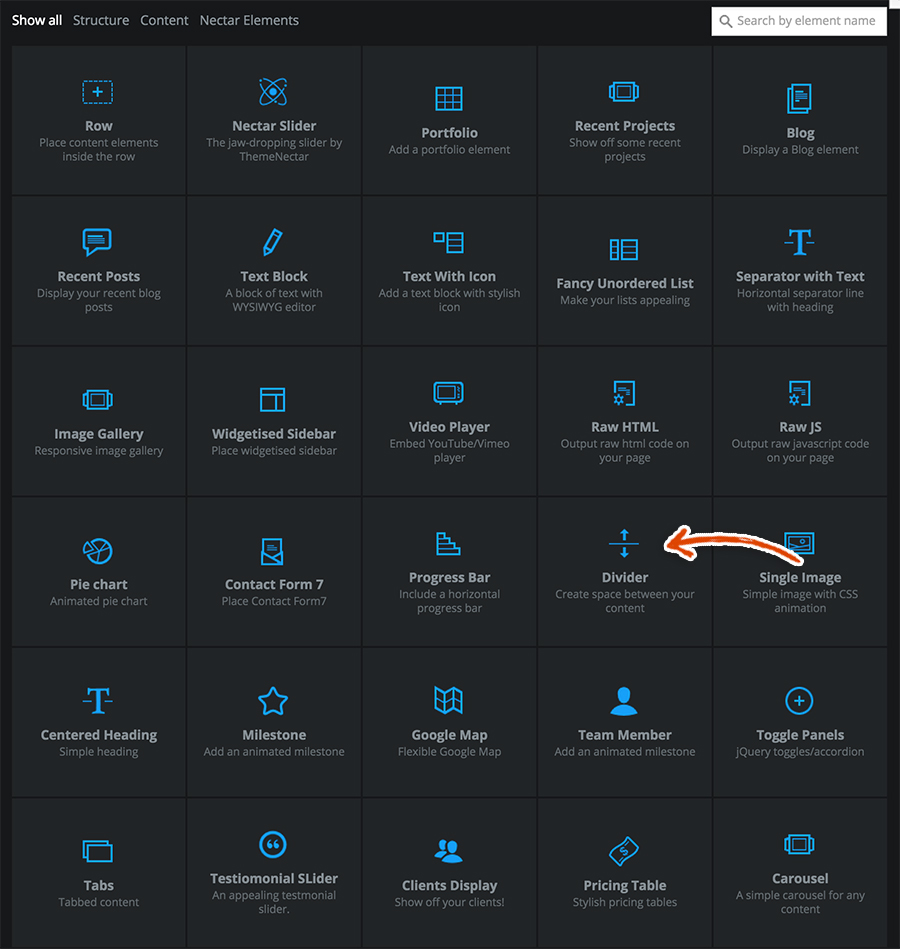
 Select Divider from the list.
 This will bring up the modal below. Select the following.
- Dividing Height – 90
Click the blue Save button.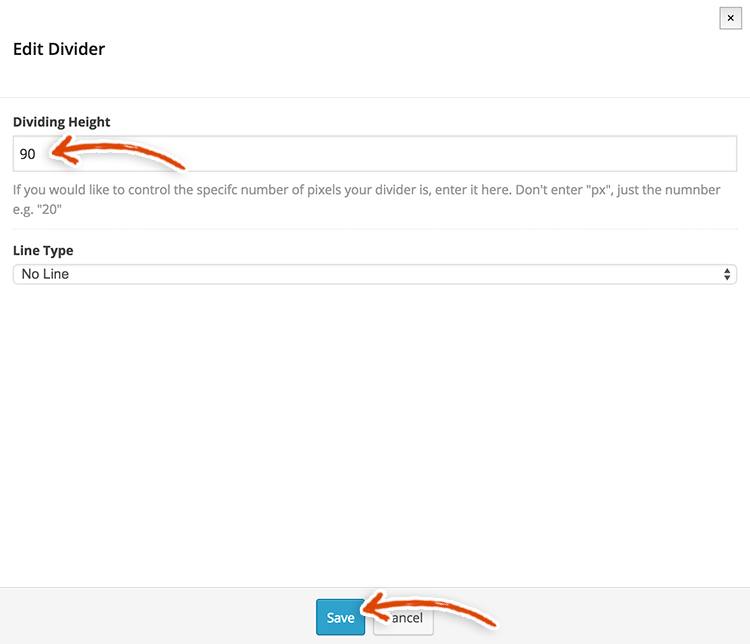 Click the plus icon underneath the divider section.
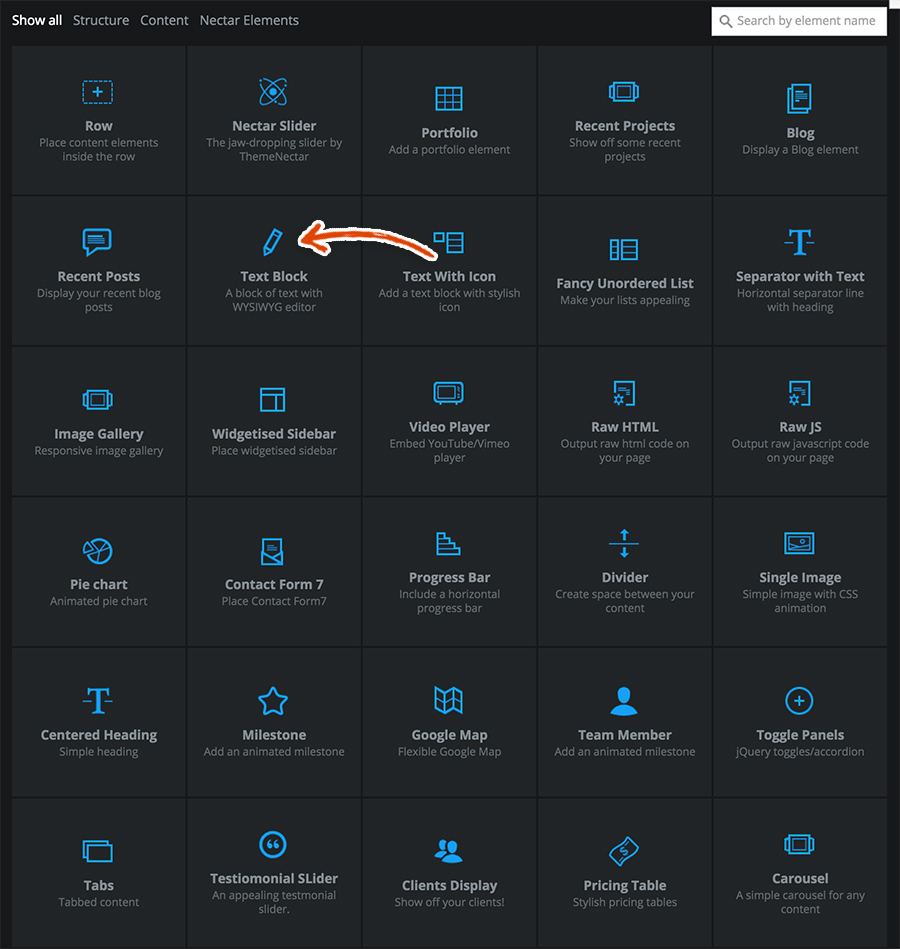
 Select the Text Block element from the list of options.
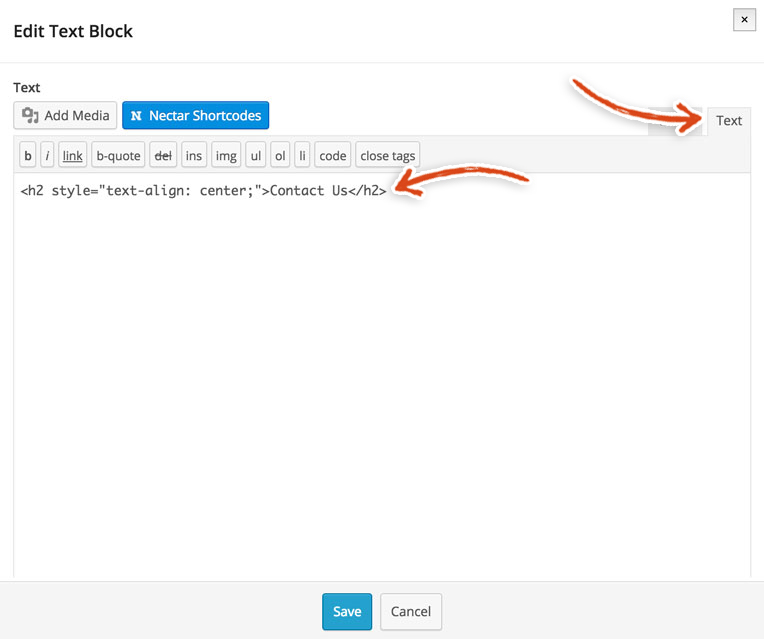
 This brings up the Text Block modal. Make sure to click on the Text tab and add the following code to the text editor.
<h2 style="text-align: center;">Contact Us</h2>
 Click on the plus sign underneath the Contact Us section.
 Select the Divider element from the list.
 The Edit Divider modal should pop up. Enter the following settings.
- Dividing Height – 40
- Line Type – No Line
Click the blue Save button.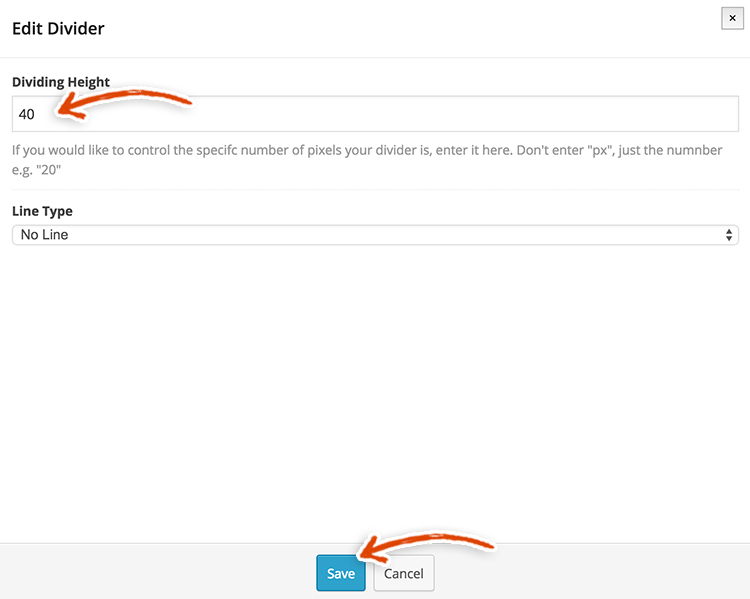 Click on the plus sign underneath the second divider section.
 Select Row from the list.
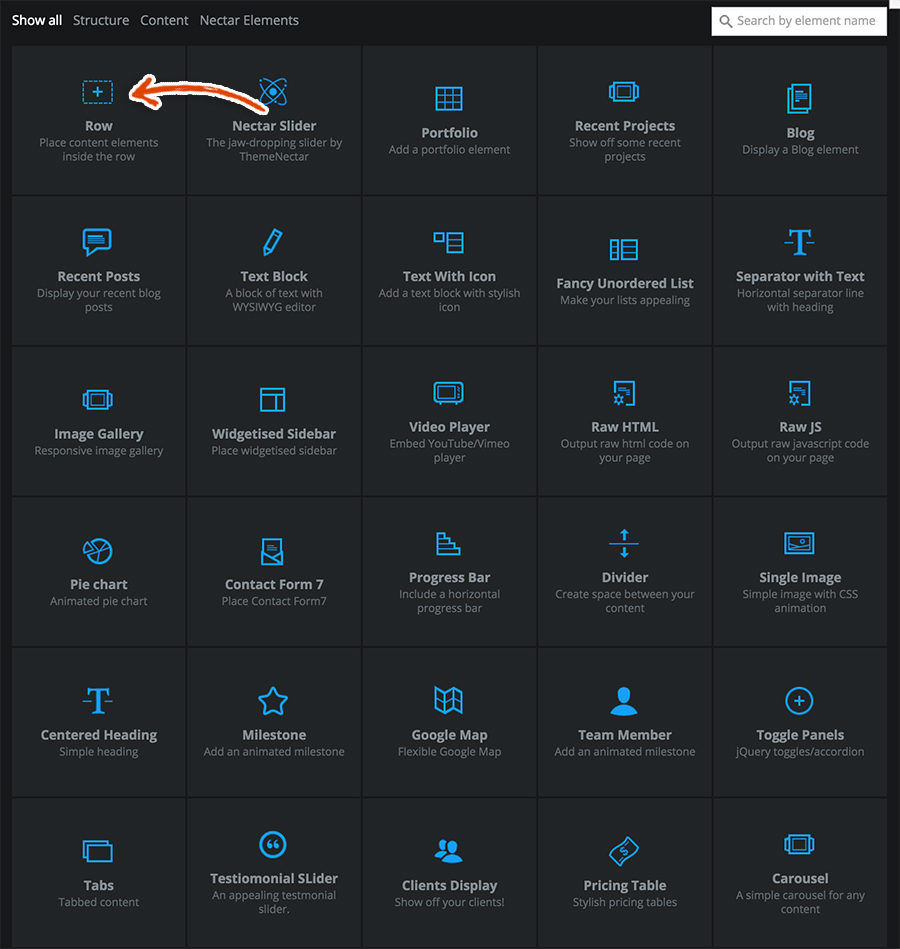 This will add a row to your Visual Composer (it should look like the below image). Hover over the Custom Layout tab on the top left of the row. Select the 1/3 + 1/3 + 1/3 option.
 This should display the following image within the Visual Composer. Click on the plus sign in the first 1/3 section.
 Select Text Block from the list.
 The following Edit Text Block modal should appear. Click on the Text tab in the top right corner and copy and paste the following text into the text editor. Replace the mindless@mm.com email address with yours.
<h3 class="margin-bottom:0" style="text-align: center;">Email</h3><p style="text-align: center;">mindless@mm.com</p>Click the blue Save button.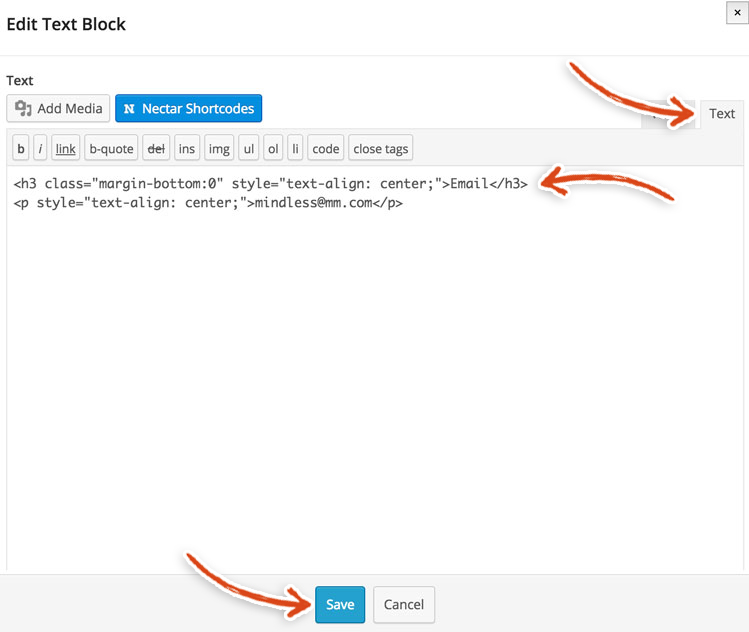 Now, click on the plus sign in the second 1/3 section.
 Select Text Block from the list of elements that are shown.
 The following Edit Text Block modal should appear. Click on the Text tab in the top right corner and copy and paste the following text into the text editor. Replace the phone number with yours (or with someone you want to mess with 😉 ).
<h3 class="margin-bottom:0" style="text-align: center;">Phone</h3>
<p style="text-align: center;">555-555-5555</p>
Click the blue Save button.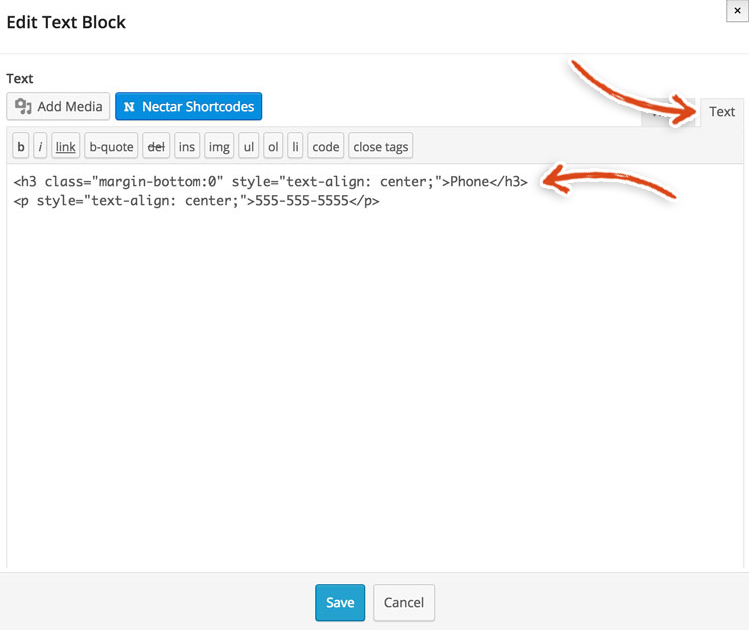 You should see the following within the Visual Composer. Click on the plus sign in the last 1/3 section.
 Select Text Block from the list of elements that are shown.
 The following Edit Text Block modal should appear. Make sure to click on the Text tab in the top right corner and copy and paste the following text into the text editor. Replace the address with yours.
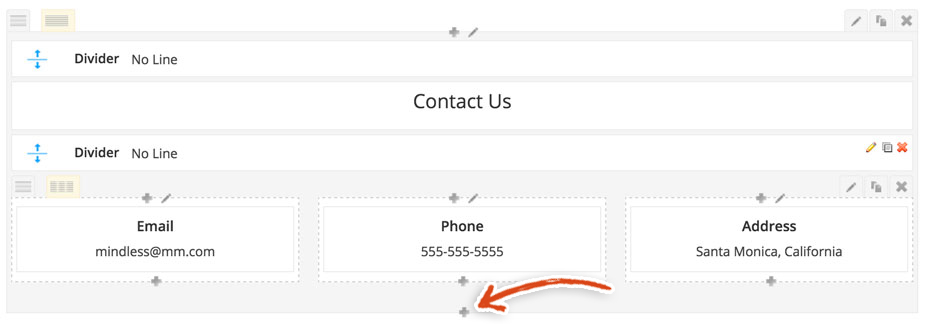
<h3 class="margin-bottom:0" style="text-align: center;">Address</h3><p style="text-align: center;">Santa Monica, California</p>Click the Save button at the bottom of the modal.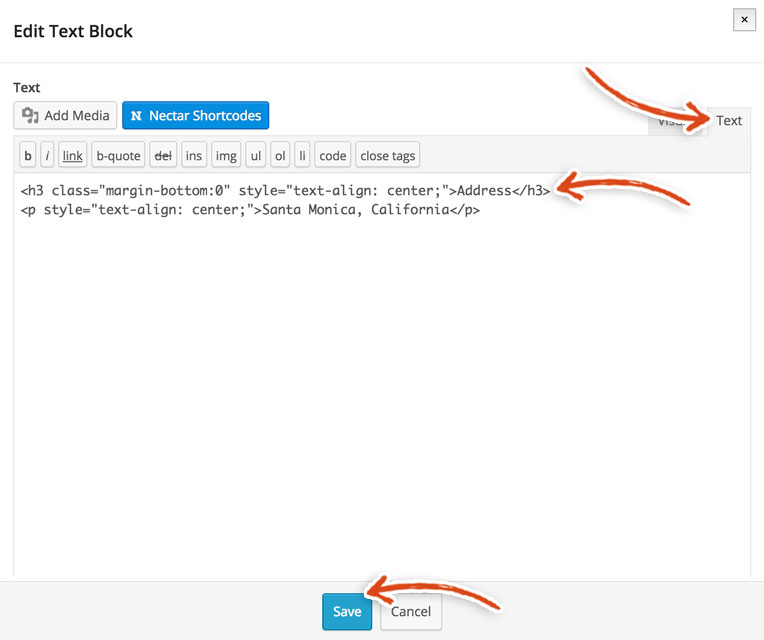 Click on the plus sign below the 1/3 + 1/3 + 1/3 row at the bottom of the page.
 Select the Divider element from the list.
 The Edit Divider modal will pop-up. Select the following settings for the Divider.
- Divider Height – 20
Click on the blue Save button.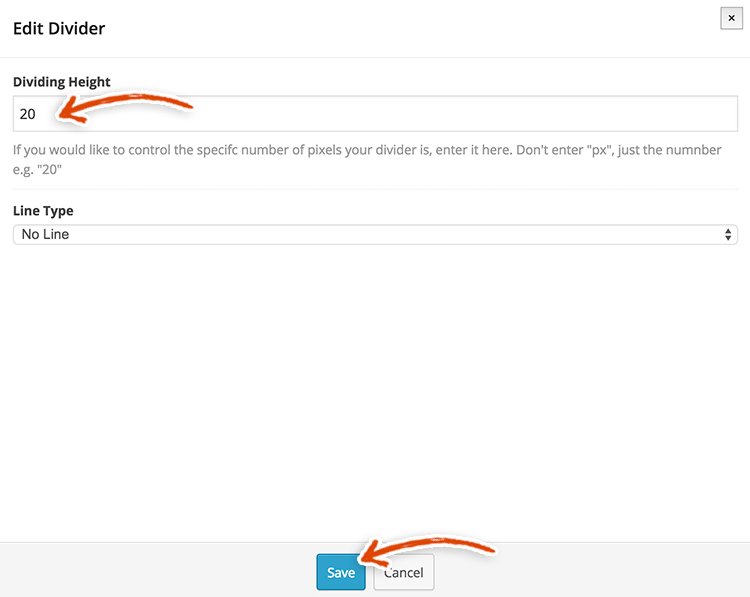 Once the modal has closed, you should see an updated Visual Composer layout. Click on the plus sign below the divider section that you just created.
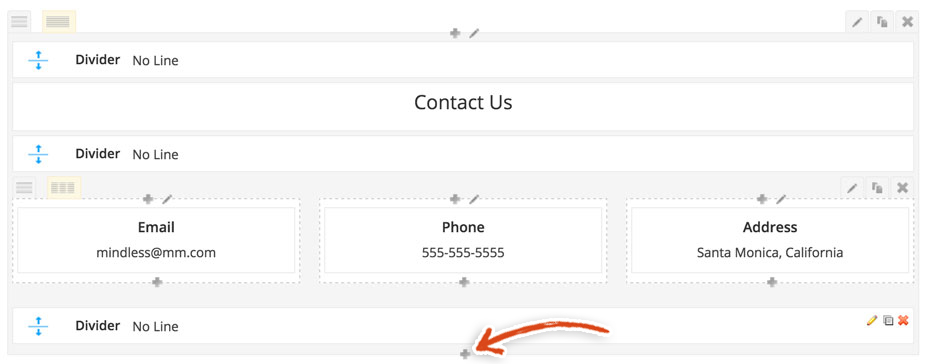 Select the Divider element from the list.
 This brings up the Edit Divider modal. Select the following settings for the divider.
- Dividing Height – 60
- Line Type – Full Width Line
Don’t forget to click the blue Save button!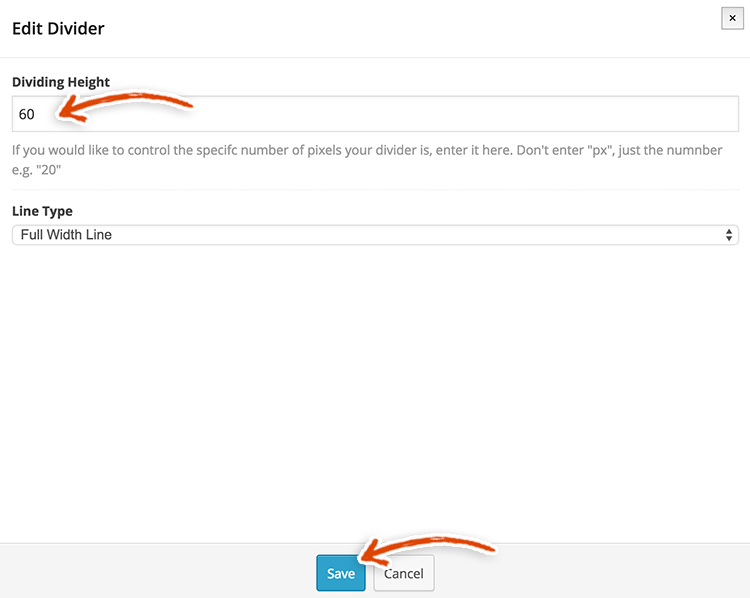 This modal should close and you should see the updated page structure. Click on the plus icon at the bottom of the Visual Composer editor.
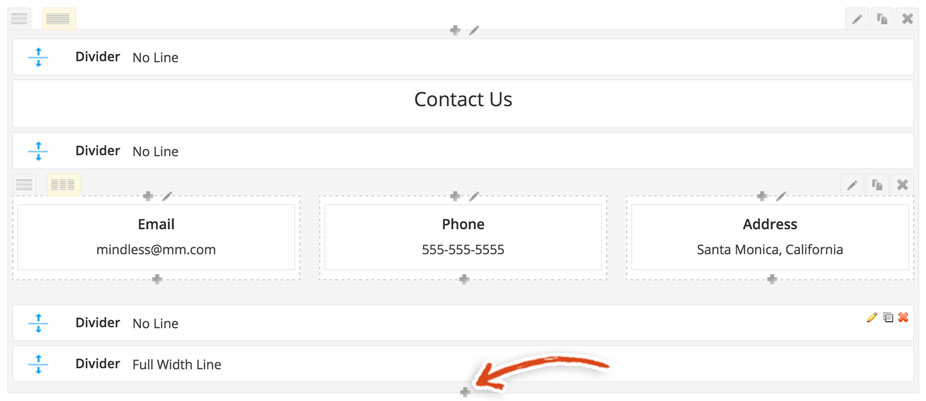 Add a text section after your last divider by clicking on the text block button.
 Add content to the Edit Text Block modal.
We added the following text, in case you want to be a copy cat! We might tattle tale on you, to ourselves, hehehe 😉
There are three ways to contact us from this contact page. You can email us. You can call us, we like that. You can mail a letter to our address, though it doesn’t have a street number, so it’d be fun to see where it ends up. Finally, you can fill out the form located directly below this paragraph. Wait, that’s 4 ways of contacting us. Oh, and you can contact the author directly on the about page. So, really there are approximately 8 ways of contacting us. See, this is what happens when you mindlessly write content for your Contact Us page.
Also, click on the blue Save button.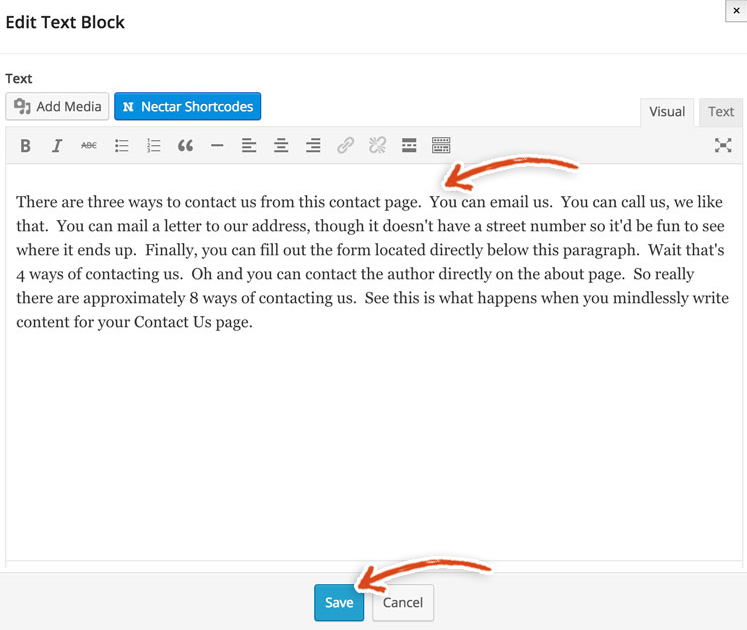 Now is the time when, you guessed it, you will see the image below in the Visual Composer. Click on the plus sign at the bottom of the page.
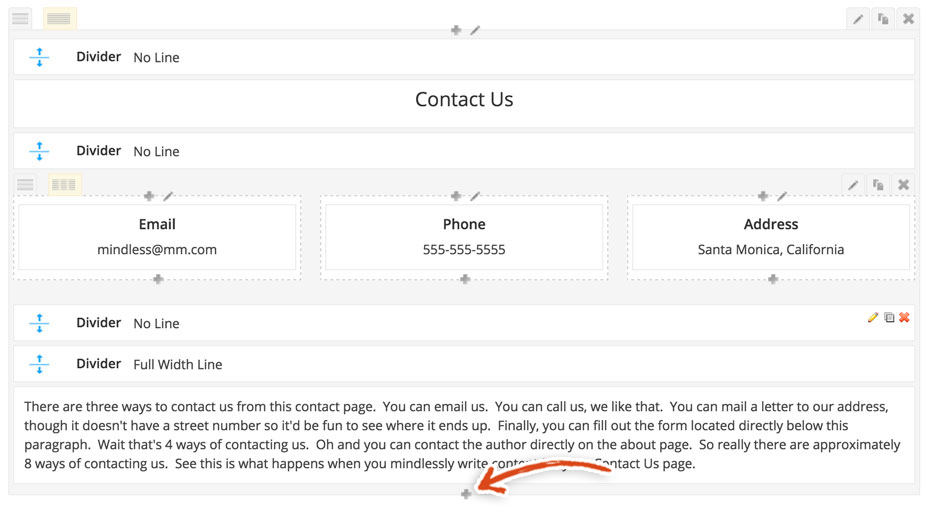 Click on the divider button in the list.
 In the Edit Divider modal, select the following settings.
- Divider Height – 60
- Line Type – Full Width Line
Click the blue Save button at the bottom of the modal. Click on the plus sign at the bottom of the Visual Composer.
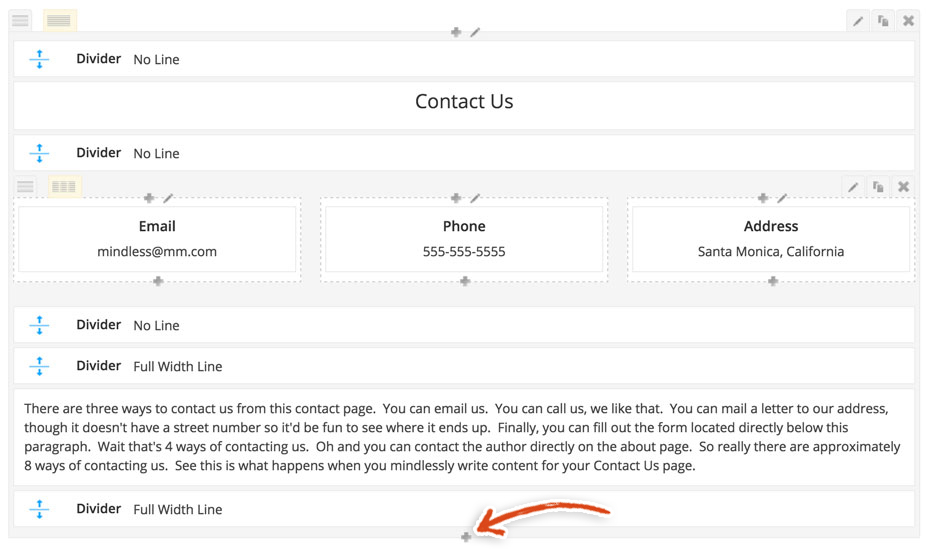 Time to add some magic communicating functionality to the Contact page. The little piece of code that you’re going to add will stick a form on the Contact page. This will give your blog readers the ability to email you directly through your website.
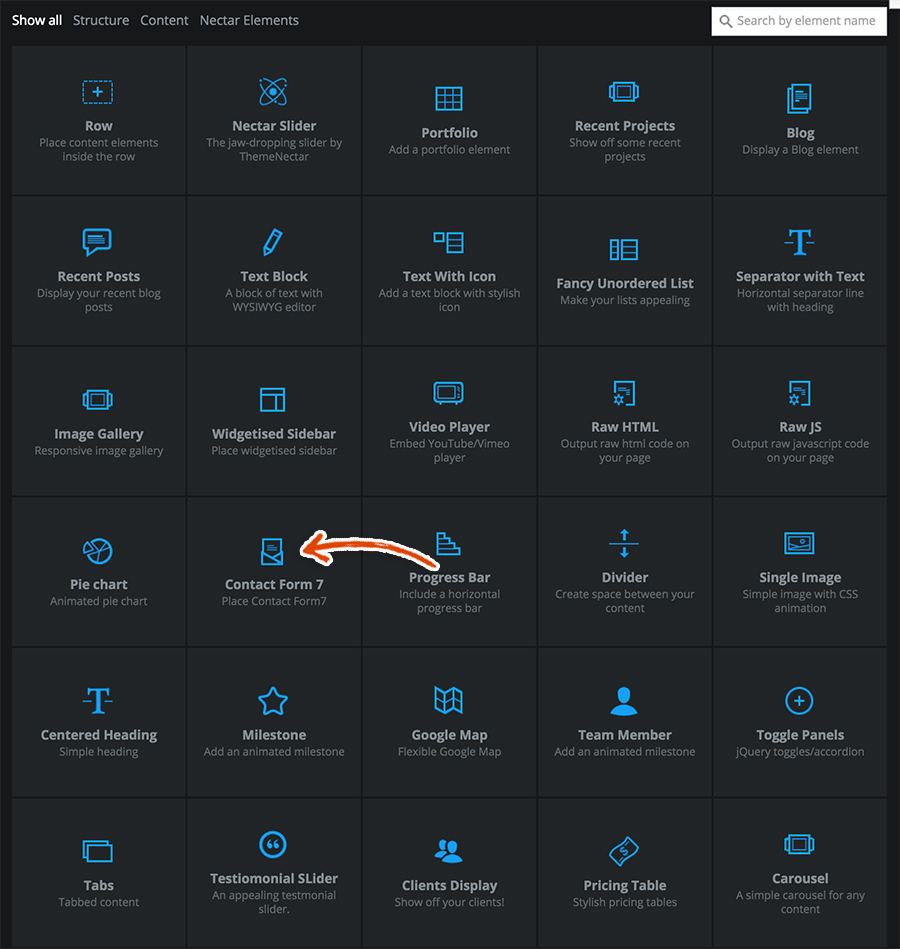
Select Contact Form 7 from the list.
 Then, you should be shown the Edit Contact Form 7 pop-up. Make the following edits.
- Form Title – Contact Us
- Select contact form – Contact form 1 (or if you named the form differently select the name you used)
Click the blue Save button.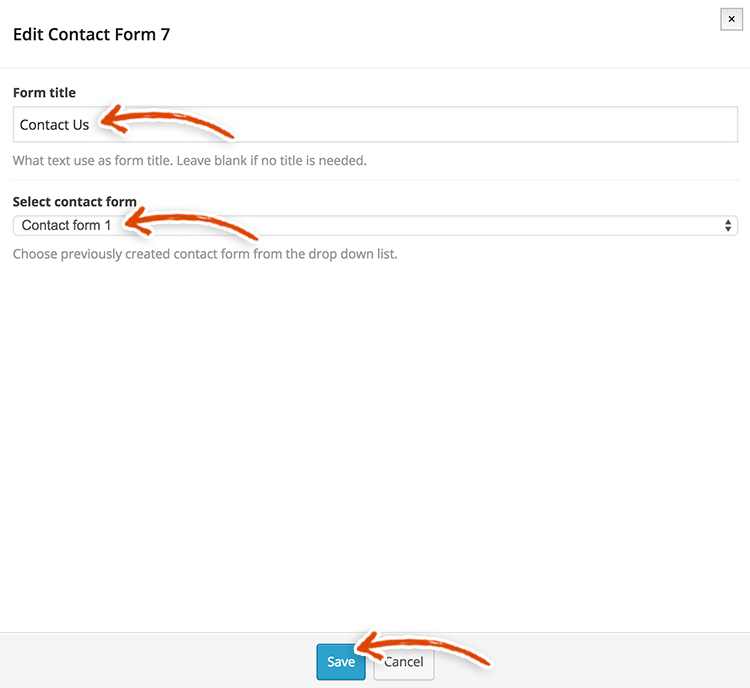 That should be pretty much it for building the page structure for the Contact page!! You’re almost home free. We need to navigate to a couple other pages to take care of a few more items to officially finish up the Contact page. Before we do, make sure to click that beautiful blue Update button on the right hand side of the page to save your work, otherwise you will cry and swear at us!!
Contact Form Plugin Settings
Hover over the Contact tab in the left sidebar and click on the Contact Forms. You will see a list of all of the contact forms (if for whatever reason there isn’t an existing form, then click the Add New link and follow the instructions). Hover over Contact form 1 and click the Edit link.
 This will bring up the Edit Contact Form page. Here, you can edit the text associated with each field in the contact form by editing the content in the text box labeled Form. Our contact form has the following fields.
- Name
- Subject
- Message
Feel free to copy the code below and paste it in the form. If you want additional fields (i.e. – Phone Number, Address, etc.), click the Generate Tag button and choose the type of field that you would like to add.
<p>Your Name (required)<br />
[text* your-name] </p>
<p>Your Email (required)<br />
[email* your-email] </p><p>Subject<br />
[text your-subject] </p><p>Your Message<br />
[textarea your-message] </p>
<p>[submit "Send"]</p>
Make sure to change the To: field under the Mail section (which is set to youremail@yourdomain.com in the image below) to whatever email address that you want receiving your contact messages. You can also change the From: field under the Mail section to whatever email address you want the contact messages to be sent from.
Finally, make sure to click the blue Save button (to save any edits that you made).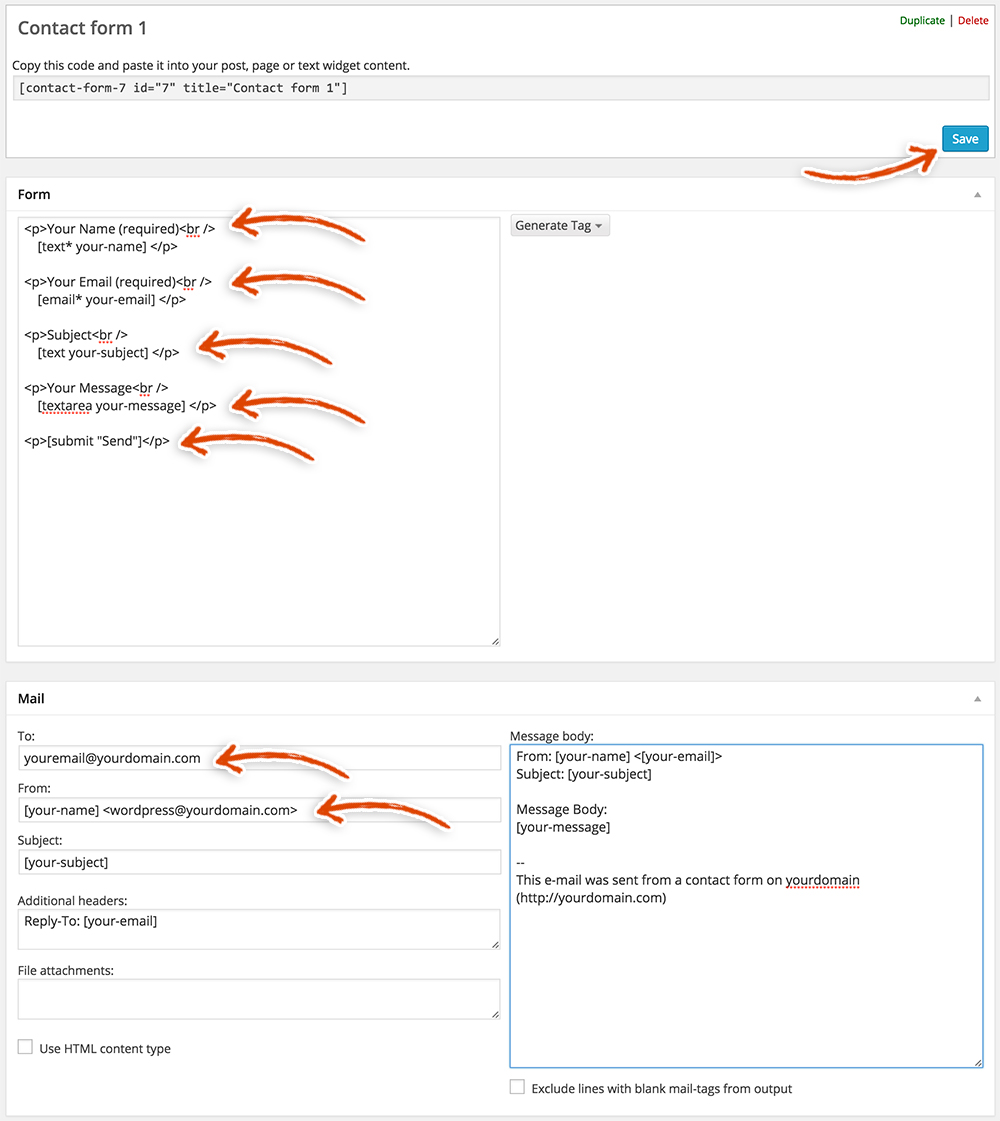
Add a Map to the Contact Page
Let’s add a sweet map to your Contact page. We’ll start by adjusting the location shown on the Google map at the top of the page. (FYI – the Contact template that we chose originally for this page has the Google Map baked into the page).
Hover over the Salient link in the left sidebar and click on Contact.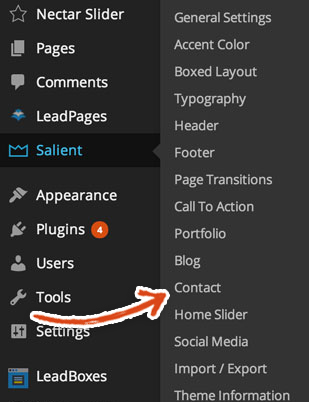 Go to where it says Map Center Latitude and Map Center Longitude. Search for your address or your city on Google.com plus the words “longitude and latitude.” We’re using the longitude and latitude for Santa Monica, CA (where we live). We got 34.0219° N, 118.4814° W in the results. So, the longitude is -118.4814 (it’s negative bc it’s West) and the latitude is 34.0219 (it’s positive bc it’s North).
Next, check the box next to Greyscale Color and set the Map Extra Color to #777777.
Then, click on the green Save Changes button.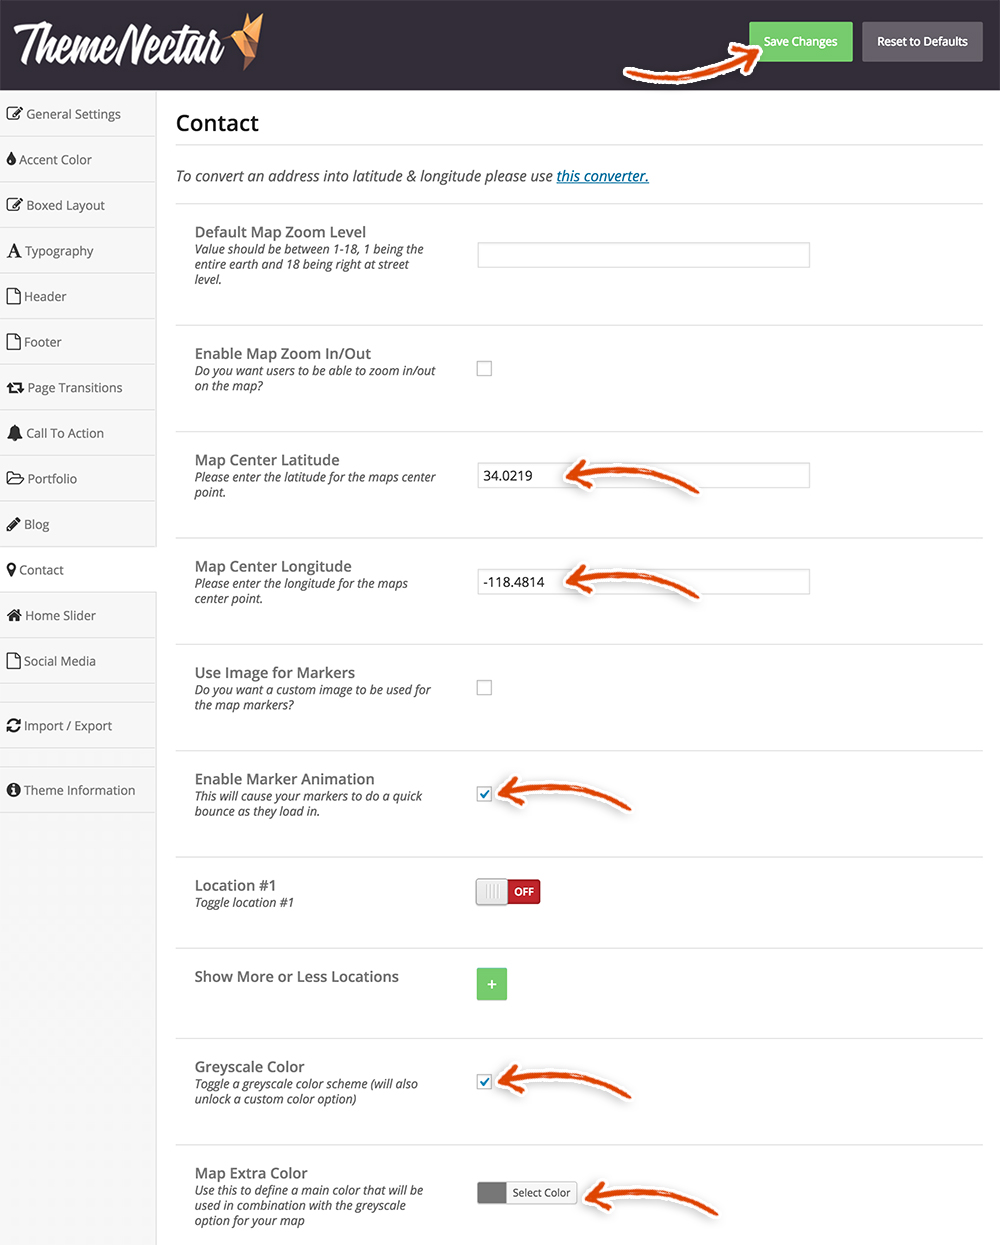 BOOM!! The Contact page is done! Holy SNIKES!! Only a few more steps and you’re beautiful new blog will be complete! Next up, it’s time to build a sexy stylish about page. Get excited!