First off, MailChimp is a freakin awesome way to send email newsletters to different groups of subscribed users. We use MailChimp exclusively in every website that we build. Not only is the brand super cool, who doesn’t love a cute little monkey, the software is top-notch and even fun to use!
We’re sure you’ve received an email or two in your lifetime and MailChimp helps make it easy to fill your readers’ inboxes. Email newsletters are a great way to engage with your readers and we would definitely recommend completing this step, though it is totally optional for finishing your beautiful new blog.
Like we said up above, this is totally optional but another thing we want to point out is that this is totally FREE to implement. MailChimp offers a completely FREE level of service up to a certain number of emails sent. You can send 12,000 emails to up to 2,000 subscribers for free.
Download the MailChimp WordPress Plugin
Click that big yellow button below to download the MailChimp WordPress plugin.
MailChimp WordPress plugin zip file
Install the MailChimp WordPress Plugin
If you’re not already logged into WordPress, login to your WordPress Admin Dashboard (yourdomain.com/wp-login.php).
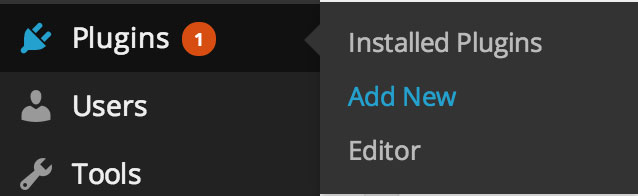
Hover over Plugins in the left sidebar and click Add New.
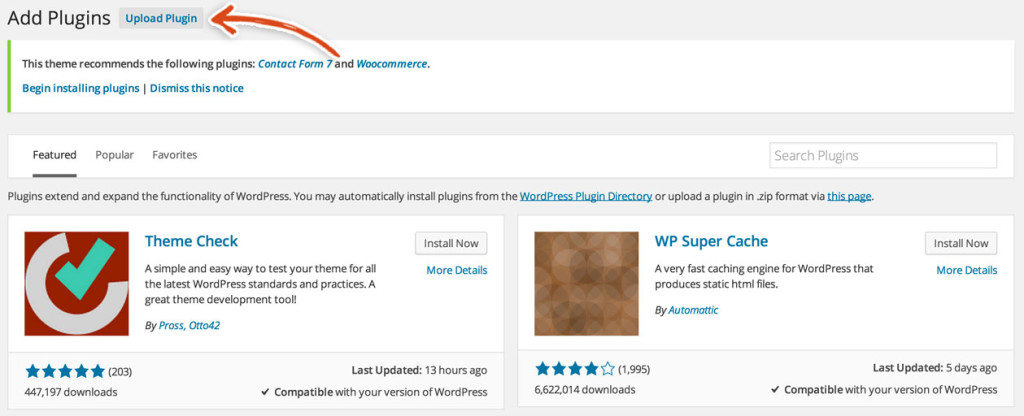
Click on the Upload Plugin button at the top of the Add Plugins page.
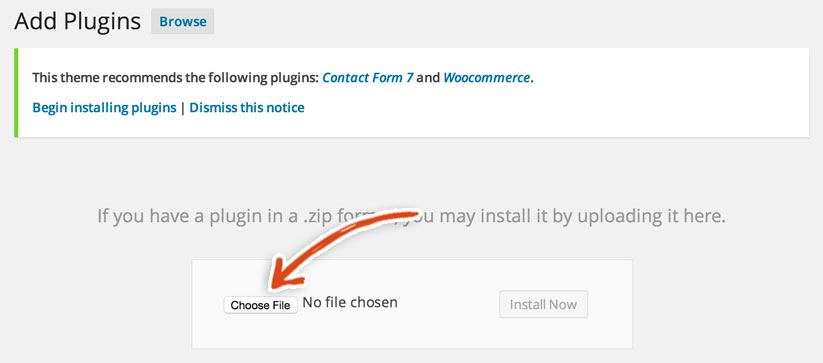
Choose the MailChimp WordPress zip file.
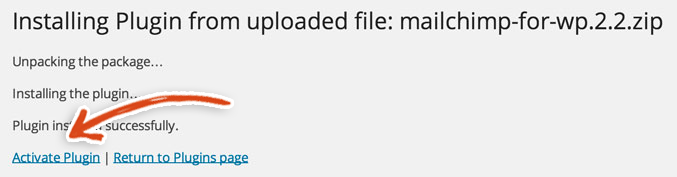
Activate the MailChimp WordPress Plugin. Click the Activate Plugin link once the plugin has been successfully installed.
Connect the MailChimp WordPress Plugin
Sweet! The MailChimp plugin is now installed! Now that you’ve installed the MailChimp WordPress plugin, you need to connect your blog to MailChimp.
If you don’t have a MailChimp account, you have to sign up for MailChimp. Head on over to Mailchimp. Remember it is FREE to add to your blog, so don’t fret. Click on the Sign Up Free button in the top right of the nav bar.

You should be redirected to the following page.

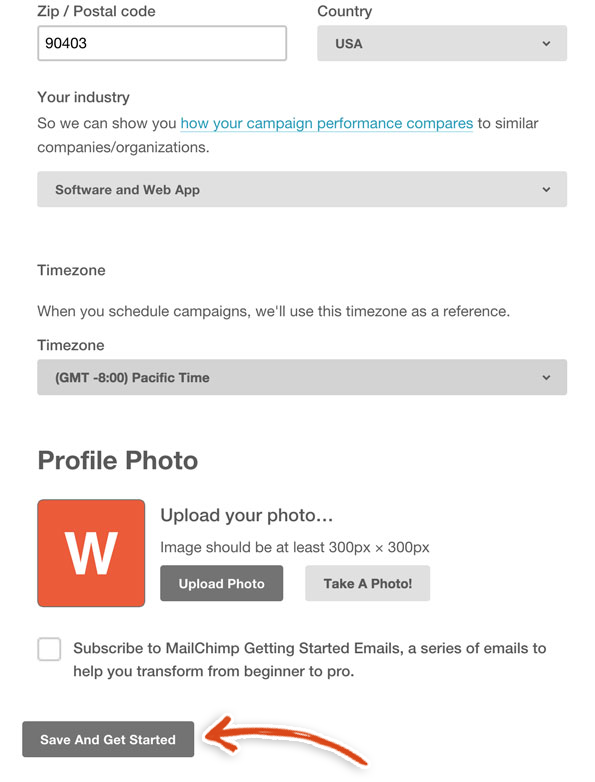
Make sure to save the email, username and password for future reference (use Dashlane to store and manage passwords 🙂 ). Once you have added the required info and clicked the Create My Account button, you will be sent to the page below. Enter all of the required information on this page as well and then click on the Save and Get Started button.

Then, MailChimp will display the following message.
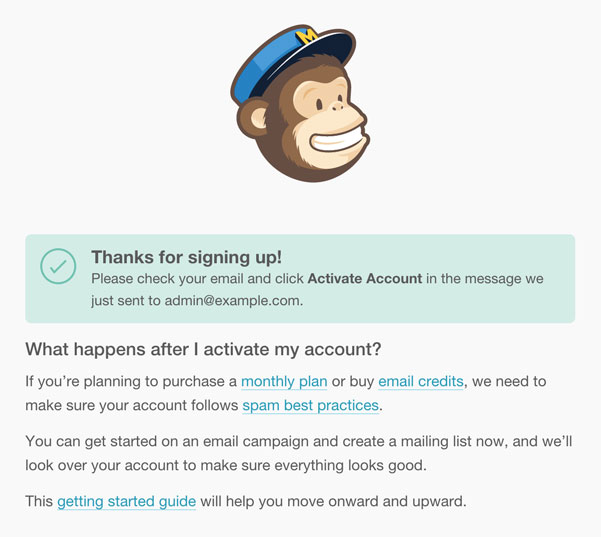
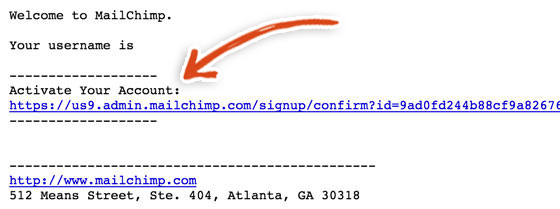
So, your next step is to check your email and find the email from MailChimp. Click the Activate Account link in that email.
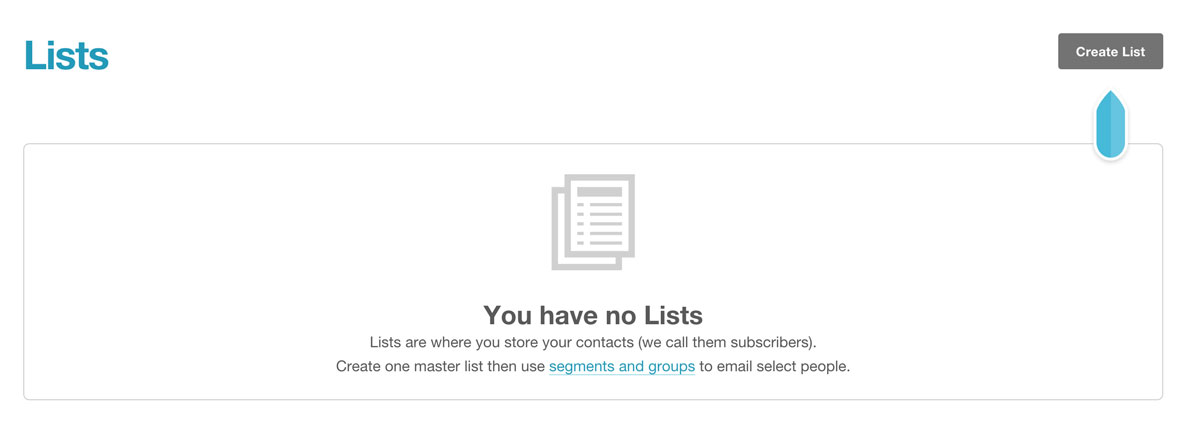
Once you click on that link, you are redirected to your MailChimp dashboard. Now, you need to create a MailChimp list. A MailChimp list is simply a group of user emails that are associated with a certain website (it is where you store your subscribers). In this case, the MailChimp list we’ll create is associated with your new blog website. Click on the Lists tab in the left sidebar.

You’ll be taken to the Lists page below. Click the Create List button in the top right corner.
You should see the Create List form below. Fill out the Create List form in its entirety. You can set the List name to whatever you’d like. We’ll call ours Example Blog Website.
As for the default “from” email, ideally you’d want to use an email address from your domain name such as yourname@yourdomainname.com. If you would like to use an email address that includes your domain name, check out Google Apps. If you don’t want to set up an email address with your domain name or would like to do this later, you can just use a personal email for now.
Finally, you can set the Default “from” name to whatever you’d like. We like to pick cool names like Optimus Prime, but feel free to use your own name or something boring like support@yourdomain.com.
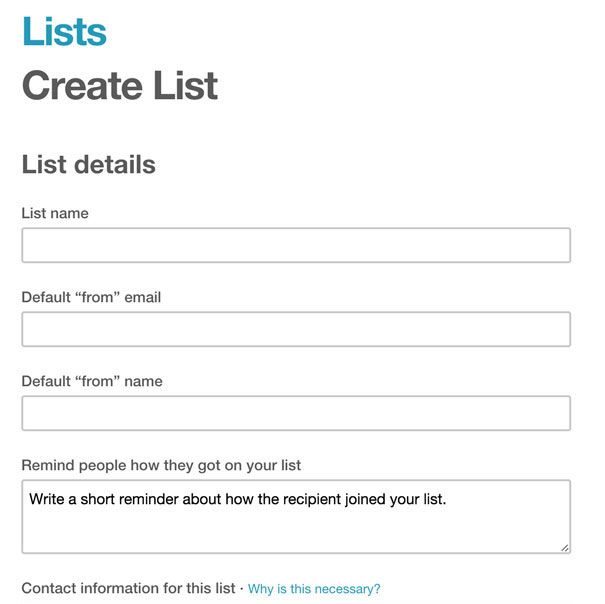
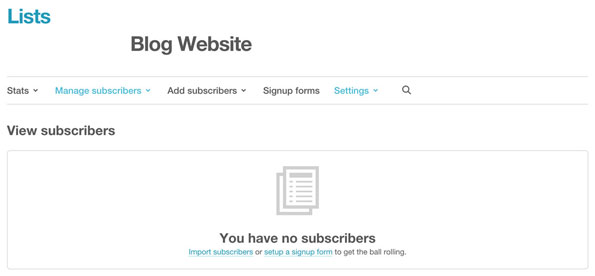
Then, click the Save button at the bottom of the list. If everything is filled out correctly, you should see the list page below.
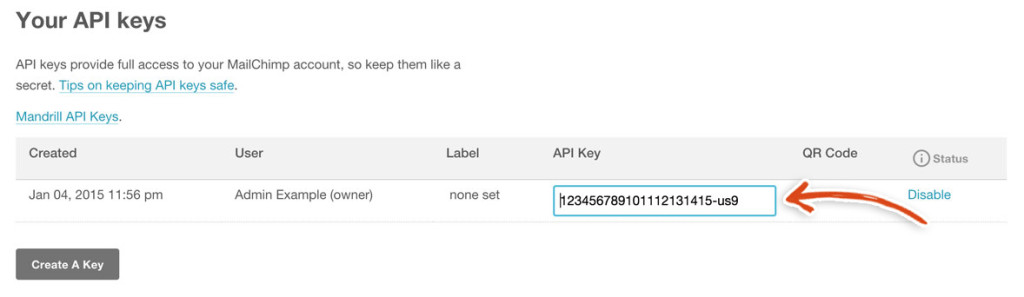
Now that you’ve created a list, your next step is to get your MailChimp API key. The API key is what allows your website to communicate with your MailChimp list. Go to http://admin.mailchimp.com/account/api. You should see the following page. Click on the Create a Key button.
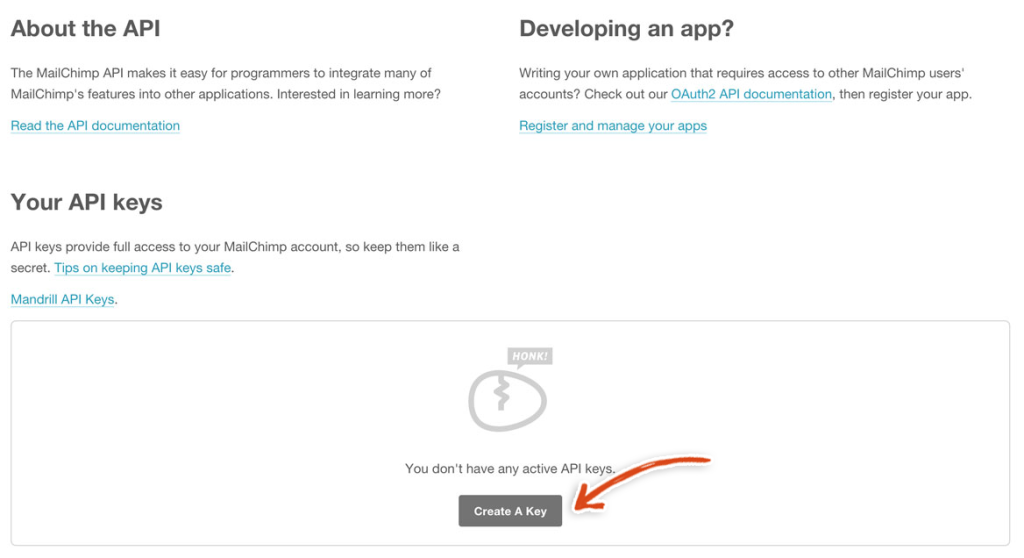
You should be redirected to the following page. Copy the API key in that field and keep it handy as we will use it in a second.
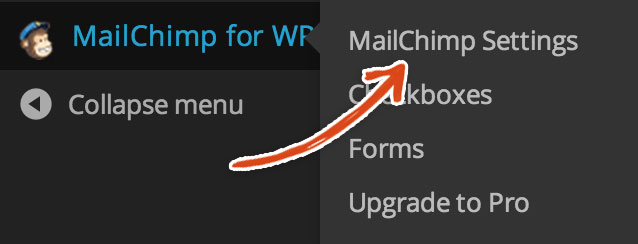
Open up a new tab in your browser and sign into your WordPress blog dashboard (ie yourdomain.com/wp-login.php). Hover over the MailChimp WP tab in the left sidebar and Click on the MailChimp Settings link.
We need to add the API that you copied from MailChimp into the field on the settings page and click Save Changes.

The text next to the MailChimp API Settings title should now read CONNECTED.
![]()
There should also be a summary of the lists associated with your MailChimp account listed on that MailChimp Settings page.

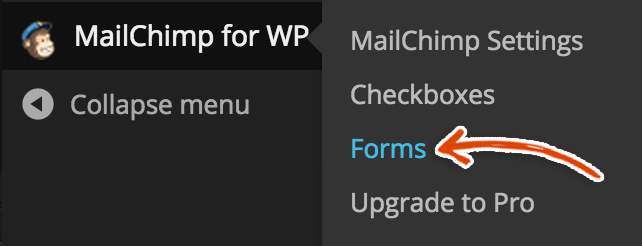
Now, let’s head over to the MailChimp forms. Click on the forms link in the MailChimp tab in the left sidebar.
For the “Lists this form subscribes to” field, make sure to check the box next to the list that you want users to be subscribed to if they submit the form on your site (ie your newly created MailChimp list).
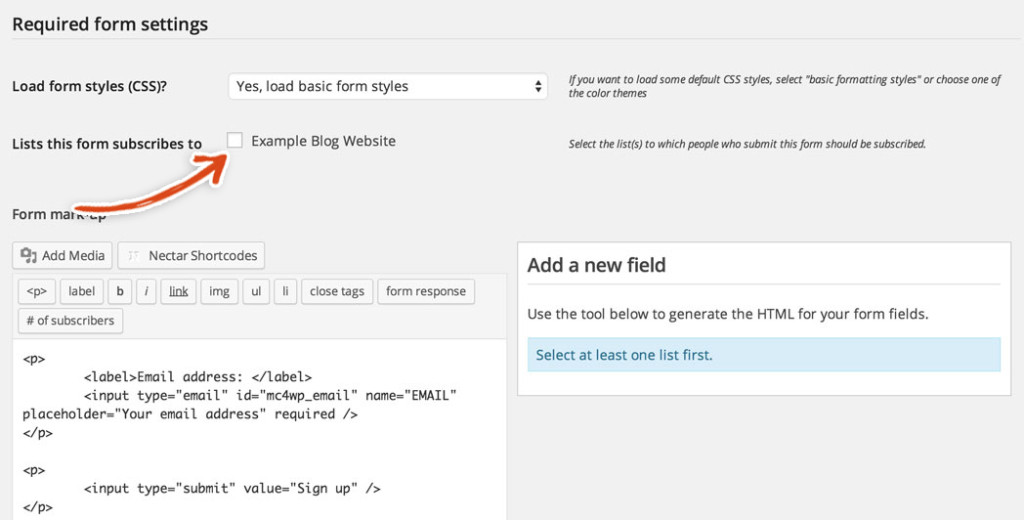
Click the blue Save Changes button at the end of the Required form settings section in order to associate that list with the Sign Up form on your blog.
BAM! You’ve successfully set up your MailChimp WordPress plugin settings – silly dilly dokeo you’re awesome! Is your brain hurting after that one? Our brains are hurting for sure! In the next step, we’re going to add the Yoast SEO plugin so you can easily optimize your new blog website for search engines!