[vc_row type=”full_width_background” bg_position=”left top” bg_repeat=”no-repeat” bg_color=”#eeeeee” scene_position=”center” text_color=”dark” text_align=”left” top_padding=”60″ bottom_padding=”60″][vc_column width=”1/1″][vc_column_text el_class=”course-page”]
Google Analytics
[/vc_column_text][divider line_type=”No Line” custom_height=”40″][vc_column_text]Google Analytics helps you determine how many users are visiting your site as well as the different actions that they\’re taking on your site. It\’s a great way to determine how user\’s are using your site as well as what areas of the site may be a bottleneck for your users and whether you are funneling users to where you want them to go. It has a ton more features including a way to get a real time view of what users are doing on your site (you can see how many users are reading a certain post or looking at a certain page of your site at this particular moment).To start, you need to create a Google Analytics account. Go to http://www.google.com/analytics/. You should see a page similar to the below:[/vc_column_text][divider line_type=”No Line” custom_height=”40″][vc_column_text] [/vc_column_text][divider line_type=”No Line” custom_height=”40″][vc_column_text]If you have a Google account already then click on the Sign In link and enter your credentials. Otherwise, click on the create an account link and go through their account creation process.If you haven\’t signed up for Google Analytics in the past, you should see something similar to the below page:[/vc_column_text][divider line_type=”No Line” custom_height=”40″][vc_column_text]
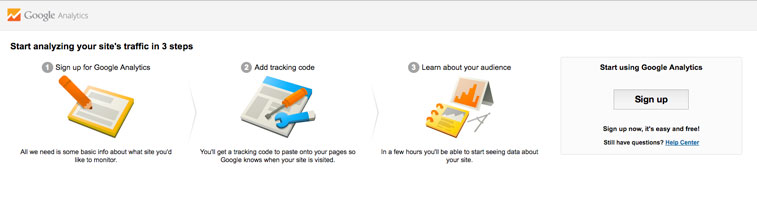 [/vc_column_text][divider line_type=”No Line” custom_height=”40″][vc_column_text]Click on the Sign Up button. You should now see something like the page below:[/vc_column_text][divider line_type=”No Line” custom_height=”40″][vc_column_text]
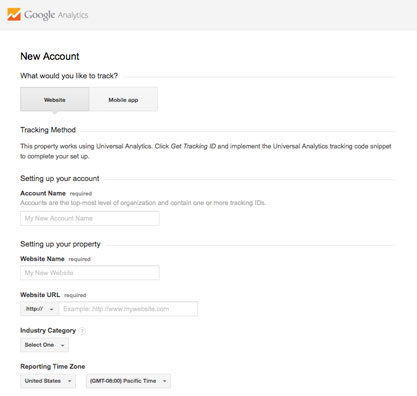 [/vc_column_text][divider line_type=”No Line” custom_height=”40″][vc_column_text]Complete the form in its entirety and include the domain name that you are using for your blog and paste it into the Website URL field. Once you submit the form, a modal should appear asking you to Agree to the Terms of Service Agreement. Click the I Accept button.[/vc_column_text][divider line_type=”No Line” custom_height=”40″][vc_column_text]
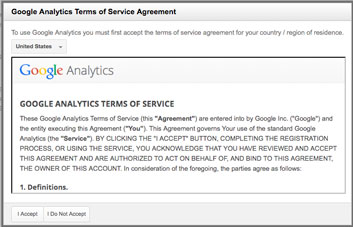 [/vc_column_text][divider line_type=”No Line” custom_height=”40″][vc_column_text]Once the form as been successfully submitted, you should see a page with the tracking code on it (the text area underneath the “This is your tracking code” section). Keep this code handy as we will use it below.[/vc_column_text][divider line_type=”No Line” custom_height=”40″][vc_column_text]
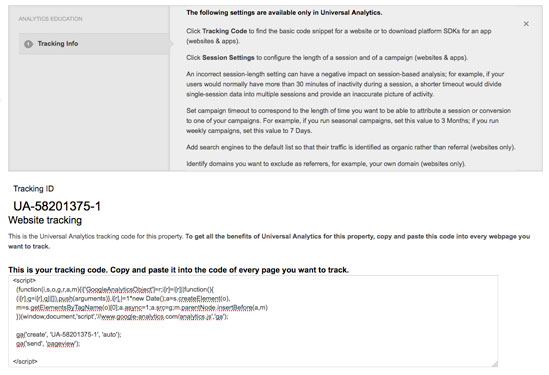 [/vc_column_text][divider line_type=”No Line” custom_height=”40″][vc_column_text]If you already have a Google Analytics account and are having a hard time finding your tracking code.Once you have signed into Google Analytics you should be defaulted to the page that displays your different web properties. The only part of that page you need to look at though is the navigation bar at the top – as seen below.[/vc_column_text][divider line_type=”No Line” custom_height=”40″][vc_column_text]
![]() [/vc_column_text][divider line_type=”No Line” custom_height=”40″][vc_column_text]Click on the Admin tab. You should then see a page similar to the below:[/vc_column_text][divider line_type=”No Line” custom_height=”40″][vc_column_text]
[/vc_column_text][divider line_type=”No Line” custom_height=”40″][vc_column_text]Click on the Admin tab. You should then see a page similar to the below:[/vc_column_text][divider line_type=”No Line” custom_height=”40″][vc_column_text]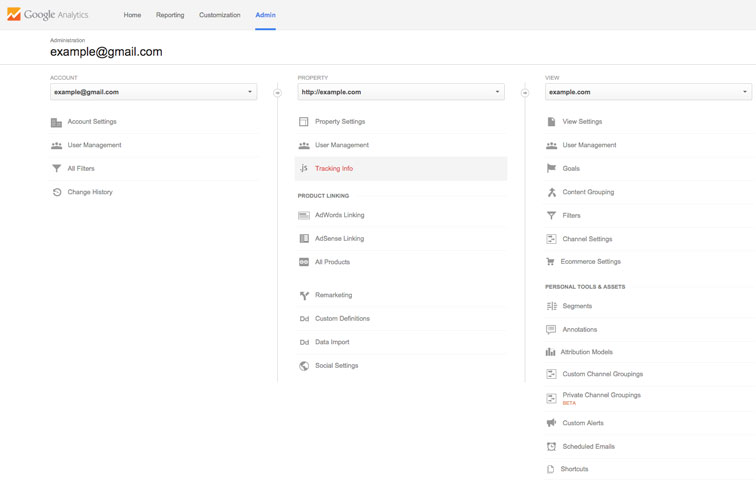 [/vc_column_text][divider line_type=”No Line” custom_height=”40″][vc_column_text]You want to focus in on the middle section. Make sure to select the correct property in the drop down (ie the domain name that you\’re using for your blog) and click on the Tracking Info link. This should reveal a dropdown menu (visible below).[/vc_column_text][divider line_type=”No Line” custom_height=”40″][vc_column_text]
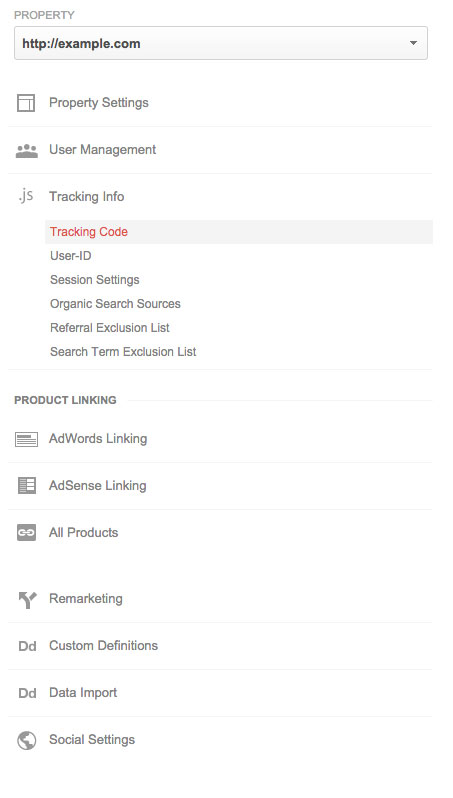 [/vc_column_text][divider line_type=”No Line” custom_height=”40″][vc_column_text]Click on the Tracking Code link. This will pull up a page that shows the tracking code underneath the text “This is your tracking code.” Keep this code close as you will need it below.[/vc_column_text][divider line_type=”No Line” custom_height=”40″][vc_column_text]
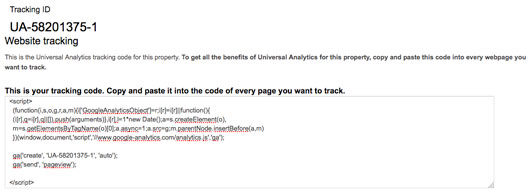 [/vc_column_text][divider line_type=”No Line” custom_height=”40″][vc_column_text]Now that you have the Google Analytics Tracking Code – hover over the Salient tab in the left sidebar.[/vc_column_text][divider line_type=”No Line” custom_height=”40″][vc_column_text]
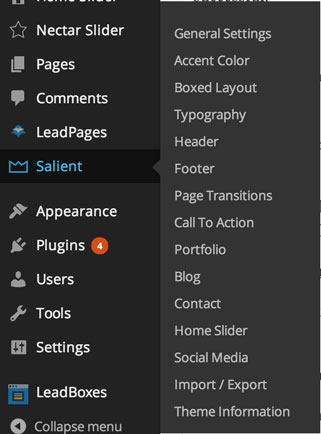 [/vc_column_text][divider line_type=”No Line” custom_height=”40″][vc_column_text]Then, click on the General Settings link.[/vc_column_text][divider line_type=”No Line” custom_height=”40″][vc_column_text]
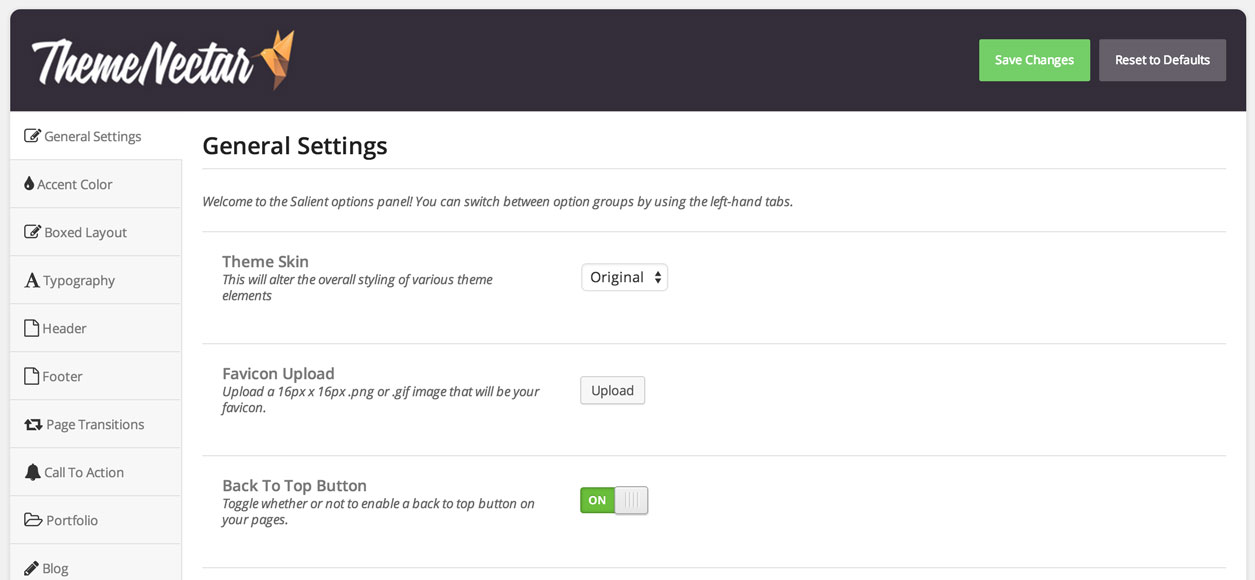 [/vc_column_text][divider line_type=”No Line” custom_height=”40″][vc_column_text]Scroll down to the bottom of this section, there should be a Google Analytics section.[/vc_column_text][divider line_type=”No Line” custom_height=”40″][vc_column_text]
 [/vc_column_text][divider line_type=”No Line” custom_height=”40″][vc_column_text]Copy and paste the Google Analytics tracking code that you got from your Google Analytics account above into this field.Make sure to click the green Save Changes button and you should be off to the races!You will know that it is hooked up correctly if you go to the section of Google Analytics where the tracking code is located and you see a status of Receiving Date – like so.[/vc_column_text][divider line_type=”No Line” custom_height=”40″][vc_column_text]
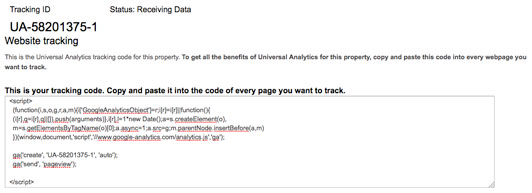 [/vc_column_text][divider line_type=”No Line” custom_height=”40″][vc_column_text]If you need more of a visual check, then go back to your Google Analytics dashboard and click on the Reporting section.[/vc_column_text][divider line_type=”No Line” custom_height=”40″][vc_column_text]
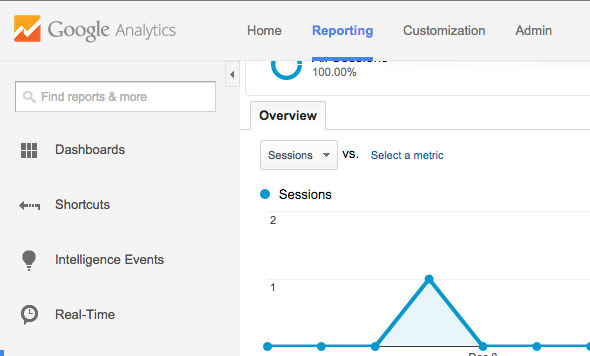 [/vc_column_text][divider line_type=”No Line” custom_height=”40″][vc_column_text]Then, click on the Real Time tab in the left sidebar and click on the Overview link.[/vc_column_text][divider line_type=”No Line” custom_height=”40″][vc_column_text]
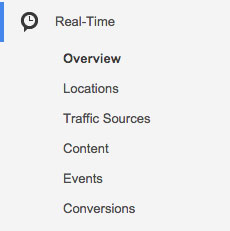 [/vc_column_text][divider line_type=”No Line” custom_height=”40″][vc_column_text]In order to check if it\’s working correctly, go to the home page of your blog and read a post and then go back to the home page and read a couple more posts. The active users on the site should go to 1 and the Pageviews graph should show some activity.[/vc_column_text][/vc_column][/vc_row]