
[vc_row type=”full_width_content” bg_position=”left top” bg_repeat=”no-repeat” bg_color=”#444444″ scene_position=”center” text_color=”dark” text_align=”left” top_padding=”0″ bottom_padding=”0″][vc_column width=”1/1″ animation=”none” column_padding=”padding-2-percent” column_padding_position=”all” background_color_opacity=”1″][vc_video link=”http://www.youtube.com/watch?v=ghPoalrv2zA&rel=0&controls=0″][/vc_column][/vc_row][vc_row type=”full_width_background” bg_position=”left top” bg_repeat=”no-repeat” bg_color=”#eeeeee” scene_position=”center” text_color=”dark” text_align=”left” top_padding=”60″ bottom_padding=”60″][vc_column width=”1/1″][vc_column_text el_class=”course-page yellow-font”]
STEP 5
[/vc_column_text][divider line_type=”No Line” custom_height=”10″][vc_column_text el_class=”course-page”]
Installing WordPress Plugins for Your Blog
[/vc_column_text][divider line_type=”No Line” custom_height=”40″][vc_column_text]This is Step 5 in the launch of your WordPress blog – (we say incredulously in case you didn’t know ;)).
There are 15 steps involved in installing the plugins needed to launch your WordPress blog:
1) Download the Contact Form 7 plugin zip file OR a link to the wordpress directory download
2) Download the Facebook Comments plugin zip file OR a link to the wordpress directory download
3) Download the Yoast SEO plugin zip file OR a link to the wordpress directory download
4) Download the MailChimp for WordPress plugin zip file OR a link to the wordpress directory download
5) Download the Disable Comments zip file OR a link to the wordpress directory download
6) Login to your WordPress Admin Dashboard[/vc_column_text][/vc_column][/vc_row][vc_row type=”full_width_background” bg_position=”left top” bg_repeat=”no-repeat” bg_color=”#444444″ scene_position=”center” text_color=”dark” text_align=”left” top_padding=”40″ bottom_padding=”40″][vc_column width=”1/1″][vc_column_text]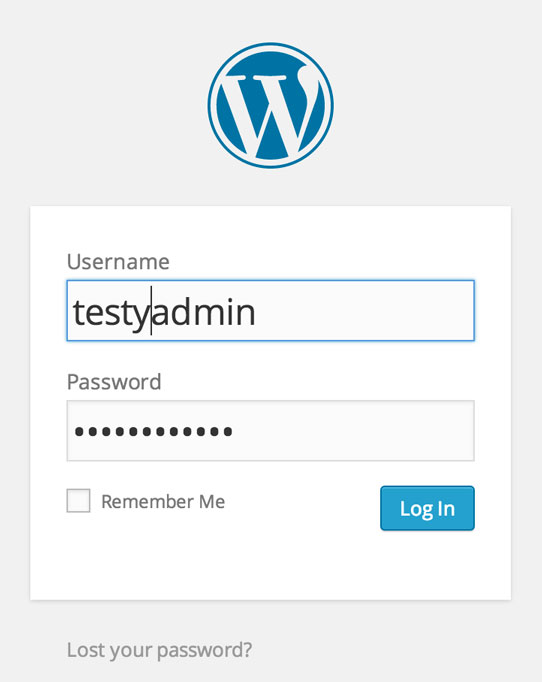 [/vc_column_text][/vc_column][/vc_row][vc_row type=”full_width_background” bg_position=”left top” bg_repeat=”no-repeat” bg_color=”#eeeeee” scene_position=”center” text_color=”dark” text_align=”left” top_padding=”60″ bottom_padding=”60″][vc_column width=”1/1″][vc_column_text]7) Upload the Facebook Comments Plugin. Go to the Add New Plugins Page. Hover over Plugins in the left sidebar and click Add New.[/vc_column_text][/vc_column][/vc_row][vc_row type=”full_width_background” bg_position=”left top” bg_repeat=”no-repeat” bg_color=”#444444″ scene_position=”center” text_color=”dark” text_align=”left” top_padding=”40″ bottom_padding=”40″][vc_column width=”1/1″][vc_column_text]
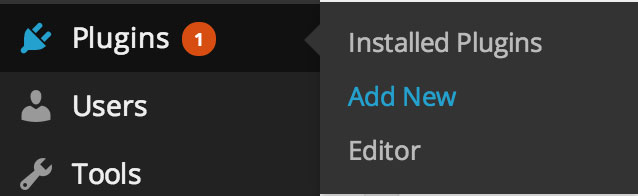 [/vc_column_text][/vc_column][/vc_row][vc_row type=”full_width_background” bg_position=”left top” bg_repeat=”no-repeat” bg_color=”#eeeeee” scene_position=”center” text_color=”dark” text_align=”left” top_padding=”60″ bottom_padding=”60″][vc_column width=”1/1″][vc_column_text]Click on the Upload Plugin button at the top of the Add Plugins page and choose the Facebook Comments zip file.[/vc_column_text][/vc_column][/vc_row][vc_row type=”full_width_background” bg_position=”left top” bg_repeat=”no-repeat” bg_color=”#444444″ scene_position=”center” text_color=”dark” text_align=”left” top_padding=”40″ bottom_padding=”40″][vc_column width=”1/1″][vc_column_text]
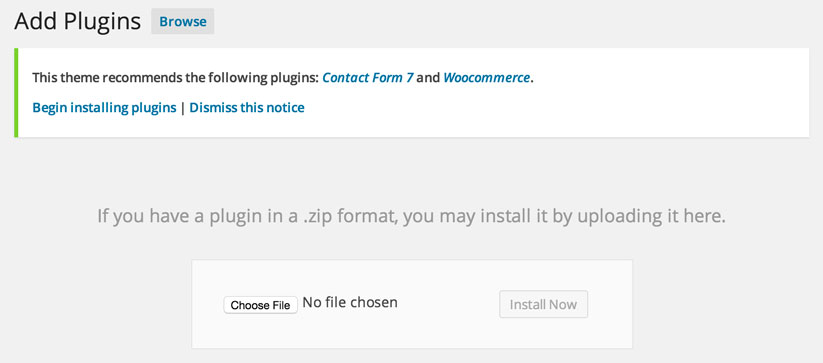
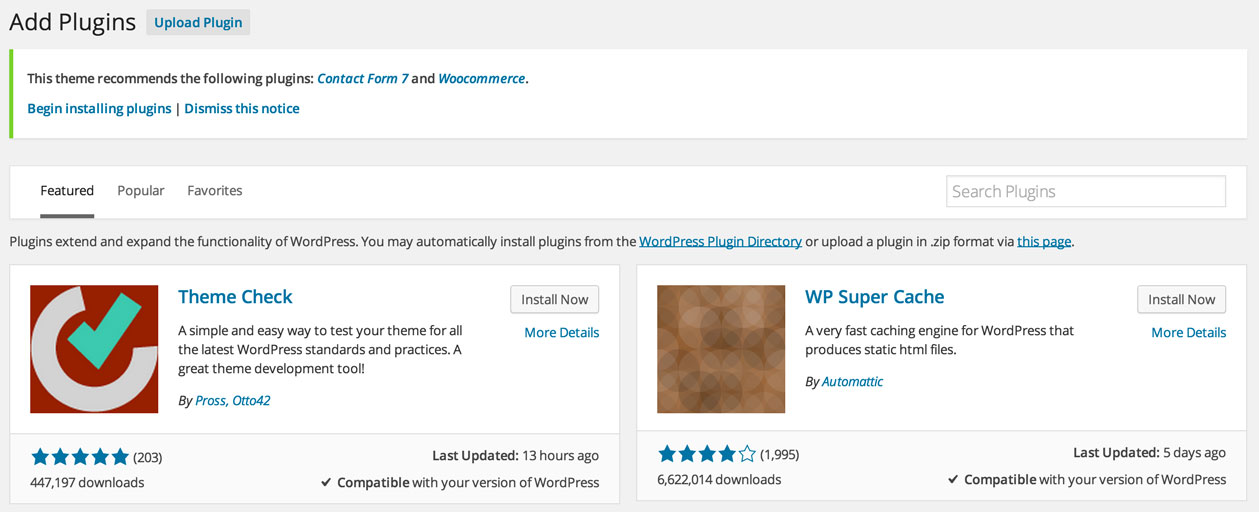
 [/vc_column_text][/vc_column][/vc_row][vc_row type=”full_width_background” bg_position=”left top” bg_repeat=”no-repeat” bg_color=”#eeeeee” scene_position=”center” text_color=”dark” text_align=”left” top_padding=”60″ bottom_padding=”60″][vc_column width=”1/1″][vc_column_text]8) Activate the Facebook Comments Plugin. Click the Activate link once the plugin has been successfully installed.[/vc_column_text][/vc_column][/vc_row][vc_row type=”full_width_background” bg_position=”left top” bg_repeat=”no-repeat” bg_color=”#444444″ scene_position=”center” text_color=”dark” text_align=”left” top_padding=”40″ bottom_padding=”40″][vc_column width=”1/1″][vc_column_text]
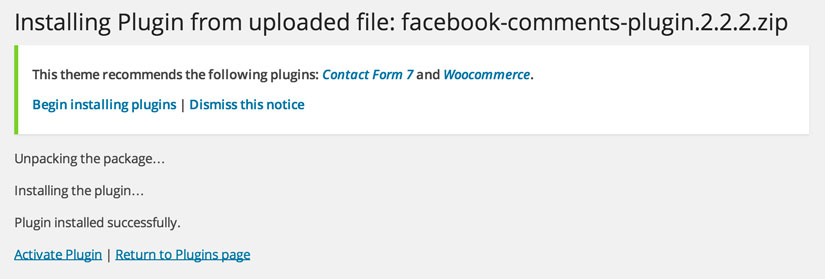 [/vc_column_text][/vc_column][/vc_row][vc_row type=”full_width_background” bg_position=”left top” bg_repeat=”no-repeat” bg_color=”#eeeeee” scene_position=”center” text_color=”dark” text_align=”left” top_padding=”60″ bottom_padding=”60″][vc_column width=”1/1″][vc_column_text]9) Upload the Contact Form 7 Plugin. Go to the Add New Plugins Page by clicking on the Add New button at the top of the Plugins page.[/vc_column_text][/vc_column][/vc_row][vc_row type=”full_width_background” bg_position=”left top” bg_repeat=”no-repeat” bg_color=”#444444″ scene_position=”center” text_color=”dark” text_align=”left” top_padding=”40″ bottom_padding=”40″][vc_column width=”1/1″][vc_column_text]
 [/vc_column_text][/vc_column][/vc_row][vc_row type=”full_width_background” bg_position=”left top” bg_repeat=”no-repeat” bg_color=”#eeeeee” scene_position=”center” text_color=”dark” text_align=”left” top_padding=”60″ bottom_padding=”60″][vc_column width=”1/1″][vc_column_text]Click on the Upload Plugin button at the top of the Add Plugins page and choose the Contact Form 7 zip file.[/vc_column_text][/vc_column][/vc_row][vc_row type=”full_width_background” bg_position=”left top” bg_repeat=”no-repeat” bg_color=”#444444″ scene_position=”center” text_color=”dark” text_align=”left” top_padding=”40″ bottom_padding=”40″][vc_column width=”1/1″][vc_column_text][/vc_column_text][/vc_column][/vc_row][vc_row type=”full_width_background” bg_position=”left top” bg_repeat=”no-repeat” bg_color=”#eeeeee” scene_position=”center” text_color=”dark” text_align=”left” top_padding=”60″ bottom_padding=”60″][vc_column width=”1/1″][vc_column_text]10) Activate the Contact Form 7 Plugin. Click the Activate link once the plugin has been successfully installed.[/vc_column_text][/vc_column][/vc_row][vc_row type=”full_width_background” bg_position=”left top” bg_repeat=”no-repeat” bg_color=”#444444″ scene_position=”center” text_color=”dark” text_align=”left” top_padding=”40″ bottom_padding=”40″][vc_column width=”1/1″][vc_column_text]
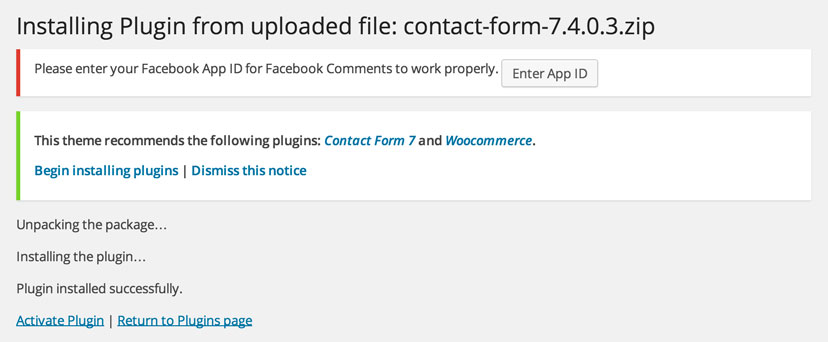 [/vc_column_text][/vc_column][/vc_row][vc_row type=”full_width_background” bg_position=”left top” bg_repeat=”no-repeat” bg_color=”#eeeeee” scene_position=”center” text_color=”dark” text_align=”left” top_padding=”60″ bottom_padding=”60″][vc_column width=”1/1″][vc_column_text]11) Upload the Yoast SEO Plugin. Go to the Add New Plugins Page. Click on the Add New button at the top of the Plugins page.[/vc_column_text][/vc_column][/vc_row][vc_row type=”full_width_background” bg_position=”left top” bg_repeat=”no-repeat” bg_color=”#444444″ scene_position=”center” text_color=”dark” text_align=”left” top_padding=”40″ bottom_padding=”40″][vc_column width=”1/1″][vc_column_text]
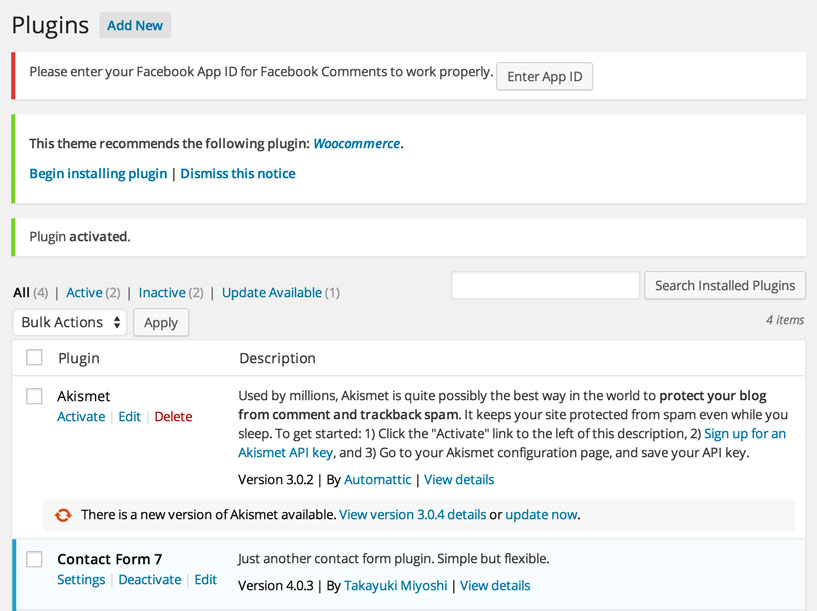 [/vc_column_text][/vc_column][/vc_row][vc_row type=”full_width_background” bg_position=”left top” bg_repeat=”no-repeat” bg_color=”#eeeeee” scene_position=”center” text_color=”dark” text_align=”left” top_padding=”60″ bottom_padding=”60″][vc_column width=”1/1″][vc_column_text]Click on the Upload Plugin button at the top of the Add Plugins page and choose the Yoast SEO zip file.[/vc_column_text][/vc_column][/vc_row][vc_row type=”full_width_background” bg_position=”left top” bg_repeat=”no-repeat” bg_color=”#444444″ scene_position=”center” text_color=”dark” text_align=”left” top_padding=”40″ bottom_padding=”40″][vc_column width=”1/1″][vc_column_text][/vc_column_text][/vc_column][/vc_row][vc_row type=”full_width_background” bg_position=”left top” bg_repeat=”no-repeat” bg_color=”#eeeeee” scene_position=”center” text_color=”dark” text_align=”left” top_padding=”60″ bottom_padding=”60″][vc_column width=”1/1″][vc_column_text]12) Activate the Yoast SEO Plugin. Click the Activate link once the plugin has been successfully installed.[/vc_column_text][/vc_column][/vc_row][vc_row type=”full_width_background” bg_position=”left top” bg_repeat=”no-repeat” bg_color=”#444444″ scene_position=”center” text_color=”dark” text_align=”left” top_padding=”40″ bottom_padding=”40″][vc_column width=”1/1″][vc_column_text]
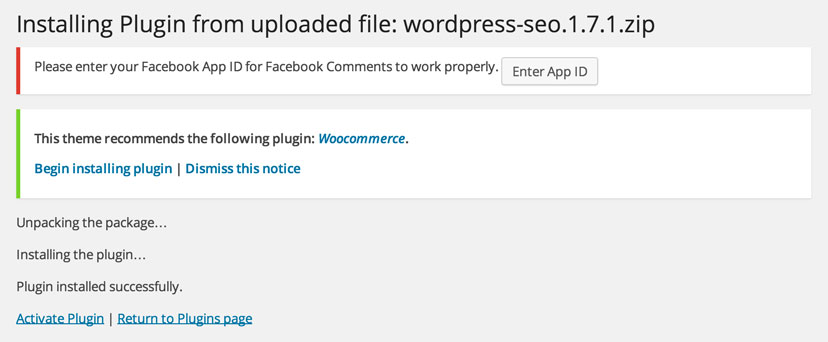 [/vc_column_text][/vc_column][/vc_row][vc_row type=”full_width_background” bg_position=”left top” bg_repeat=”no-repeat” bg_color=”#eeeeee” scene_position=”center” text_color=”dark” text_align=”left” top_padding=”60″ bottom_padding=”60″][vc_column width=”1/1″][vc_column_text]13) Upload the MailChimp for WordPress Plugin. Go to the Add New Plugins Page. Click on the Add New button at the top of the Plugins page.[/vc_column_text][/vc_column][/vc_row][vc_row type=”full_width_background” bg_position=”left top” bg_repeat=”no-repeat” bg_color=”#444444″ scene_position=”center” text_color=”dark” text_align=”left” top_padding=”40″ bottom_padding=”40″][vc_column width=”1/1″][vc_column_text][/vc_column_text][/vc_column][/vc_row][vc_row type=”full_width_background” bg_position=”left top” bg_repeat=”no-repeat” bg_color=”#eeeeee” scene_position=”center” text_color=”dark” text_align=”left” top_padding=”60″ bottom_padding=”60″][vc_column width=”1/1″][vc_column_text]Click on the Upload Plugin button at the top of the Add Plugins page and choose the MailChimp for WordPress zip file.[/vc_column_text][/vc_column][/vc_row][vc_row type=”full_width_background” bg_position=”left top” bg_repeat=”no-repeat” bg_color=”#444444″ scene_position=”center” text_color=”dark” text_align=”left” top_padding=”40″ bottom_padding=”40″][vc_column width=”1/1″][vc_column_text][/vc_column_text][/vc_column][/vc_row][vc_row type=”full_width_background” bg_position=”left top” bg_repeat=”no-repeat” bg_color=”#eeeeee” scene_position=”center” text_color=”dark” text_align=”left” top_padding=”60″ bottom_padding=”60″][vc_column width=”1/1″][vc_column_text]14) Activate the MailChimp for WordPress Plugin. Click the Activate link once the plugin has been successfully installed.[/vc_column_text][/vc_column][/vc_row][vc_row type=”full_width_background” bg_position=”left top” bg_repeat=”no-repeat” bg_color=”#444444″ scene_position=”center” text_color=”dark” text_align=”left” top_padding=”40″ bottom_padding=”40″][vc_column width=”1/1″][vc_column_text]
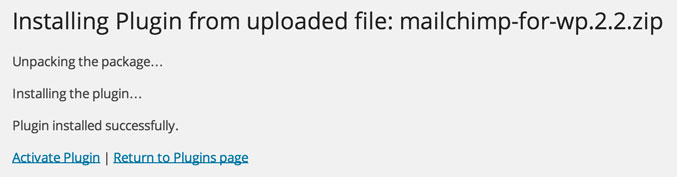 [/vc_column_text][/vc_column][/vc_row][vc_row type=”full_width_background” bg_position=”left top” bg_repeat=”no-repeat” bg_color=”#eeeeee” scene_position=”center” text_color=”dark” text_align=”left” top_padding=”60″ bottom_padding=”60″][vc_column width=”1/1″][vc_column_text]15) Upload the Disable Comments WordPress Plugin. Go to the Add New Plugins Page. Click on the Add New button at the top of the Plugins page.[/vc_column_text][/vc_column][/vc_row][vc_row type=”full_width_background” bg_position=”left top” bg_repeat=”no-repeat” bg_color=”#444444″ scene_position=”center” text_color=”dark” text_align=”left” top_padding=”40″ bottom_padding=”40″][vc_column width=”1/1″][vc_column_text][/vc_column_text][/vc_column][/vc_row][vc_row type=”full_width_background” bg_position=”left top” bg_repeat=”no-repeat” bg_color=”#eeeeee” scene_position=”center” text_color=”dark” text_align=”left” top_padding=”60″ bottom_padding=”60″][vc_column width=”1/1″][vc_column_text]Click on the Upload Plugin button at the top of the Add Plugins page and choose the Disable Comments WordPress zip file.[/vc_column_text][/vc_column][/vc_row][vc_row type=”full_width_background” bg_position=”left top” bg_repeat=”no-repeat” bg_color=”#444444″ scene_position=”center” text_color=”dark” text_align=”left” top_padding=”40″ bottom_padding=”40″][vc_column width=”1/1″][vc_column_text][/vc_column_text][/vc_column][/vc_row][vc_row type=”full_width_background” bg_position=”left top” bg_repeat=”no-repeat” bg_color=”#eeeeee” scene_position=”center” text_color=”dark” text_align=”left” top_padding=”60″ bottom_padding=”60″][vc_column width=”1/1″][vc_column_text]14) Activate the Disable Comments WordPress Plugin. Click the Activate link once the plugin has been successfully installed.[/vc_column_text][/vc_column][/vc_row][vc_row type=”full_width_background” bg_position=”left top” bg_repeat=”no-repeat” bg_color=”#444444″ scene_position=”center” text_color=”dark” text_align=”left” top_padding=”40″ bottom_padding=”40″][vc_column width=”1/1″][vc_column_text]
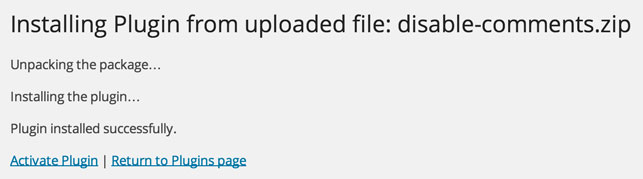 [/vc_column_text][/vc_column][/vc_row][vc_row type=”full_width_background” bg_position=”left top” bg_repeat=”no-repeat” bg_color=”#eeeeee” scene_position=”center” text_color=”dark” text_align=”left” top_padding=”60″ bottom_padding=”60″][vc_column width=”1/1″][vc_column_text]15) Update the Facebook Comments Settings
16) Update Yoast SEO Settings
17) Update MailChimp plugin Settings
18) Update Disable Comments plugin Settings
Step 6 is waiting for you and is next in line! You will be adding the first pages to your WordPress blog.
Mission Control Note:
Feel free to use any hosting company that you prefer, but when you do purchase a hosting service, please do so after clicking on a link on our site to that particular service (either on this page or on our Ultimate Guide to WordPress Hosting Companies page). My brother Lee and I love what we do and we have spent countless hours creating WordPress sites and creating badass free resources and launch guides for building WordPress sites. We want to be totally transparent with you about how we are able to spend the time creating these free launch guides. We are able to provide these materials at no cost to you because we make money by referring our users to services that we use and that we believe in. We would never suggest a service that we have had bad experiences with in the past and are always looking to improve on what we recommend in order to give you the best possible experience. You keep the lights on for us and we are really grateful to you for that :)[/vc_column_text][/vc_column][/vc_row][vc_row type=”full_width_background” bg_position=”left top” bg_repeat=”no-repeat” bg_color=”#eeeeee” scene_position=”center” text_color=”dark” text_align=”left” bottom_padding=”60″][vc_column width=”1/1″][vc_column_text el_class=”course-page”]
Comments
[/vc_column_text][divider line_type=”No Line” custom_height=”40″][vc_column_text]
[/vc_column_text][/vc_column][/vc_row]