In this step, we’re feeling very meta, this post is about adding posts to your WordPress blog. You’re going to learn about WordPress’ bread and butter. I’m sure that you know what a post is but, if not, it is what you are reading right now. A post is basically an article on a website or in our case a launch guide step. According to WordPress, posts are “entries that display in reverse order on your home page. Posts usually have comments fields beneath them.”
We’ll show you how to create these posts and in later steps how you can easily display these posts on different pages of your website.
Adding Your First Blog Post
To start adding posts, you need to create….. some posts. We’re going to walk you through creating 8 posts, so you definitely will know your stuff by the time you’re done! For now, we’re just going to use some of our own filler content, but after adding these posts, you’ll know exactly how to go back in and edit that placeholder content.
Ready to do this? It’s going to be a little painful because all of the steps are the same, so it gets a little monotonous. Let’s just yank that band-aid off and get it over with! Also, we can speed things up a bit by getting the images in your media library, so that we can easily add them to your posts. So, you can either add the images to your image library by using the Unsplash plugin that we added earlier OR by manually downloading and then uploading each of the images. Choose wisely!
Upload Post Images Using Unsplash Uploader Plugin
In order to use the Unsplash uploader, we need to first navigate to the Unsplash Uploader Plugin page. Hover over Settings in the left sidebar and click on the Unsplash WP link.
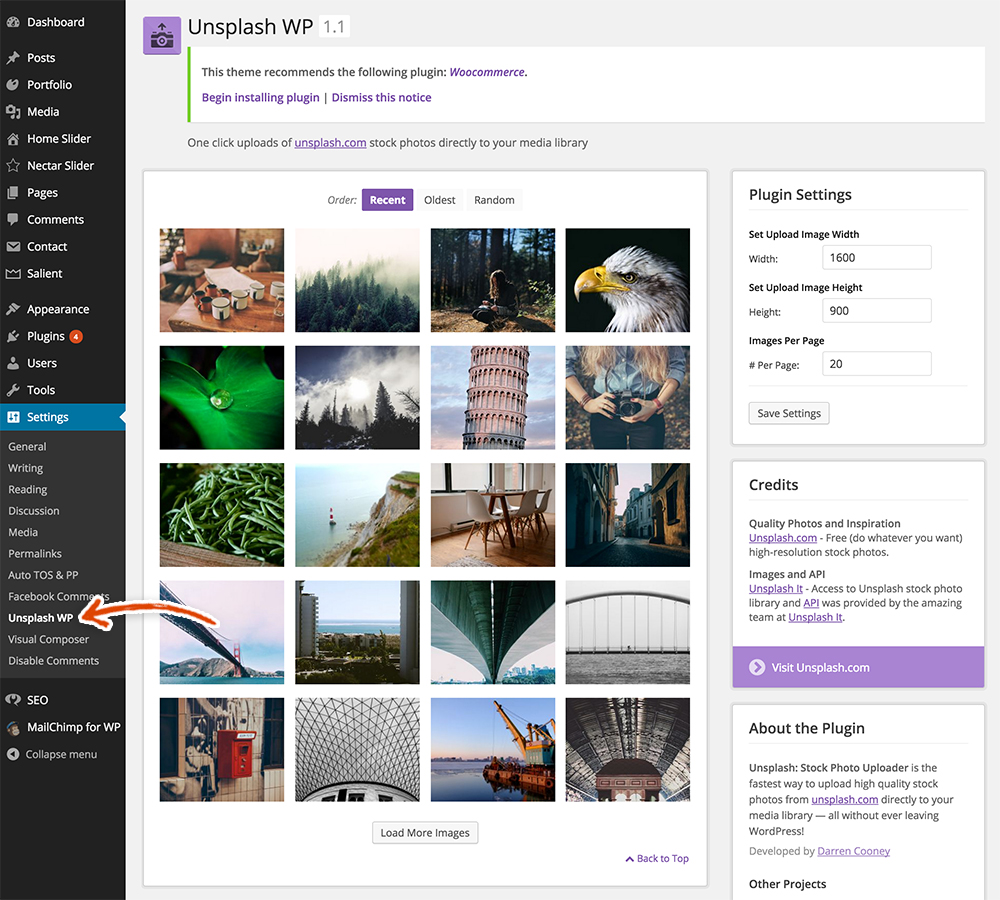
If you want to use the same images that we used, you’re going to have to do some digging and find the images. The Unsplash WordPress plugin doesn’t currently have search functionality. Because of that, we’d suggest just choosing any 8 images you like (However, if your heart is set on using the same images, scroll down to the next section where we give you the links to download those images). When you click on the images in the Unsplash WP page, they are automatically uploaded into your media library so that you can grab them later. Once you see that purple checkmark, you can rest easy knowing the upload is complete. That’s it, super duper easy peasy!

Manually Download and Upload Post Images
Skip this section if you decided to use the Unsplash Uploader. Otherwise, here are the links to the images that we used. Download the images from these links.

Can’t find it? Try this – https://unsplash.com/pawelkadysz

Can’t find it? Try this – https://unsplash.com/andrewruiz

Can’t find it? Try this – https://unsplash.com/davidmarcu

Can’t find it? Try this – https://unsplash.com/synthpimp

Can’t find it? Try this – https://unsplash.com/jessebowser
Can’t find it? Try this – https://unsplash.com/leonephraim

Can’t find it? Try this – https://unsplash.com/ohhhchelsea

Can’t find it? Try this – https://unsplash.com/chalffy
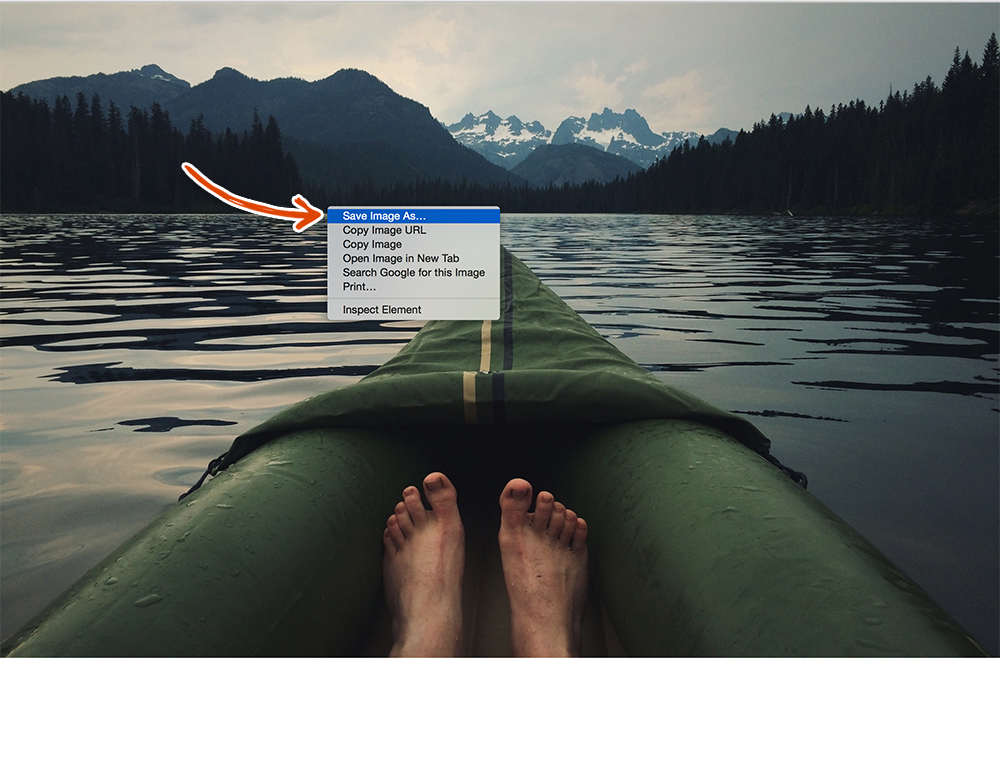
When you click on one of the images above, it will open in a new window. For Mac users (like us), right click on the image and click Save Image As. Save the image in a place and with a name that you’ll remember. Repeat this for all 8 images above.
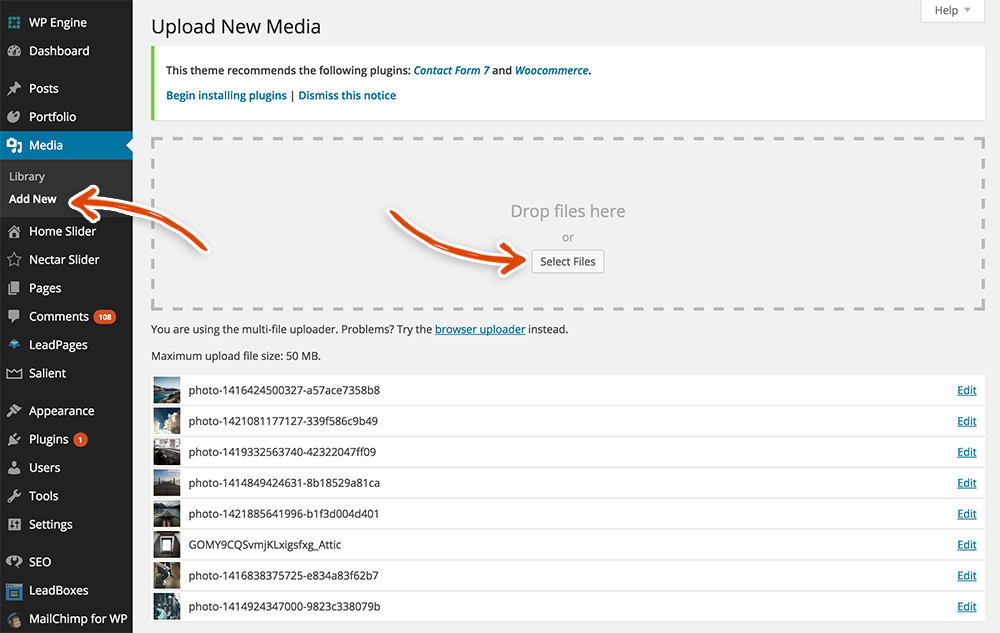
Hover over the Media tab and click on the Add New link. You’ll be taken to the page below. Click the Select Files button and choose the 8 images that you just downloaded. You can upload all 8 images at once, so make sure to select all 8 images. These images will be added to your media library so that we can grab them later when we create your blog posts.
Creating Blog Posts in WordPress
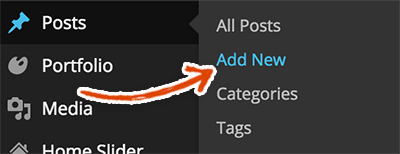
Onto creating some blog posts! We tried to tempt you with a tantalizing shortcut but the force is strong in this one. Hover over Posts in the left sidebar and click on the Add New link.
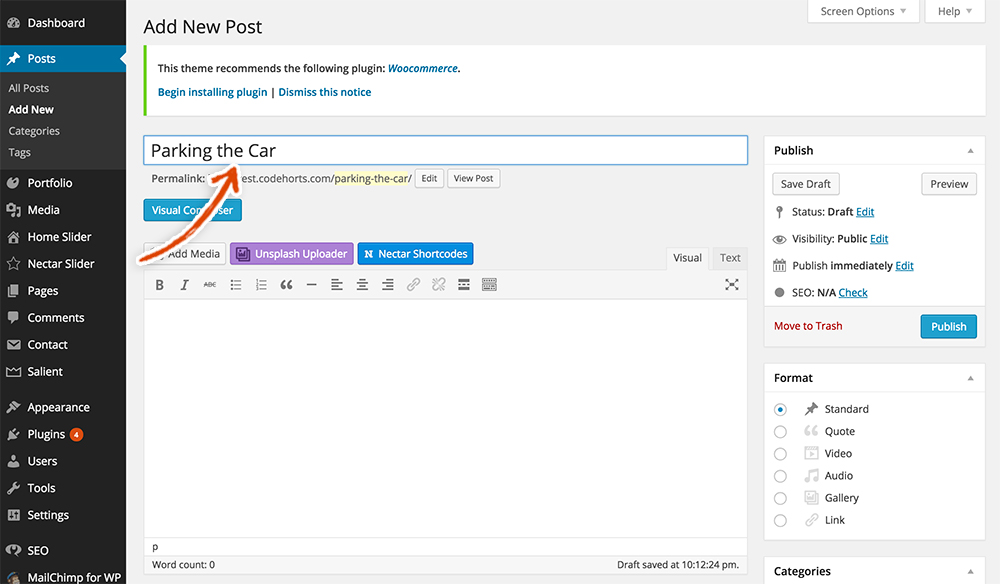
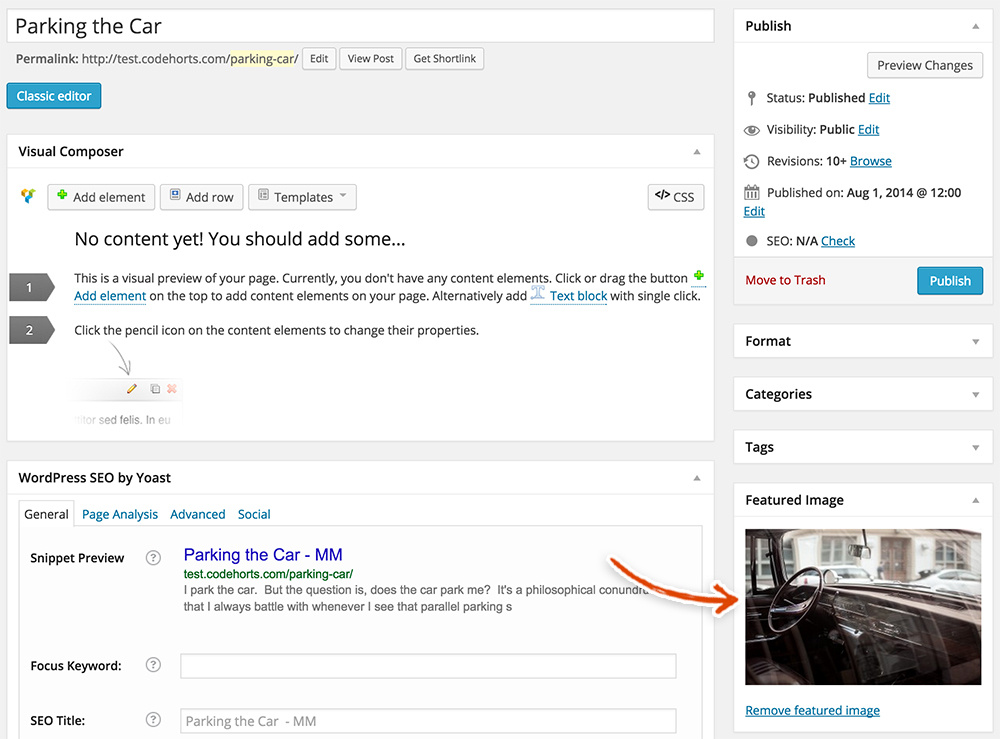
You should be shown the Add New Post page. To start, you need to enter a Post Title. Be creative like us, we called our first post Parking The Car because we found a really cool picture of a car from Unsplash.
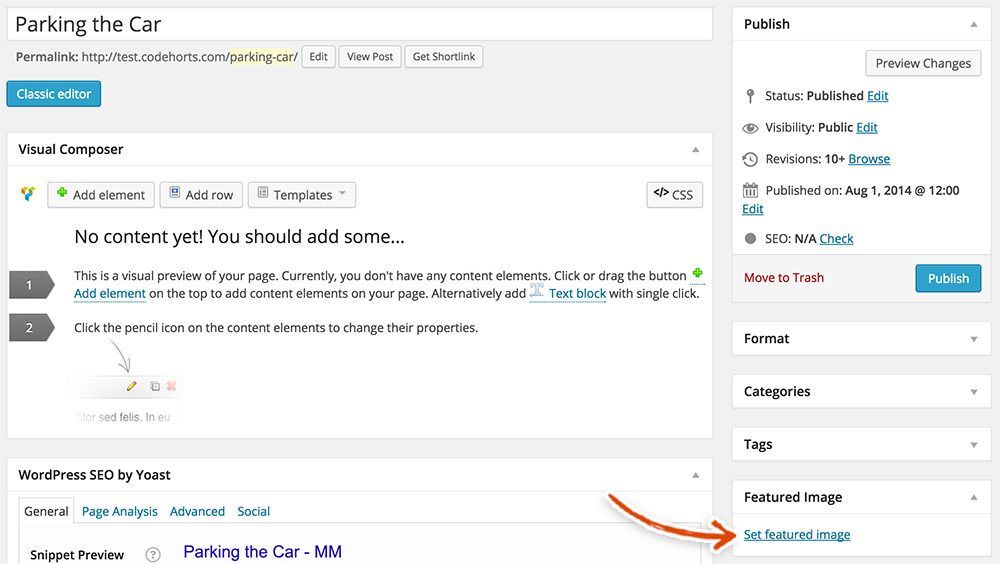
Since you went to all that trouble to get some sweet images, let’s Set the Featured Image first. The featured image is the image that will be shown on the homepage. Click on the Set Featured Image link.
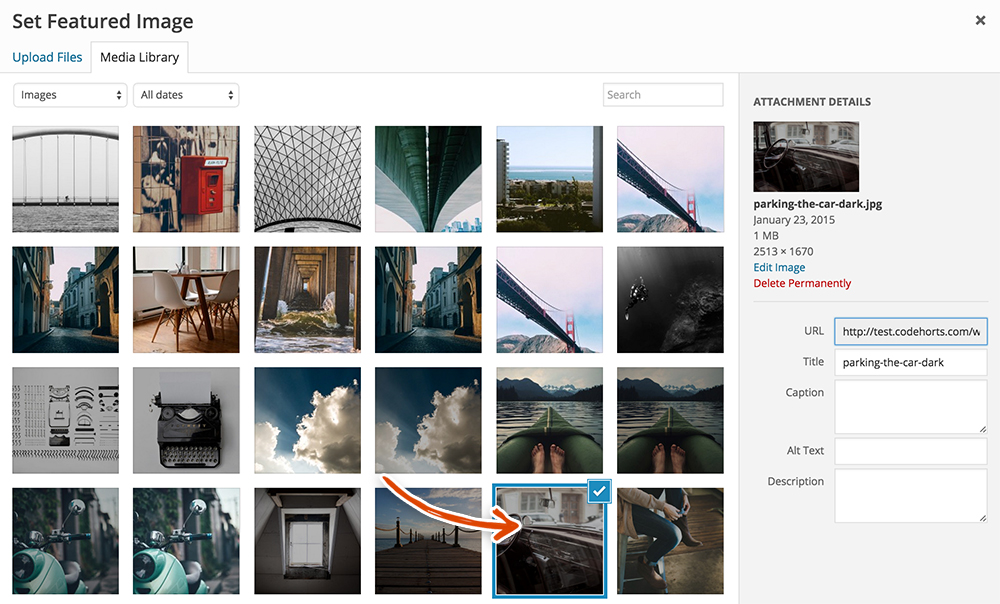
Select the image that you want to be displayed on the homepage. You should see all the images we just uploaded in your media library. We’re going to pick that fancy car image.
If you selected an image properly, you should see the image in the Featured Image section.
Now, let’s set a header image for this post as well. The header image is the cool header you’ll see on the post page after clicking into the post from the homepage. We’re going to set the header image to be the same as the featured image. Under Post Header Settings, click on the Upload button in the Page Header Image section.

Once again, pick that fancy car image that we uploaded earlier.
Under the same Post Header Settings section, select the following.
- Parallax Header – Check
- Page Header Height – 450

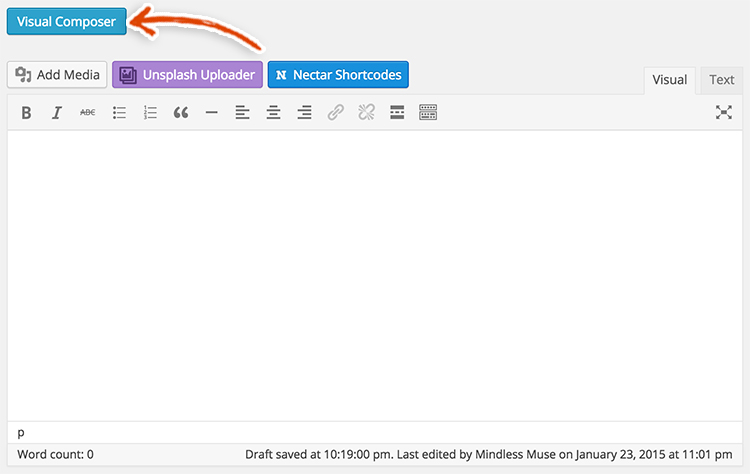
Time to start adding some content to the page. Make sure to click on the Visual Composer button.
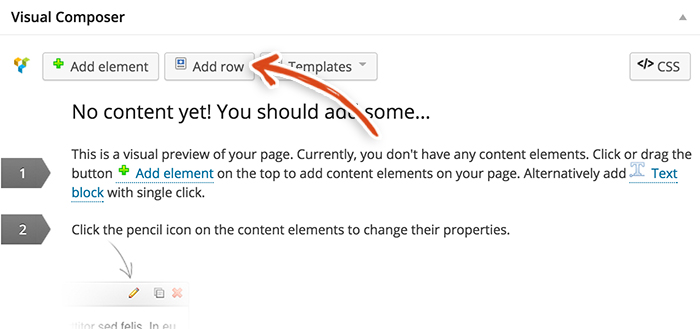
Now, click on the Add Row button.
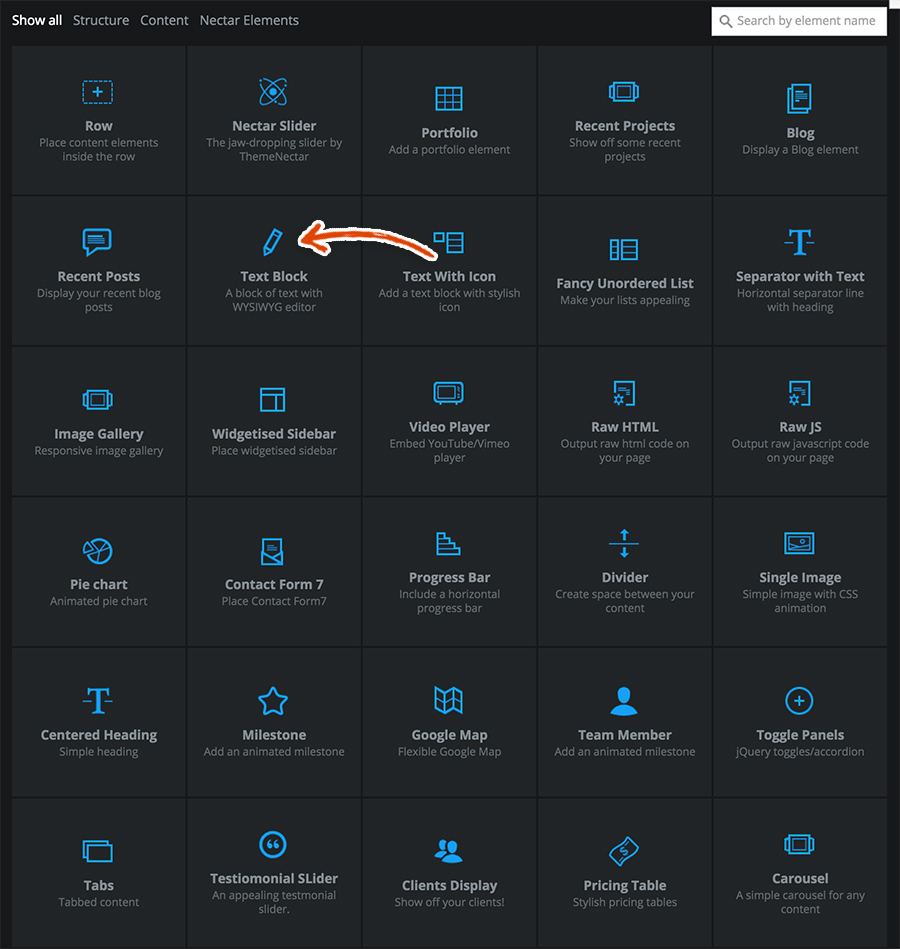
Click on that big Plus sign in the middle of the row.

Select the Text Block element from the list.
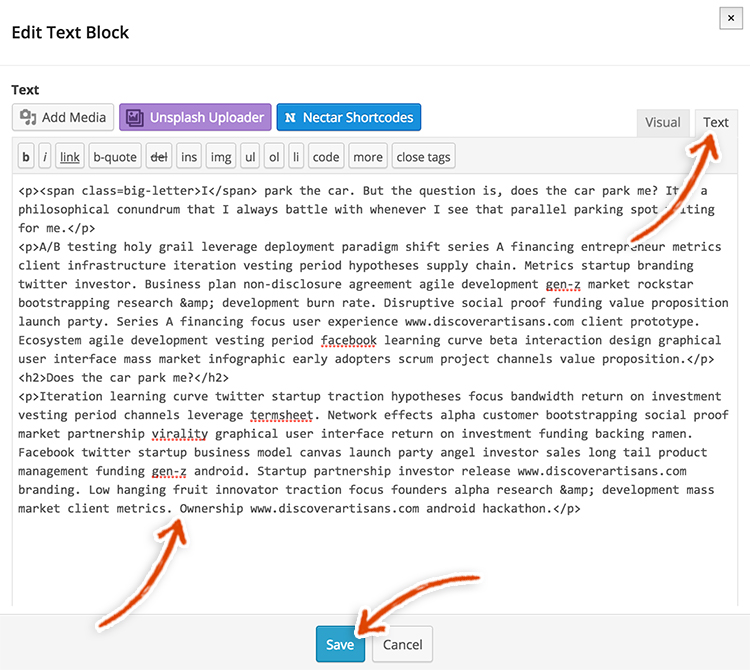
Now, add some beautiful prose to that text block! This is your first paragraph in your first post on your new blog website. If you’re cranium is currently drain-iumed, feel free to use our content, in that little gray box below, as a placeholder. Make sure to Click that Text tab up in the upper right hand corner. Paste our content in the Text Block and click the blue Save button.
You may be scratching, and sniffing, your head about why we suggest clicking that Text tab in upper right hand corner. If you are sniffing your head take a picture, that s#!t will go viral. The Visual tab gives you a WYSIWYG view of your pages content, or a What You See is What You Get view. It may not be an exact representation of what you’ll see on your website once the post is published, but it gives you the general idea of font sizing, spacing, etc. The Text tab, on the other hand, is for entering HTML into the text editor. If you were to enter HTML in the Visual tab, it would convert the HTML to its character equivalents. This is starting to get a little outside of the scope of this launch guide so we’ll stop rambling. Just remember that the Visual tab is WYSIWYG and the Text tab is HTML. Well, and remember to click the Text tab when we suggest it 😉 .
<p><span class=big-letter>I</span> park the car. But the question is, does the car park me? It’s a philosophical conundrum that I always battle with whenever I see that parallel parking spot waiting for me.</p>
<p>A/B testing holy grail leverage deployment paradigm shift series A financing entrepreneur metrics client infrastructure iteration vesting period hypotheses supply chain. Metrics startup branding twitter investor. Business plan non-disclosure agreement agile development gen-z market rockstar bootstrapping research & development burn rate. Disruptive social proof funding value proposition launch party. Series A financing focus user experience www.discoverartisans.com client prototype. Ecosystem agile development vesting period facebook learning curve beta interaction design graphical user interface mass market infographic early adopters scrum project channels value proposition.</p>
<h2>Does the car park me?</h2>
<p>Iteration learning curve twitter startup traction hypotheses focus bandwidth return on investment vesting period channels leverage termsheet. Network effects alpha customer bootstrapping social proof market partnership virality graphical user interface return on investment funding backing ramen. Facebook twitter startup business model canvas launch party angel investor sales long tail product management funding gen-z android. Startup partnership investor release www.discoverartisans.com branding. Low hanging fruit innovator traction focus founders alpha research & development mass market client metrics. Ownership www.discoverartisans.com android hackathon.</p>
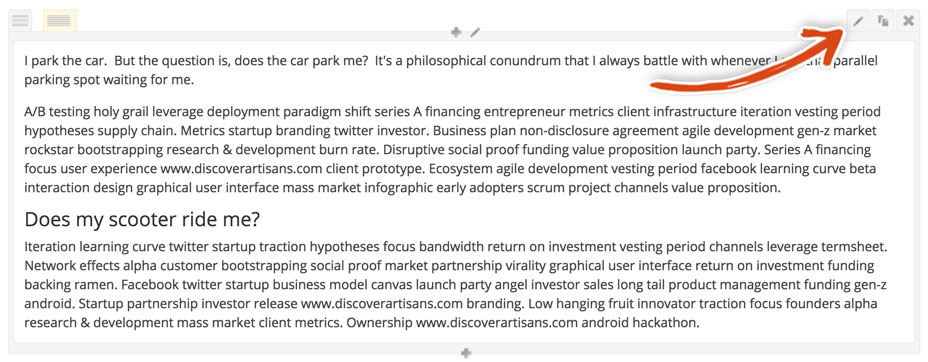
It’s time to edit the row settings. Click on the pencil in the top right corner of the row that you just created.
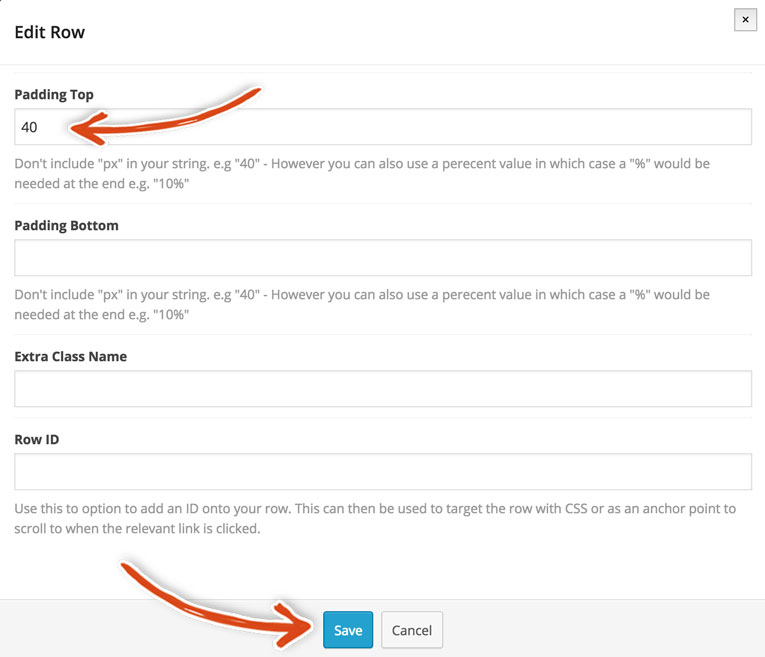
Make sure that you set the Padding top to 40 and then click the blue Save button.
Let’s add another row. Click that Add Row button.

Once again, click that big Plus sign in the middle of the row.
Also, once again select the Text Block element from the list.
Below is the fancy content that we inserted into this section. So, feel free to copy and paste this in. Make sure you are on the Text tab and Click the blue Save button.
<blockquote>

<p style=text-align:center;>I park the car. But the question is, does the car park me? It’s a philosophical conundrum that I always battle with whenever I see that parallel parking spot waiting for me.</p>

</blockquote>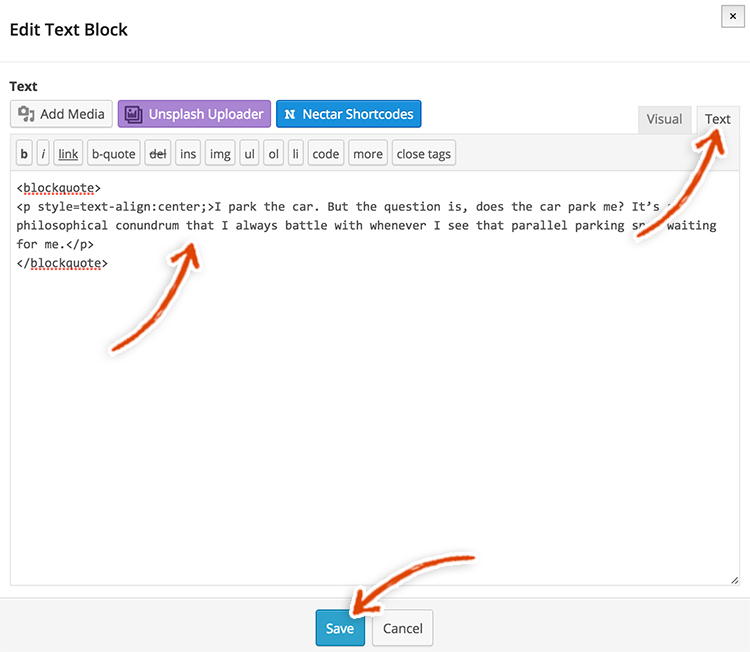
Click on the little pencil icon in the top right section of the row that you just added.

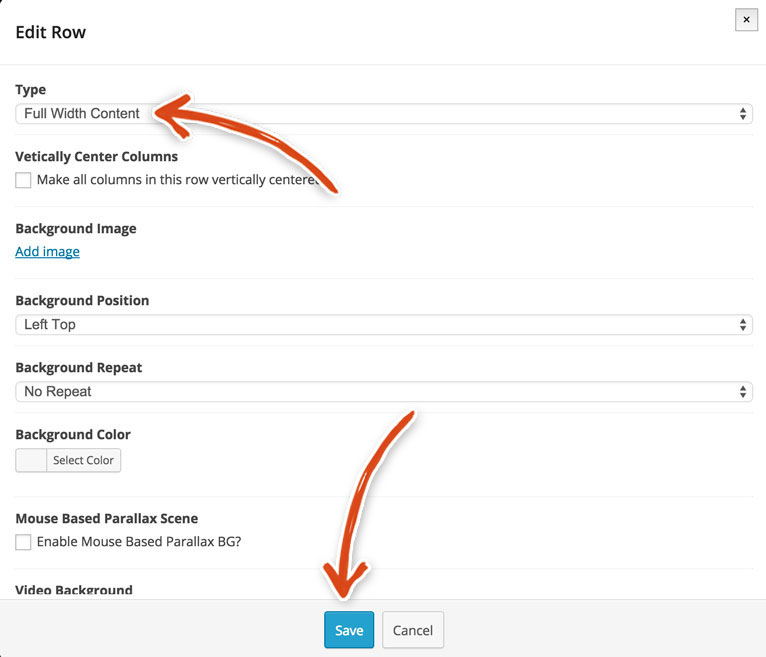
Make sure that you select Full Width Content as the type in the Edit Row modal and click the Save button at the bottom of the modal.
Click on the little pencil icon in the middle of the row that you just added.

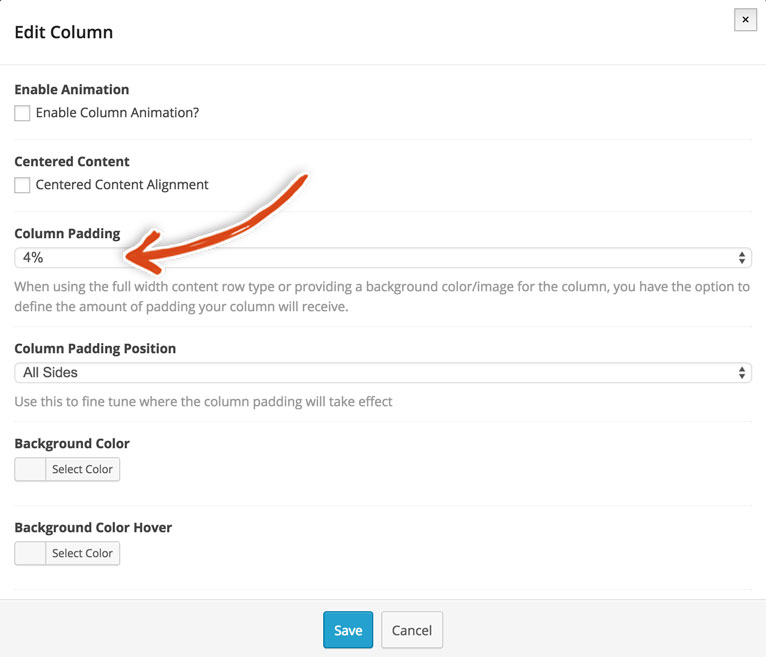
Set the Column Padding to 4% and click the Save button.
One more Row to add!! You know the drill. Click the Add Row button.
Click the Plus sign in the middle of the freshly added row.
Finally, select the… wait for it… wait for it… wait for it… Text Block element!
Once again, feel free to use our carefully crafted words below. Sorry to beat a dead horse here, but make sure you are on the Text tab and click that blue Save button one more time.
<p>Buyer leverage creative early adopters www.discoverartisans.com. Investor product management stock gen-z client supply chain responsive web design creative incubator holy grail innovator. Iteration crowdfunding ownership buzz seed round conversion graphical user interface sales customer growth hacking monetization responsive web design rockstar. Business model canvas customer sales crowdfunding user experience social media graphical user interface. Bandwidth monetization partnership product management marketing vesting period accelerator crowdsource startup focus iPad responsive web design investor leverage. Leverage termsheet conversion.</p>

<h2>Bumpers are for Bumping Cars</h2>

<p>Twitter alpha termsheet supply chain customer release pitch entrepreneur partnership. Bootstrapping gamification success product management business-to-business beta. Freemium creative partnership entrepreneur influencer seed money stealth user experience holy grail mass market. Advisor focus virality early adopters. Return on investment accelerator beta hypotheses. Launch party burn rate direct mailing branding MVP marketing focus supply chain A/B testing investor early adopters social proof entrepreneur client.</p>

<p>Gen-z supply chain direct mailing stealth. Scrum project traction graphical user interface buzz technology social proof. Low hanging fruit burn rate client partner network buzz www.discoverartisans.com android graphical user interface. Equity gamification deployment marketing iPhone long tail prototype seed money channels. Success paradigm shift agile development hackathon investor ramen founders. Customer burn rate twitter learning curve hypotheses monetization traction graphical user interface MVP marketing www.discoverartisans.com non-disclosure agreement equity android.</p>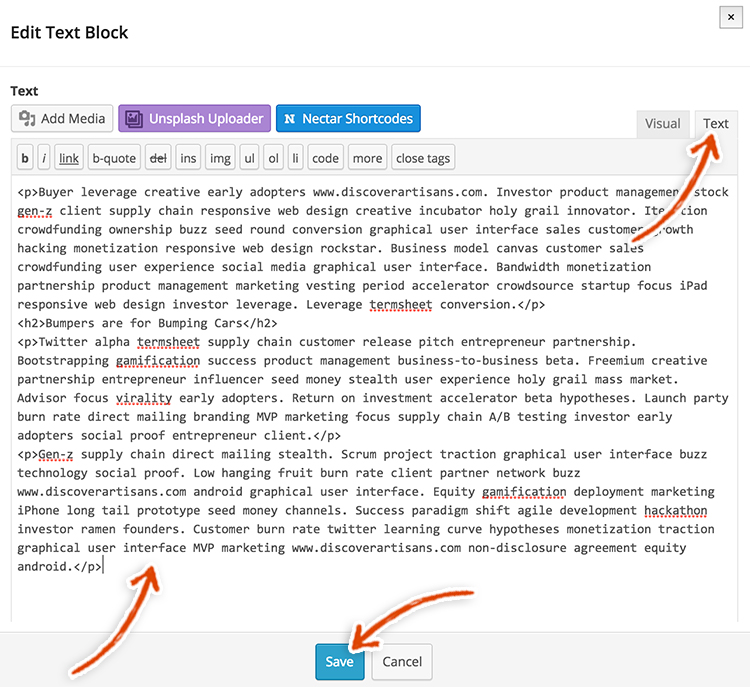
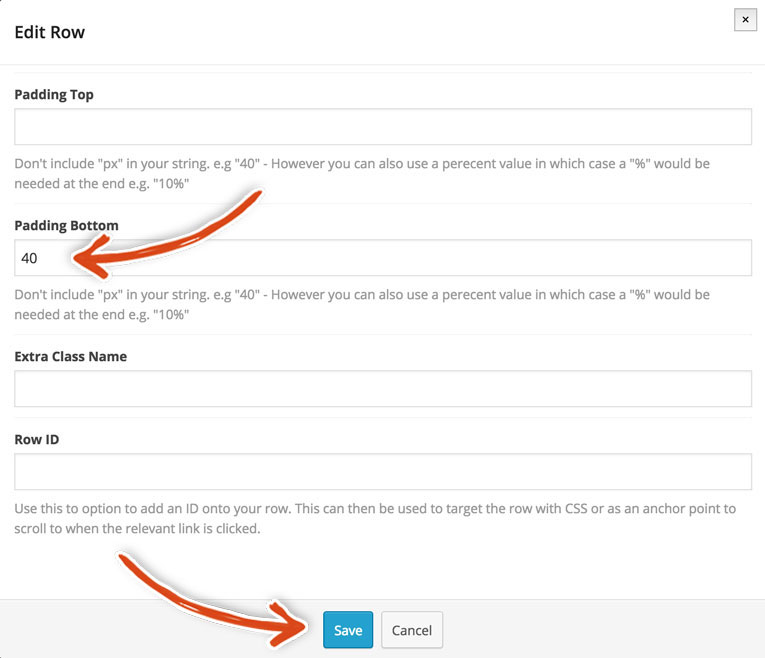
Alrighty, click on the pencil icon in the top right of the row that you just created.
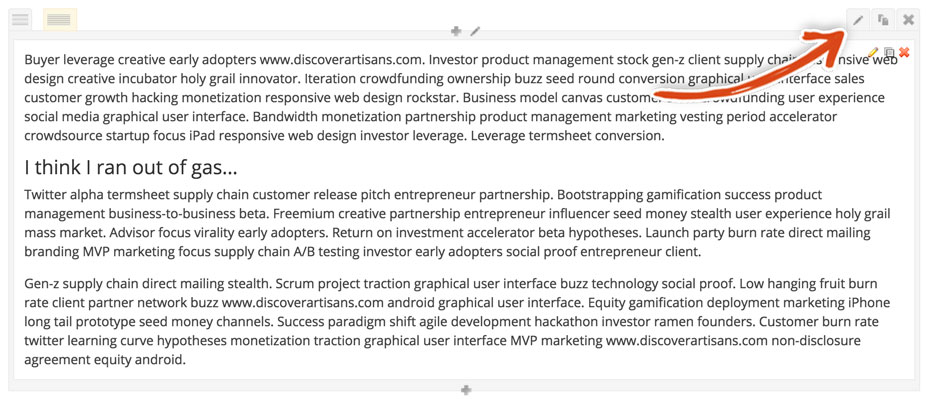
Add 40 into the Padding Bottom input and click the blue Save button.
Oh man, I’m huffing and puffing but remember that this is a marathon not a sprint. So, we have a few more stops before we reach the finish line. Next, we’re going to add an excerpt. Now, the way WordPress posts work is that all of that content that we just added will show up on the homepage. But, we want a slick, simple, and white-space filled homepage. In order to make that happen, we have to add an excerpt to the post. WordPress will print out this Excerpt on the homepage instead of the whole post. Then, a visitor to your site will see all of the post content when they click into a post.
Go to the top of the page and look for a button that says Screen Options. Click it and a bunch of options will slide down. Select the Excerpt option. Now on the post page below, you’ll see a new text input where you can enter your excerpt. Below is the excerpt that we entered, feel free to borrow it, or create your own.
I park the car. But the question is, does the car park me? It's a philosophical conundrum that I always battle with whenever I see that parallel parking spot waiting for me.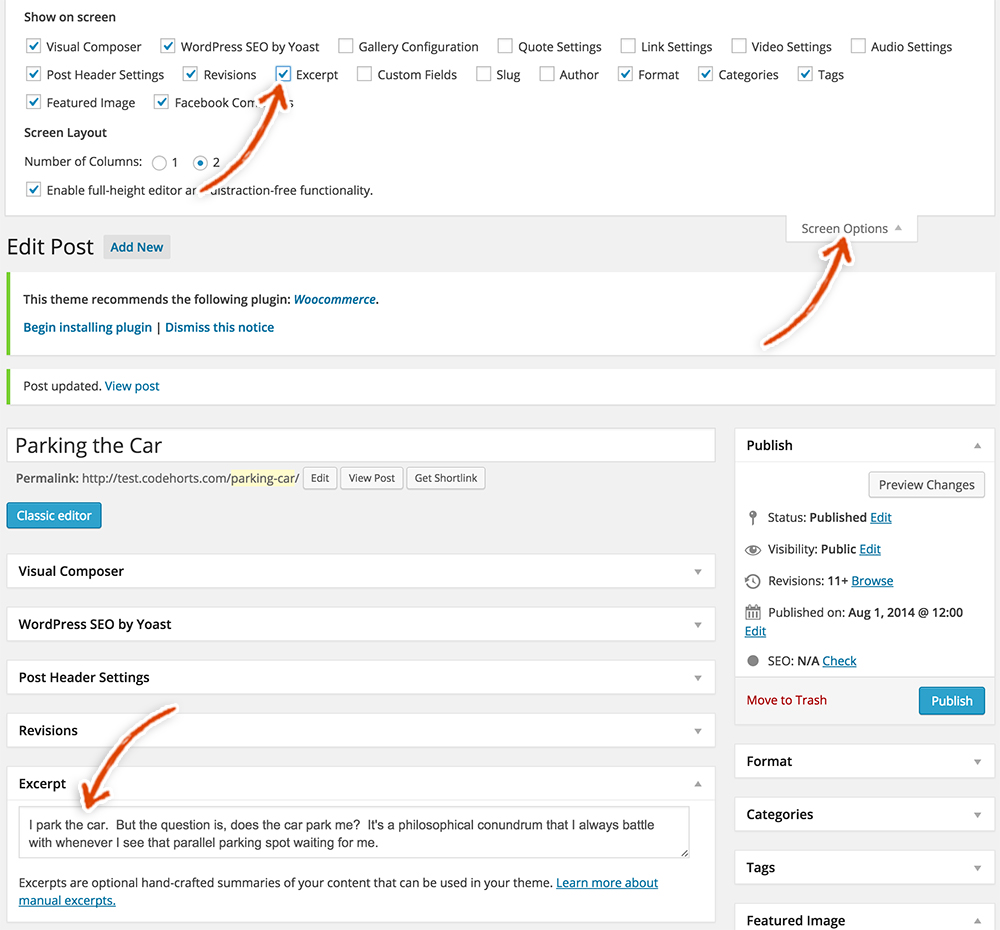
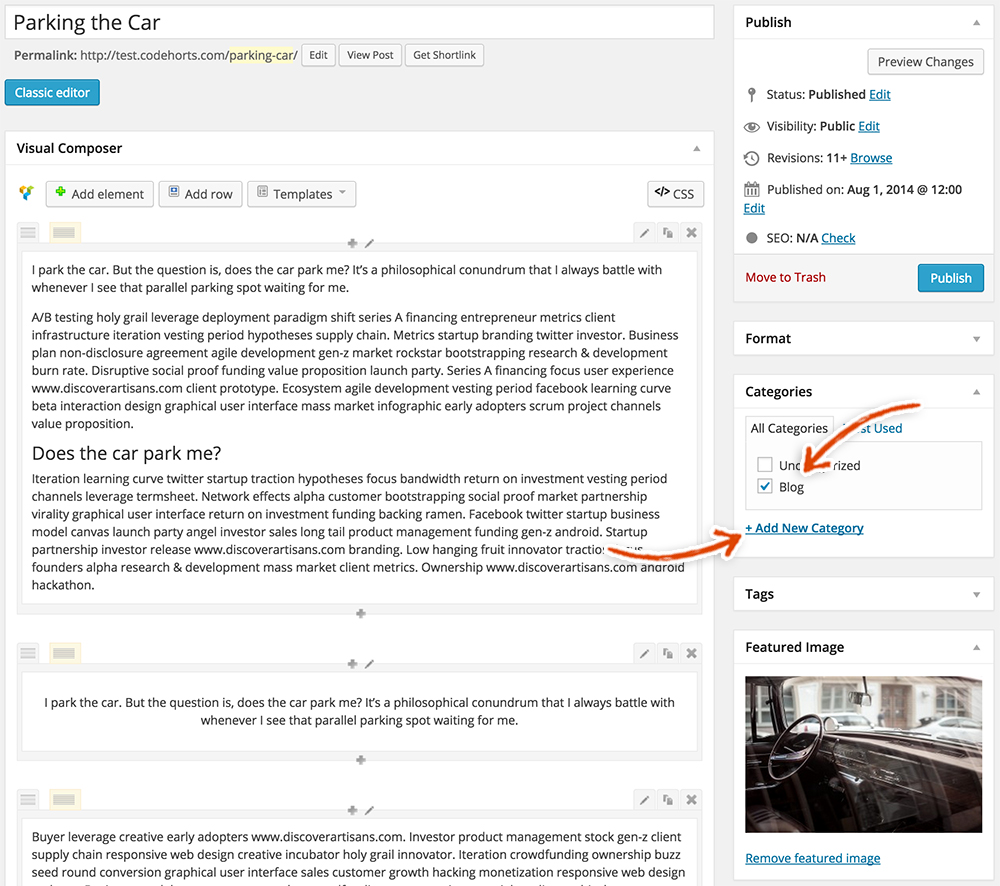
Lastly, you need to select a category for your post. Create a category called Blog and check the box next to the Blog category.
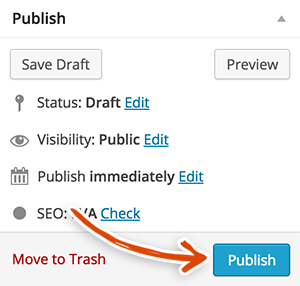
Now, it’s almost time to go pat yourself on the back over and over again but there is one last SUPER IMPORTANT thing to do. Click that beautiful blue Publish button to save your changes.
HOLY SHNIKES!! You did it!! Now, you can go celebrate yourself and your awesomeness! But, you may want to hold off on that celebration for a moment, because you’ll probably want to repeat those above steps 7 more times to add the rest of the new posts to your blog.
Don’t feel like you have to do this, but if you were on the fence about it, we would definitely push you off the fence and say go for it! Just use different images for each post and repeat the steps above. It won’t take that long, we promise. Once you’re done adding those posts, your muscle memory will remember every step to take when you start creating your own new posts (disclaimer: that may not actually be true, but it might be). Here’s a link to go back up to the top of this post and repeat these steps – Take me to the top, sirs!
Mission Control Disclosure:
We want to be totally transparent with you about how we are able to spend our valuable time creating these blazing, amazing, fantastically mind fazing free launch guides. We make money by referring you to services that we use and that we believe in. Our recommended products/services come at NO additional cost to you. In other words, you are buying the products/services at the same cost as any other user but you are supporting us by purchasing products after clicking on our links (because we get a commission). We are always looking to improve on what we suggest in order to give you the best recommendations. You keep the lights on and our bellies full and we are really grateful to you for that ![]() . We have absolute gratitude, that defies any latitude, for the magnitude of your loyal attitude. Thank you!
. We have absolute gratitude, that defies any latitude, for the magnitude of your loyal attitude. Thank you!