Isn’t a header a move in soccer where you headbutt the soccer ball? Why would I want to add a soccer headbutt to my website? What the heck is a footer? Is it when you footbutt a soccer ball? Wow, I’ve never even heard of the word footbutt but it’s pretty darn funny sounding isn’t it? These were the questions we asked ourselves when we were first starting to code and boy oh boy were we way off!
What is a Header?
The header is basically a container located at the top of every page of your website. In the header, you’ll find the menu for navigating the site, a logo, and any other critical information that helps users of your site find what they’re looking for. The header for the blog website we’re building contains the logo as well as links to the Home page, Gallery page, About page, and Contact page. Additionally, we’ve included a search button so users can easily search your blog.
What is a Footer?
The footer is somewhat similar to the header except that it’s a container located at the bottom of every page. The footer will also contain a number of navigational links for helping a user get around your website. You’ll also find additional lower priority links in the footer. We want the header to be as simple and easy to use as possible, so we only want links to the highest priority pages in the header.
For example, in the footer of the blog we’re building, we have links to our Contact page, as well as our Facebook, Twitter, Youtube, and LinkedIn accounts. We definitely still want people to visit these pages but they are lower priority, supplemental tools for sharing information with people that use our website.
Add a Header and Menu in WordPress
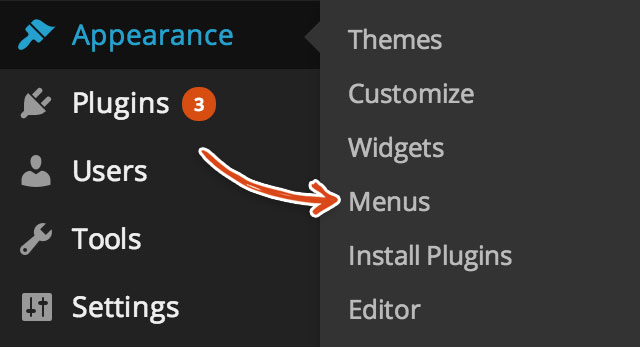
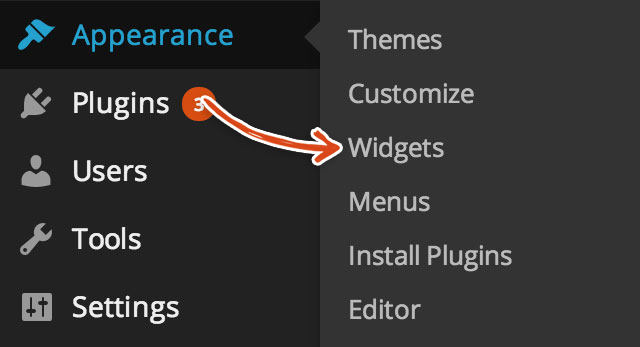
Hover over Appearance in the left sidebar and click on the Menus link.
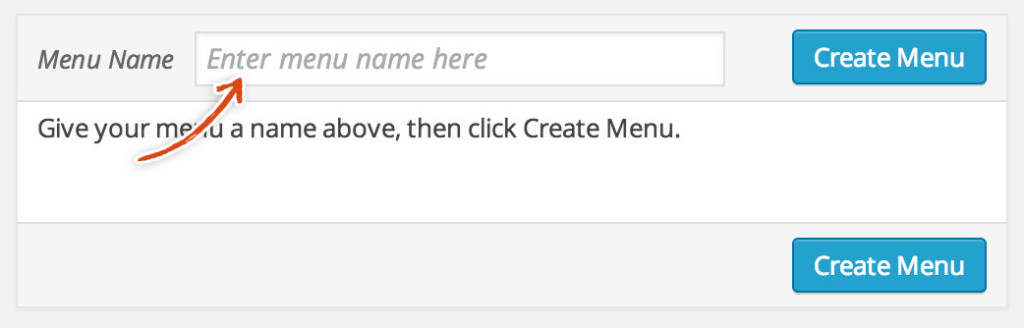
You should see the following form on Menus page. In the Enter menu name here field, type in Home. Then, click the Create Menu button. This will create a new Menu for your website called Home.
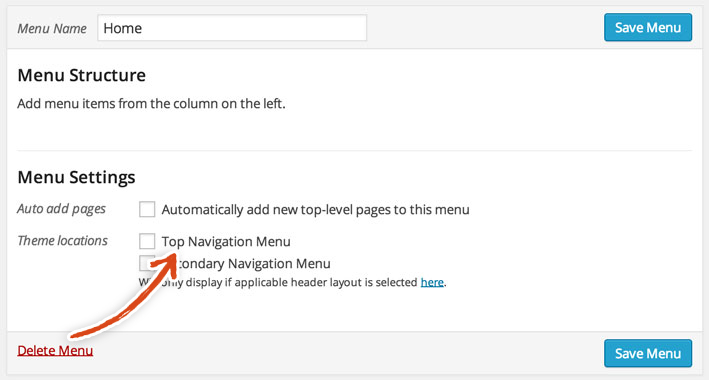
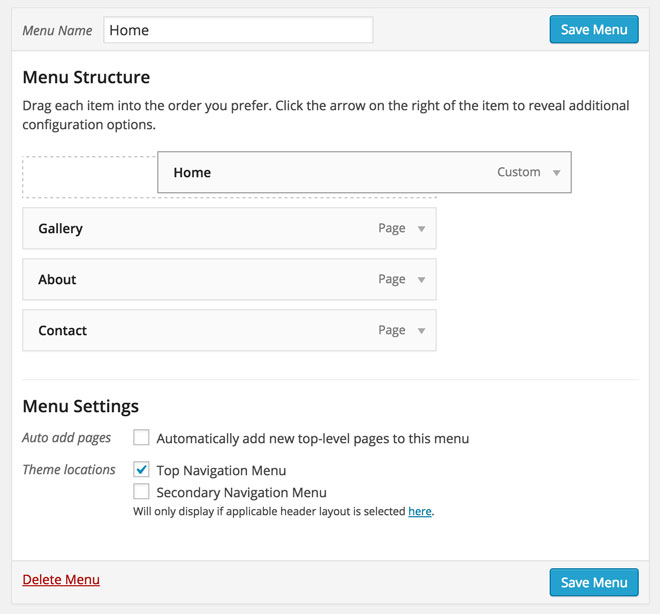
After the Home Menu has been created, you will see the following. Check the box next to Top Navigation Menu (so that this menu will be visible at the top of all of your pages site wide). Click the Save Menu button after checking that box.
While the Home menu settings are still open, go to the Pages box on the left side of the page. Check the boxes next to Gallery, Contact, Home, and About pages and then click Add To Menu.

You should see the WordPress Menu Structure section at the right populate with rectangles corresponding to each of those pages.
Click the Save Menu button. You should see the message below if the menu saved successfully.

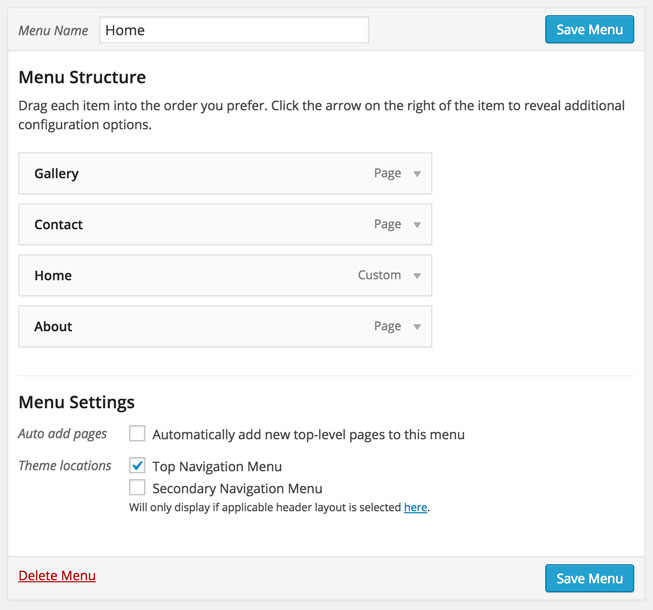
Let’s reorder the pages in the menu. You want to do this so that the menu items are in a more logical order. You can put the menu items in whatever order you prefer. To move a menu item, click on an item and simultaneously drag the item to its desired position. As you can see from the image below, we changed the position so from left to right it is Home, Gallery, About and Contact.
Click the Save Menu button and you’re done with the header! You can check out your work by going to yourdomain.com.
Add a Footer in WordPress
Now, let’s move on to adding a footer to your new blog website. Hover over the Appearance tab in the left sidebar and click on the Widgets link.
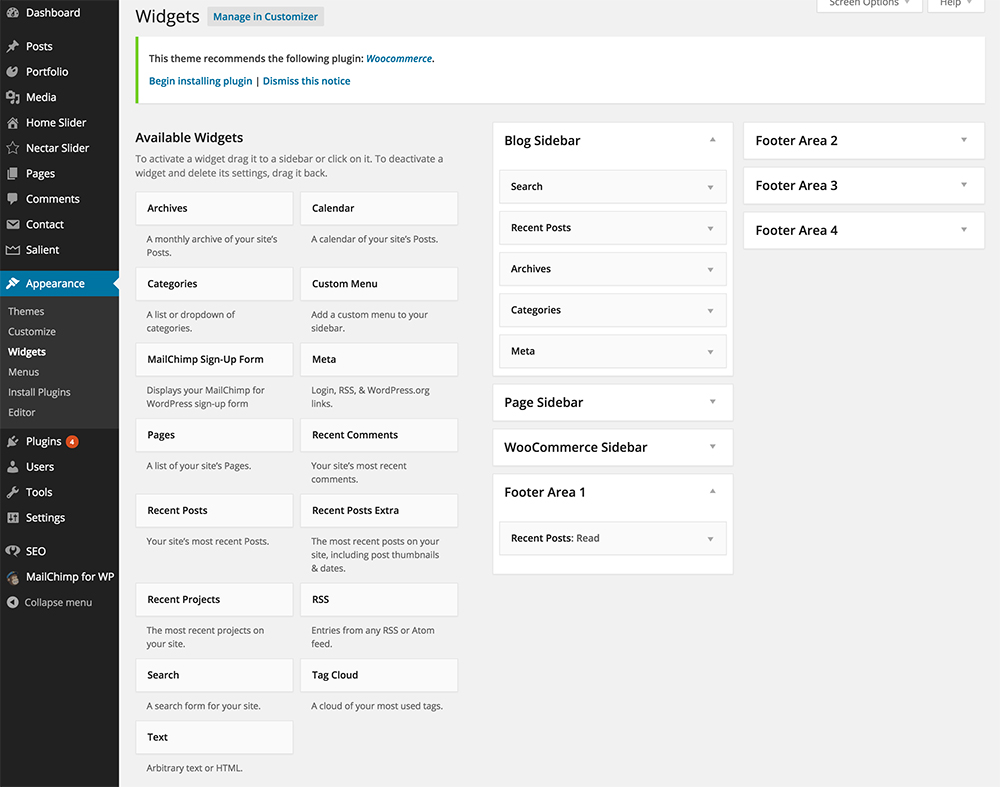
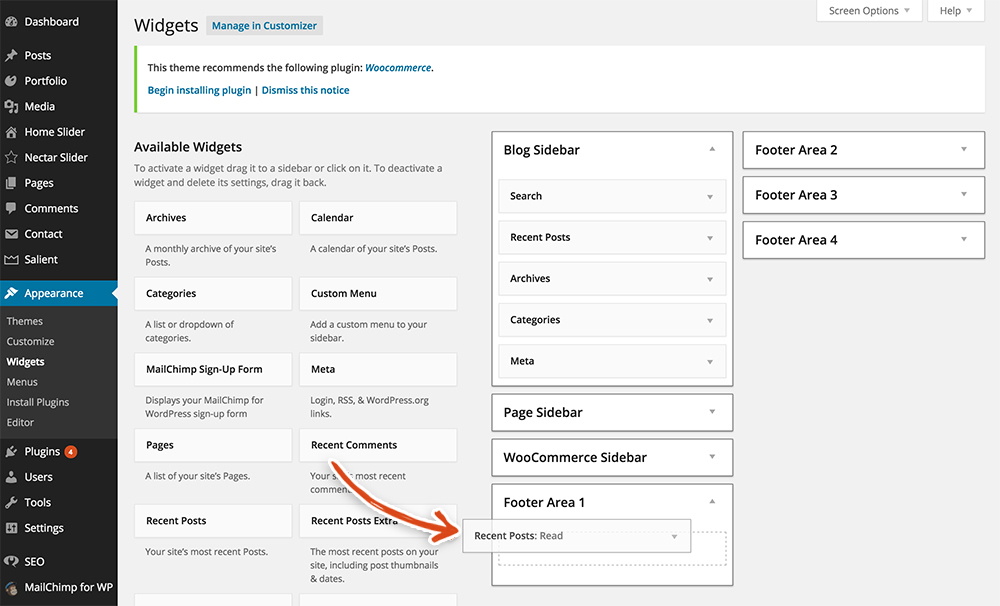
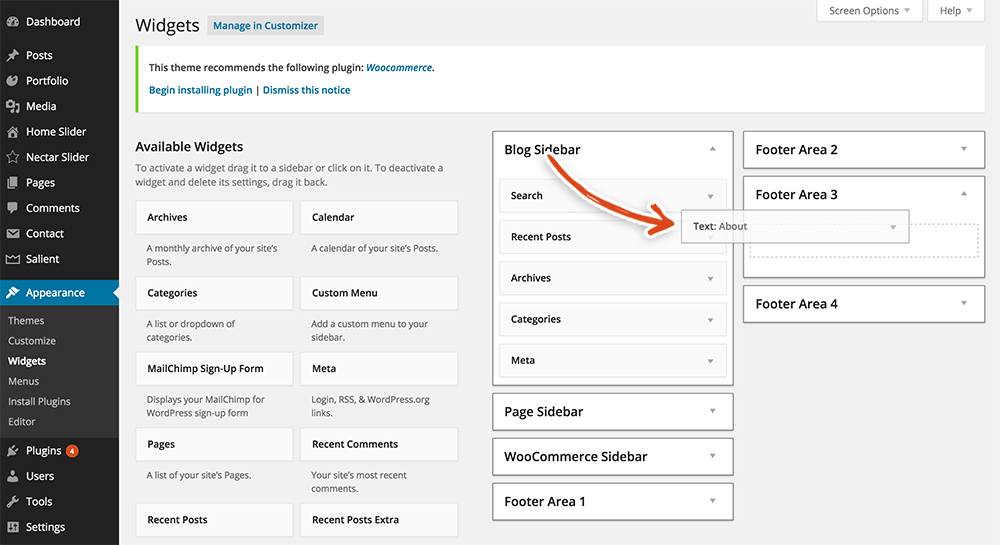
You should land on the Widgets page – that looks like the image below. This widgets page is where you can add and remove items from both the sidebar of your blog and the footer area. In the blog website we’re building, we don’t have a sidebar so we won’t be using the sidebar widgets. We will however, be using the footer widgets. The widgets are just little pieces of functionality that add content or features to different areas of your website.
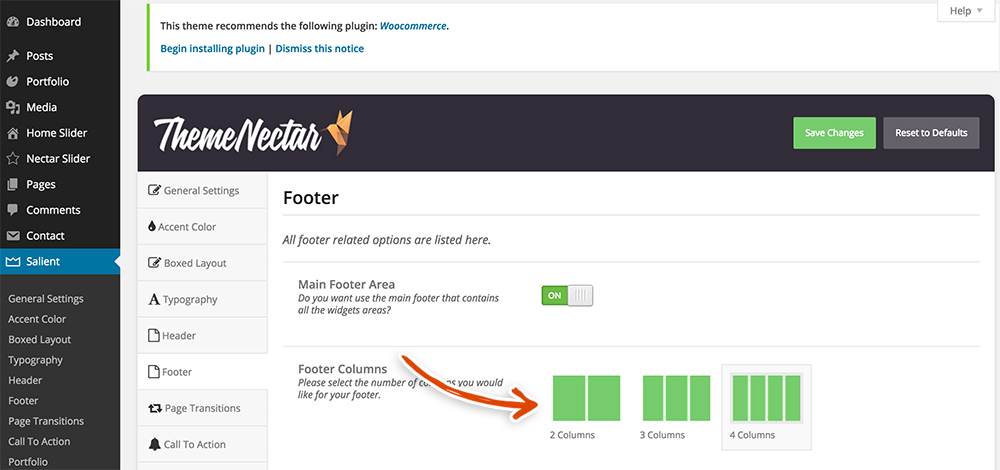
We designed the footer for the blog website to have 4 different areas. Your settings should default to 4 columns, so you don’t need to change anything. However, you can change the layout of the footer to have 2, 3 or 4 different areas by hovering over Salient in the left sidebar and going to the Salient Settings > Footer tab (as seen in the screenshot below).
But, for our site, you’ll see 4 footer areas. You can place a widget in each of the footer areas. The definition of each widget is located directly underneath it. In the following steps, we’ll be adding several of these widgets. Feel free to play around with adding different widgets to see what they do.
Footer Area 1
Let’s first add a Recent Posts Widget to Footer Area 1. To do this, click on the Footer Area 1 caret (revealing white space beneath that). Then, click on the Recent Posts rectangle and drag it to the white area underneath Footer Area 1.
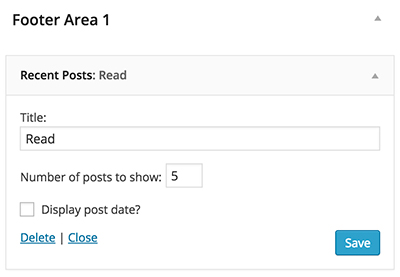
Click on the caret on the Recent Posts widget within Footer Area 1. You should see an image similar to the one below. Edit the content as you see fit and then make sure to click the Save button.
Footer Area 2
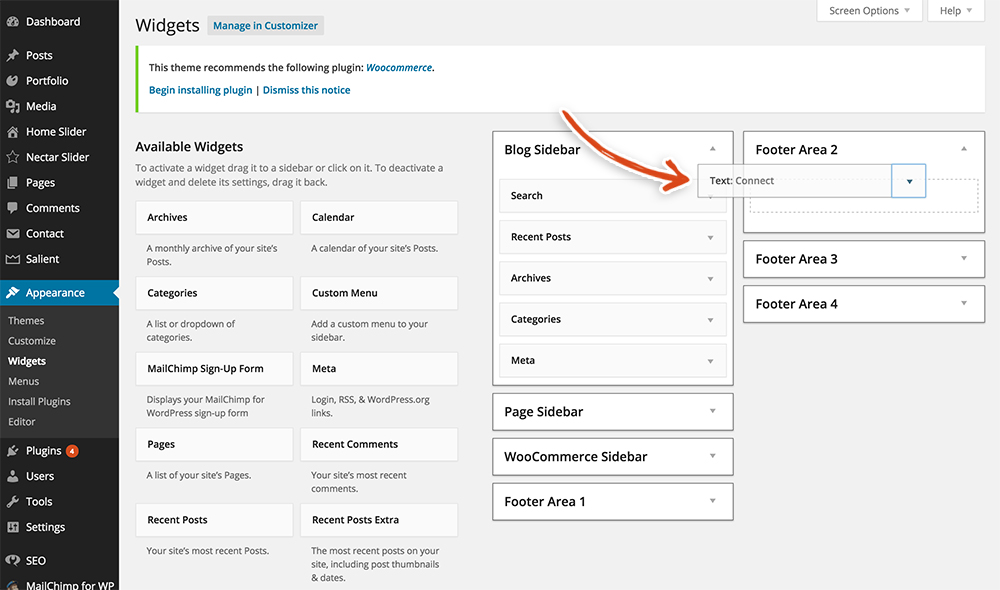
Add a Text Widget to Footer Area 2 by first clicking on the Footer Area 2 caret (revealing white space beneath that). Then, click on the Text rectangle and drag it to the white area underneath Footer Area 2.
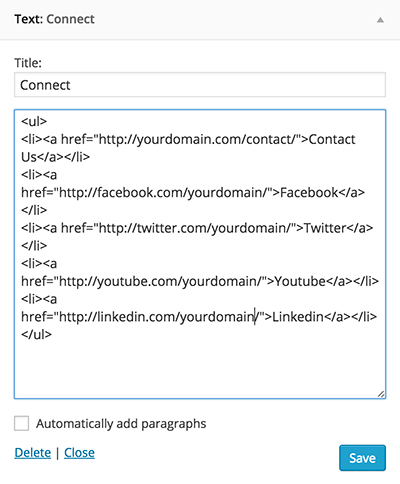
Click on the caret on the Text Widget within Footer Area 2. The WordPress Text Widget is basically a blank canvas. You can enter just about anything you want from plain old text to full-blown HTML. We thought it’d be helpful to add a section where users can connect with us directly and with our social accounts. If you would like to have the same Connect area that we have on our blog, copy the HTML below.
<ul>
<li><a href="yourdomain.com/contact/">Contact Us</a></li>
<li><a href="http://facebook.com/yourcompany/">Facebook</a></li>
<li><a href="http://twitter.com/yourcompany/">Twitter</a></li>
<li><a href="http://youtube.com/yourcompany/">Youtube</a></li>
<li><a href="http://linkedin.com/yourcompany/">Linkedin</a></li>
</ul>
Paste that into the second editable box (as shown in the image below). Edit the content as you see fit and then make sure to click the Save button.
Footer Area 3
Add another Text Widget to Footer Area 3 by first clicking on the Footer Area 3 caret (revealing white space beneath that). Click on the Text rectangle on the left and drag it to the white area underneath Footer Area 3.
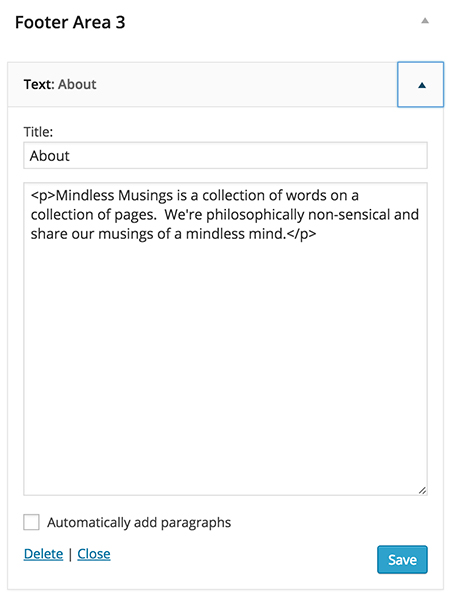
Click on the caret on the Text widget within Footer Area 3. You should see an image similar to the one below. You can see the content we entered in the screenshot below, but feel free to edit the content as you see fit and then make sure to click the Save button.
Footer Area 4
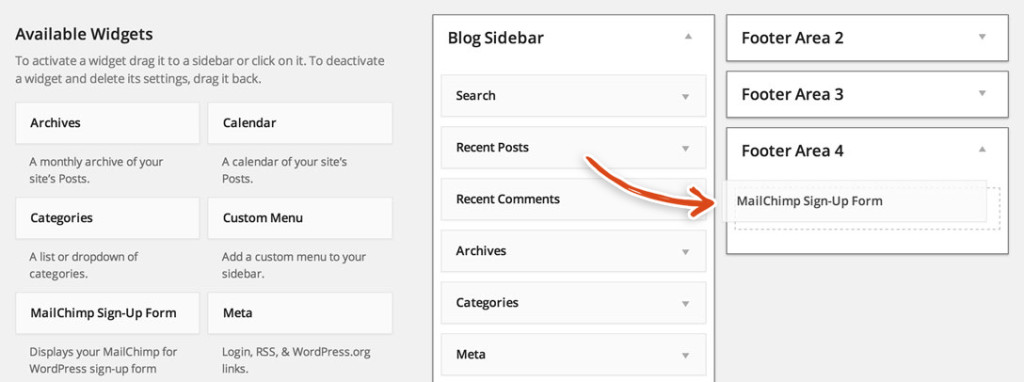
Finally, let’s add a MailChimp Sign-Up Form Widget to Footer Area 4 by first clicking on the Footer Area 4 caret (revealing white space beneath that). The MailChimp Sign-Up Form Widget allows you to collect your users’ emails so that they can subscribe to your newsletter. It’s a great way to engage with your audience. Click on the MailChimp Sign-Up Form rectangle on the left and drag it to the white area underneath Footer Area 4.
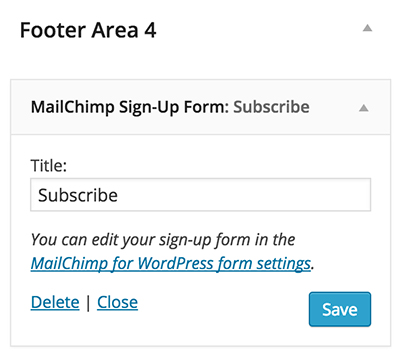
Make sure to click on the caret on the MailChimp Sign-Up Form within Footer Area 4, enter the title that you would like to use and click the Save button.
Wow, you must be sweet butter, because you’re on a roll! You now have a header and footer on every page of your website!! Let’s keep the ball rolling and create the homepage for you new website in the next step.
Mission Control Note:
We want to be totally transparent with you about how we are able to spend our valuable time creating these blazing, amazing, fantastically mind fazing free launch guides. We make money by referring you to services that we use and that we believe in. Our recommended products/services come at NO additional cost to you. In other words, you are buying the products/services at the same cost as any other user but you are supporting us by purchasing products after clicking on our links (because we get a commission). We are always looking to improve on what we suggest in order to give you the best recommendations. You keep the lights on and our bellies full and we are really grateful to you for that ![]() . We have absolute gratitude, that defies any latitude, for the magnitude of your loyal attitude. Thank you!
. We have absolute gratitude, that defies any latitude, for the magnitude of your loyal attitude. Thank you!