What is a Custom Post Type?
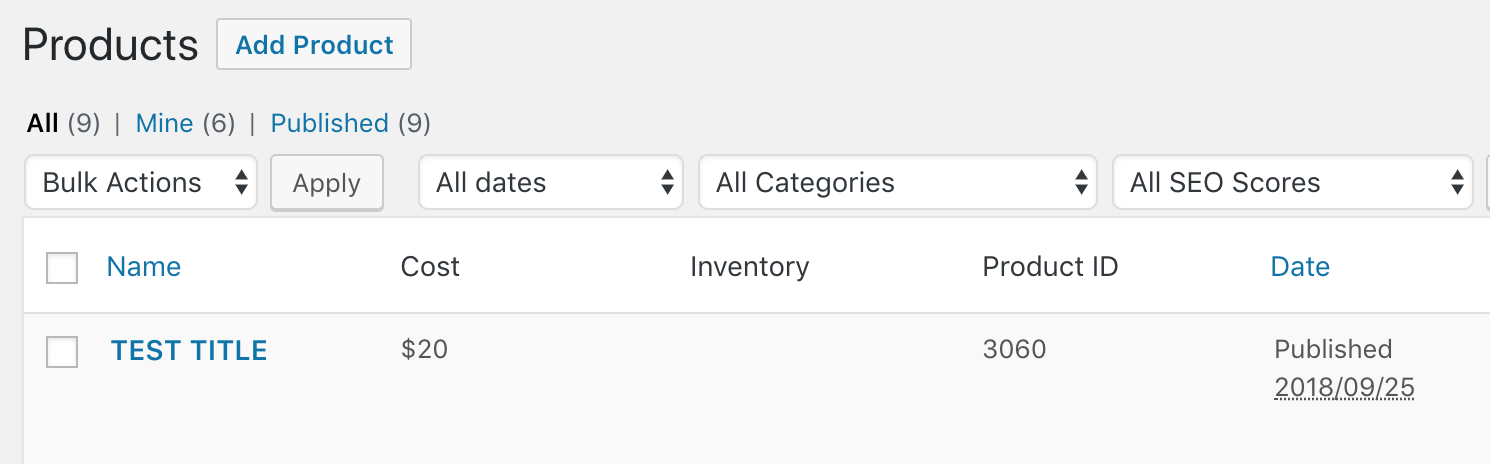
I like to think of a custom post type as an object specifically as a different version of the WordPress Post object. You get all of the benefits of the post object but can name the object something else to suit your particular purposes. We created a custom post type called Products for our WPMerchant WordPress plugin. We wanted a way to create products and add a cost to the product and charge a customer for that product. Creating a Products custom post type was the best way to do that. You can see the Products link in the image below.

When you click on Products, you see a list of all of the WPMerchant Products that have been created.
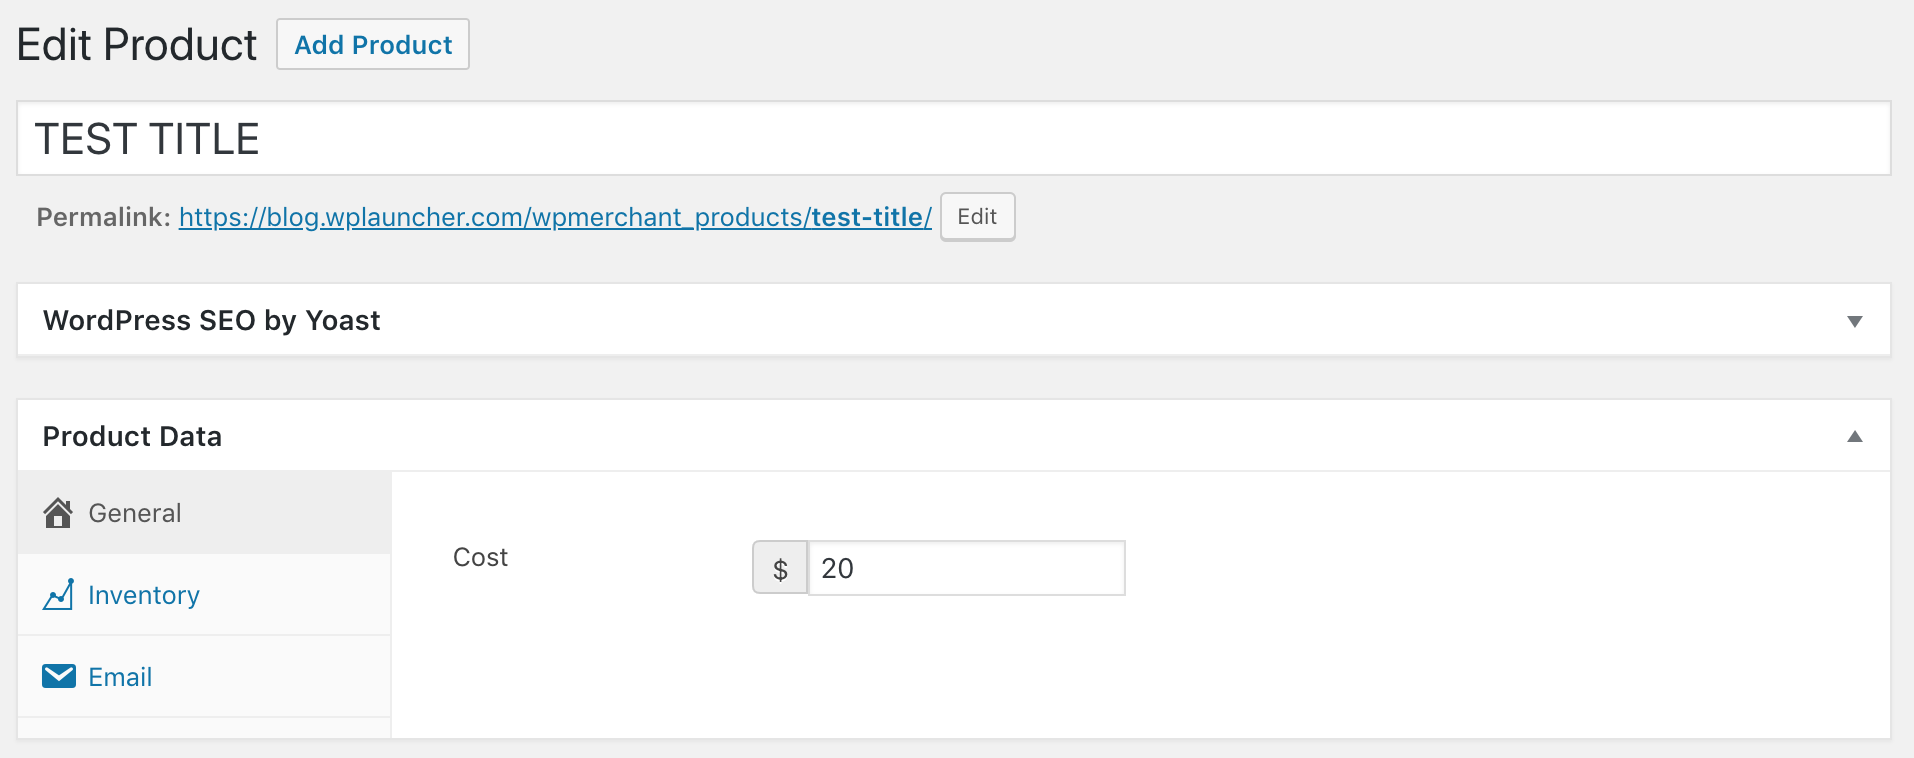
If you click on a particular product, you’ll go to the WPMerchant Product Edit Page.
The following 5 steps walk you through how to create a custom post type, like the one shown above, for your WordPress plugin.
Important Note:
As a reminder, we’re using the WordPress Plugin Boilerplate to build this plugin. If you have never used this WordPress plugin framework, check out our post on WordPress Plugin Development. You’re going to open the class-plugin-name-admin.php file that exists within the admin directory (in your WordPress Plugin Boilerplate framework).
STEP 1: Add to the class-plugin-name-admin.php file’s construct function
Add the following action to the _construct method in the class-plugin-name-admin.php file.
add_action('init', array( $this, 'register_custom_post_types' ));STEP 2: Create the Register Custom Post Types Method
You will need to rename all of the arguments below to match the custom post type that you want to create. For example, the function below creates the WPMerchant Product custom post type, but if you wanted to create a download manager you could name the custom post type download and adjust all of the arguments below to fit that.
public function register_custom_post_types(){
$customPostTypeArgs = array(
			'label'=>'WPMerchant Products',
			'labels'=>
				array(
					'name'=>'Products',
					'singular_name'=>'Product',
					'add_new'=>'Add Product',
					'add_new_item'=>'Add New Product',
					'edit_item'=>'Edit Product',
					'new_item'=>'New Product',
					'view_item'=>'View Product',
					'search_items'=>'Search Product',
					'not_found'=>'No Products Found',
					'not_found_in_trash'=>'No Products Found in Trash',
'menu_name' => 'Products',
					'name_admin_bar'     => 'Products',
				),
			'public'=>true,
			'description'=>'WPMerchant Products',
			'exclude_from_search'=>false,
			'show_ui'=>true,
			'show_in_menu'=>$this->plugin_name,
			'supports'=>array('title','thumbnail', 'custom_fields'),
			'taxonomies'=>array('category','post_tag'));

// Post type, $args - the Post Type string can be MAX 20 characters
register_post_type( 'wpmerchant_products', $customPostTypeArgs );
}
The arguments above give you a ton of flexibility in how you wish to generate your custom post type. For example, this post will show you how to add the post type edit page as a submenu to the top-level menu page. Therefore, you will have a plugin dashboard and then a plugin custom post type edit page as a submenu item.
However, if you don’t want to have a top-level plugin dashboard page and simply just want the post type edit page, then you should remove the show_in_menu argument and add the following two arguments:
'menu_position'=>26,
'menu_icon'=>"dashicons-admin-links",
These arguments will create a WordPress admin sidebar menu item but it will link to your custom post type instead of your plugin’s dashboard – which is at times simpler and easier for your users as they don’t have to go two levels down to reach the custom post type edit page. Also, if you would like to change the text that appears in the admin menu, you need to update the labels array in the customPostTypeArgs variable. You can do this by changing the menu_name and the name_admin_bar arguments.
If you would like to know how to edit your custom post type further, check out the WordPress codex on the register_post_type function at https://codex.wordpress.org/Function_Reference/register_post_type.
STEP 3: Add the following to the construct method
Then, you need to add the admin_menu action from the WordPress Plugin API to your _construct method.
add_action('admin_menu', array( $this, 'addPluginAdminMenu' ), 9);STEP: 4: Add the addPluginAdminMenu Method
You referenced the addPluginAdminMenu function in the admin_menu action above, so you need to add that function to your class-plugin-name-admin.php file’s _construct method.
public function addPluginAdminMenu() {
//add_menu_page( $page_title, $menu_title, $capability, $menu_slug, $function, $icon_url, $position );
add_menu_page( 'WPMerchant', 'WPMerchant', 'administrator', $this->plugin_name, array( $this, 'display_plugin_admin_dashboard' ), plugin_dir_url( FILE ) . 'img/logo-icon.png', 26 );
}
For the second to last parameter, the icon url, we use a custom logo icon, so we can limit the possibility of confusion for our users (if an icon is used on another plugin) and because we like branding it, but you can also replace that with any of the following:
- A base64 encoded SVG which will start with ‘data:image/svg+xml;base64,’. The color of this SVG element will match the color scheme.
- A Dashicons helper class that will be used as a font icon. See the following link for all dashicons helper classes – https://developer.wordpress.org/resource/dashicons/. An example of a helper class is ‘dashicons-chart-pie’.
- If you set this parameter to ‘none’ you will leave the div.wp-menu-image element empty so that you can add an icon with a CSS rule.
Step 5: Add the display_plugin_admin_dashboard function and logo-icon.png
You’ll notice in the AddPluginAdminMenu function that we reference a method called display_plugin_admin_dashboard. This method needs to exist in the class-plugin-name-admin.php file in order for your plugin to work. So, you’ll need to add the following function to your plugin:
public function display_plugin_admin_dashboard() {
    require_once 'partials/wpmerchant-admin-display.php';
}
This function requires the inclusion of a file called plugin-name-admin-display.php. This is included in the default version of the WordPress plugin boilerplate so you will just need to add HTML content to it to match your needs. You can edit this file by opening it up in your admin/partials directory. This is where your users will go when they click on your plugin name in the WordPress dashboard, so it’s good practice to add onboarding information here or welcome information to your users. For example, we included the following in our plugin-name-admin-display.php file for WPMerchant.
<div class="wrap">
	<h2><?php echo esc_html( get_admin_page_title() ); ?></h2>
	 <!--NEED THE settings_errors below so that the errors/success messages are shown after submission - wasn't working once we started using add_menu_page and stopped using add_options_page so needed this-->
		 <h3>Get Started with WPMerchant in 1 Minute</h3>
		 <iframe width="640" height="360" src="https://www.youtube.com/embed/OEoDKUlR-5w" frameborder="0" allowfullscreen></iframe>
		 <h3>Collect Money/Bitcoin with a WPMerchant Buy Button in 6 Simple Steps:</h3>

	 <p><a href="https://www.wpmerchant.com/contact" target="_blank">Contact Us</a> with any questions.</p>
</div>
Last but not least, you need to add the logo-icon.png file that is referenced in the addPluginAdminMenu shown above to your admin/img directory. You will have to first create an img directory in your admin directory as it doesn’t exist by default. We created and saved our admin menu icon to be 250px width by 250px height. However, we set the height and width of our icon to be 20px by 20px via our CSS rules – see the below CSS rule as an example:
/* Admin Menu Icon - shrink the logo */
.toplevel_page_plugin-name .wp-menu-image img{
	height:20px;
	width:20px;
}
You need to add the above CSS rule to your plugin-name-admin.css file within the admin/css directory. And, obviously, you need to replace plugin-name with the name of your plugin.
That’s all she wrote! Your custom post type will now show up when you hover over your plugin name in the left sidebar of the WordPress Admin Dashboard. If you click on your custom post type name, you will see the list of existing custom post type instances and can add or edit an instance.
In the next post, learn how to add a custom field and meta box to your WordPress plugin’s custom post type, by clicking on the button below: