So, you have purchased a domain name and have decided to host your website on WPEngine.
If you haven’t purchased a domain name, check out our post on Finding and Using a Custom Domain Name.
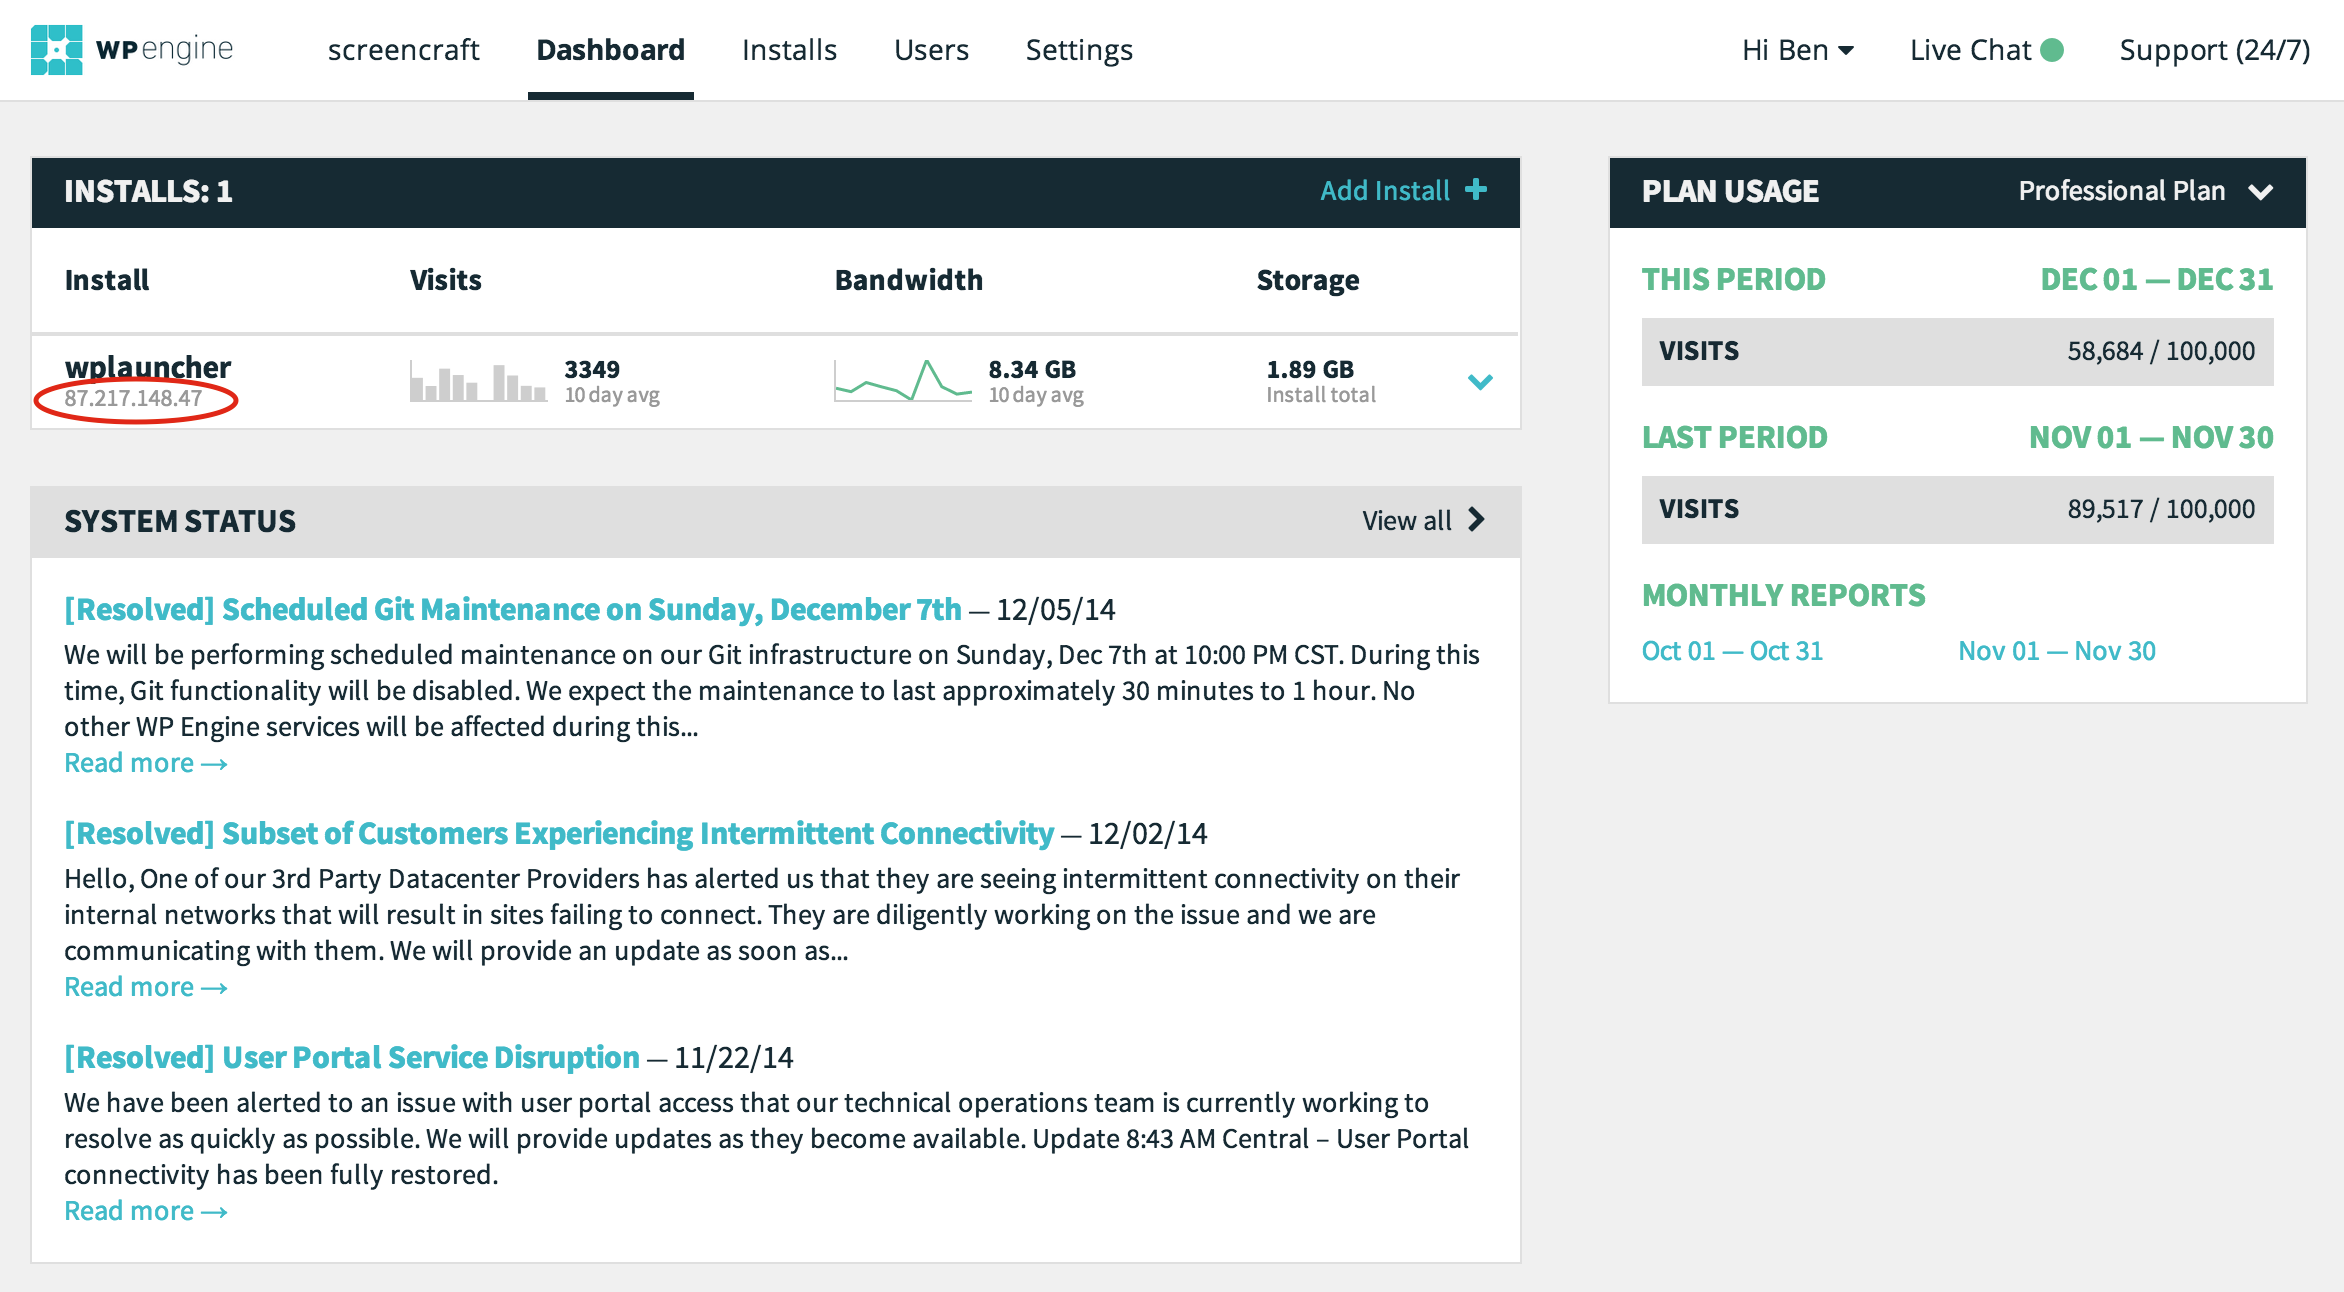
Start off by going to the WPEngine login page and login to your WPEngine account. Then, you need to find the IP Address associated with your WordPress install on your WPEngine account. Check out the screenshot below to see how you get that IP Address. In this case, it’s 87.217.148.47 (we’ve used a made up IP address, so if it matches yours for any reason, sorry!).
Change the DNS Settings
Now that you have your WPEngine IP Address, you need to login to your domain registrar (if you bought it during this process it is GoDaddy). It is time to change your domain’s DNS settings to point to your WPEngine IP Address. So, you need to click on the accordion called Domains. This will display the content below. Click on the Manage button next to your domain.

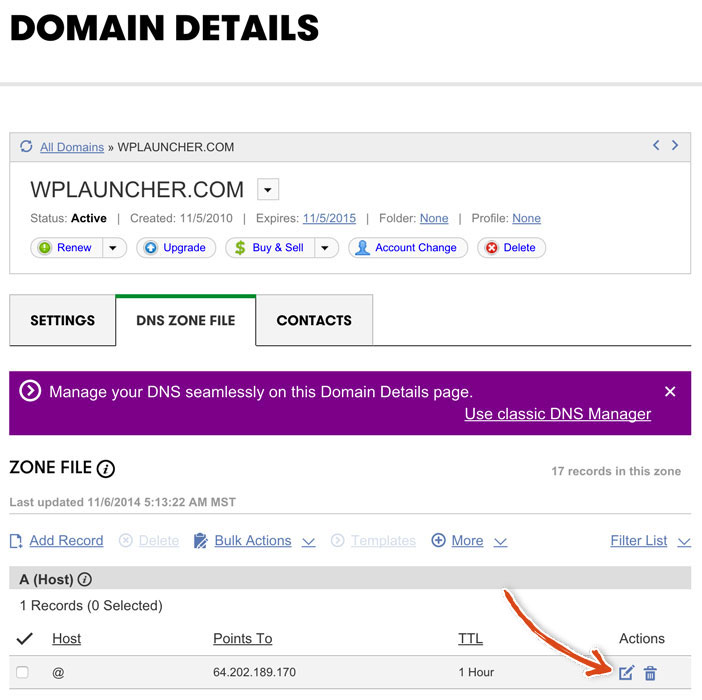
After clicking the Manage button, you will see the Domain Details Page. Click on the DNS Zone File tab next to the Settings tab (that is currently open).

You’ll see the page below. If an A Record is present and @ is the host value, then you need to click on the pencil icon at the far right.
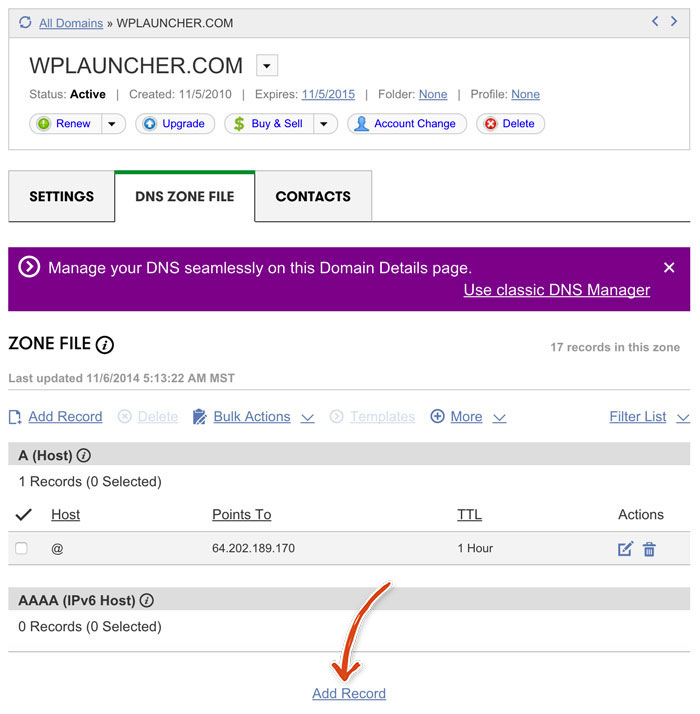
If an A Record is NOT visible, then click on the Add Record link at the bottom of the page.
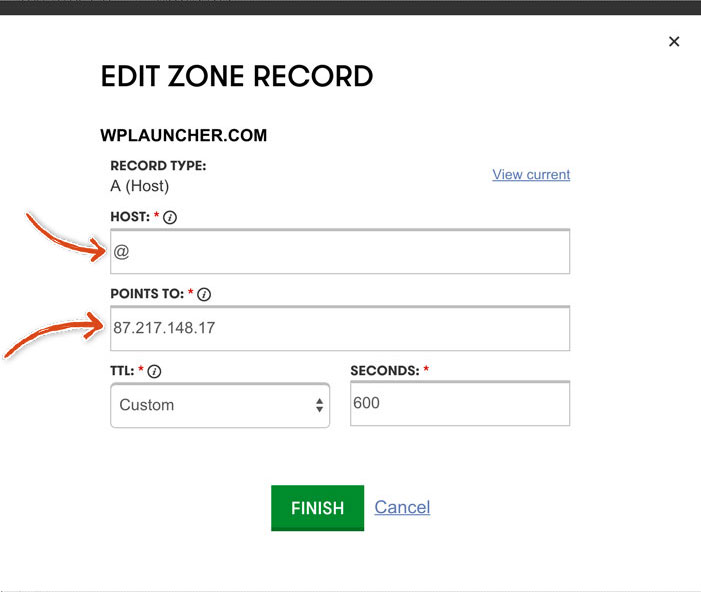
You need to select an A(Host) record type, enter @ into the host input and the IP address from WPEngine into the Points to field. For the TTL field (Time To Launch), we just left it at the default but you can speed up this change by selecting the 1/2 hour value. This will look like the following:
Click Finish and you’ve successfully changed DNS settings on your domain name! You’re a real technical whizkid!
Add Your Domain to WPEngine
Login to WPEngine with your credentials. Once you are on your dashboard, click on the install name. You will see the following page:

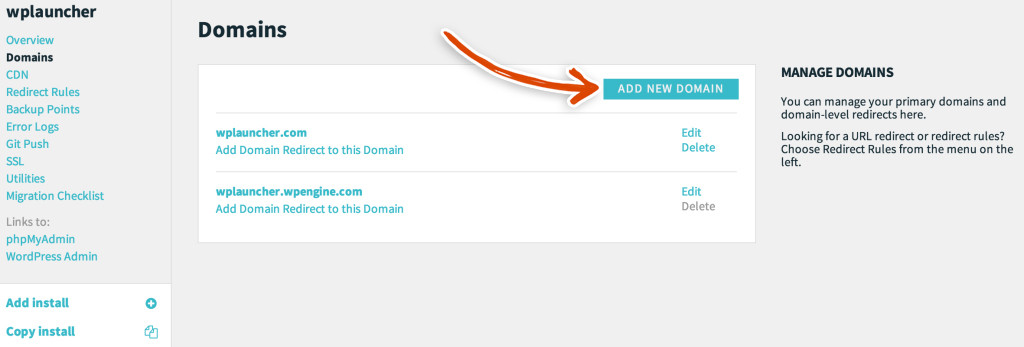
Click on Domains in the left sidebar and then click Add New Domain. You will see the following:
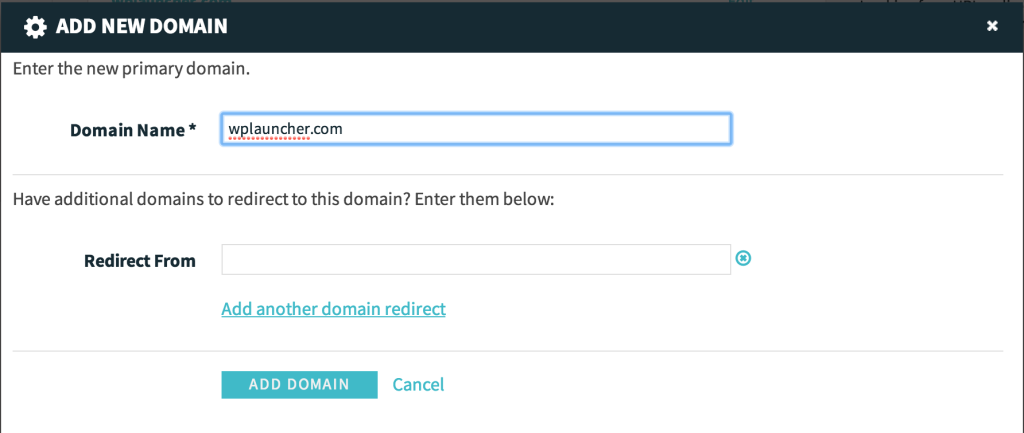
Enter the domain name and any domains you want to redirect to this domain:
Add Your Domain to WordPress
Navigate to your WordPress dashboard by clicking the WordPress Admin link.

Log into WordPress and you should see your WordPress Dashboard.

On the left sidebar there is a tab called settings, hover over that word and then click General in the menu that appears.

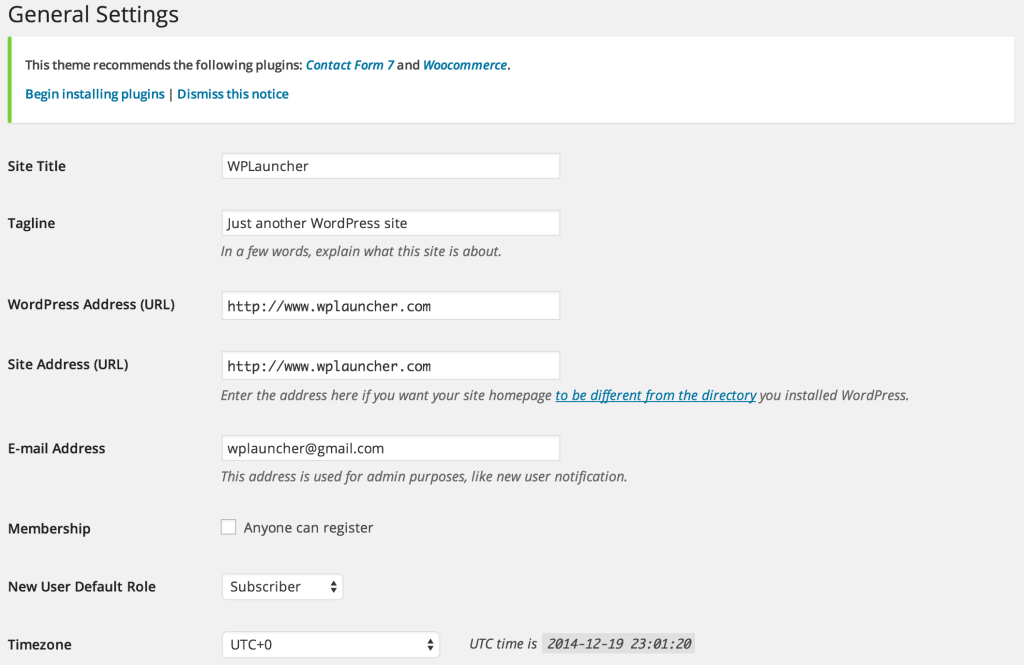
You will then see the following page. Set the WordPress Address and the Site Address fields to your domain name (http://blog.wplauncher.com in our case). Click the Save Changes button at the bottom of the page. Then, stand up and pat yourself on the back because you’re donezo!
Mission Control Disclosure:
We want to be totally transparent with you about how we are able to spend our valuable time creating these blazing, amazing, fantastically mind fazing free launch guides. We make money by referring you to services that we use and that we believe in. Our recommended products/services come at NO additional cost to you. In other words, you are buying the products/services at the same cost as any other user but you are supporting us by purchasing products after clicking on our links (because we get a commission). We are always looking to improve on what we suggest in order to give you the best recommendations. You keep the lights on and our bellies full and we are really grateful to you for that ![]() . We have absolute gratitude, that defies any latitude, for the magnitude of your loyal attitude. Thank you!
. We have absolute gratitude, that defies any latitude, for the magnitude of your loyal attitude. Thank you!